Kinetic Testing
Humphrey Field Analyzer II-
i
series User Manual 2660021145640 A
13-38
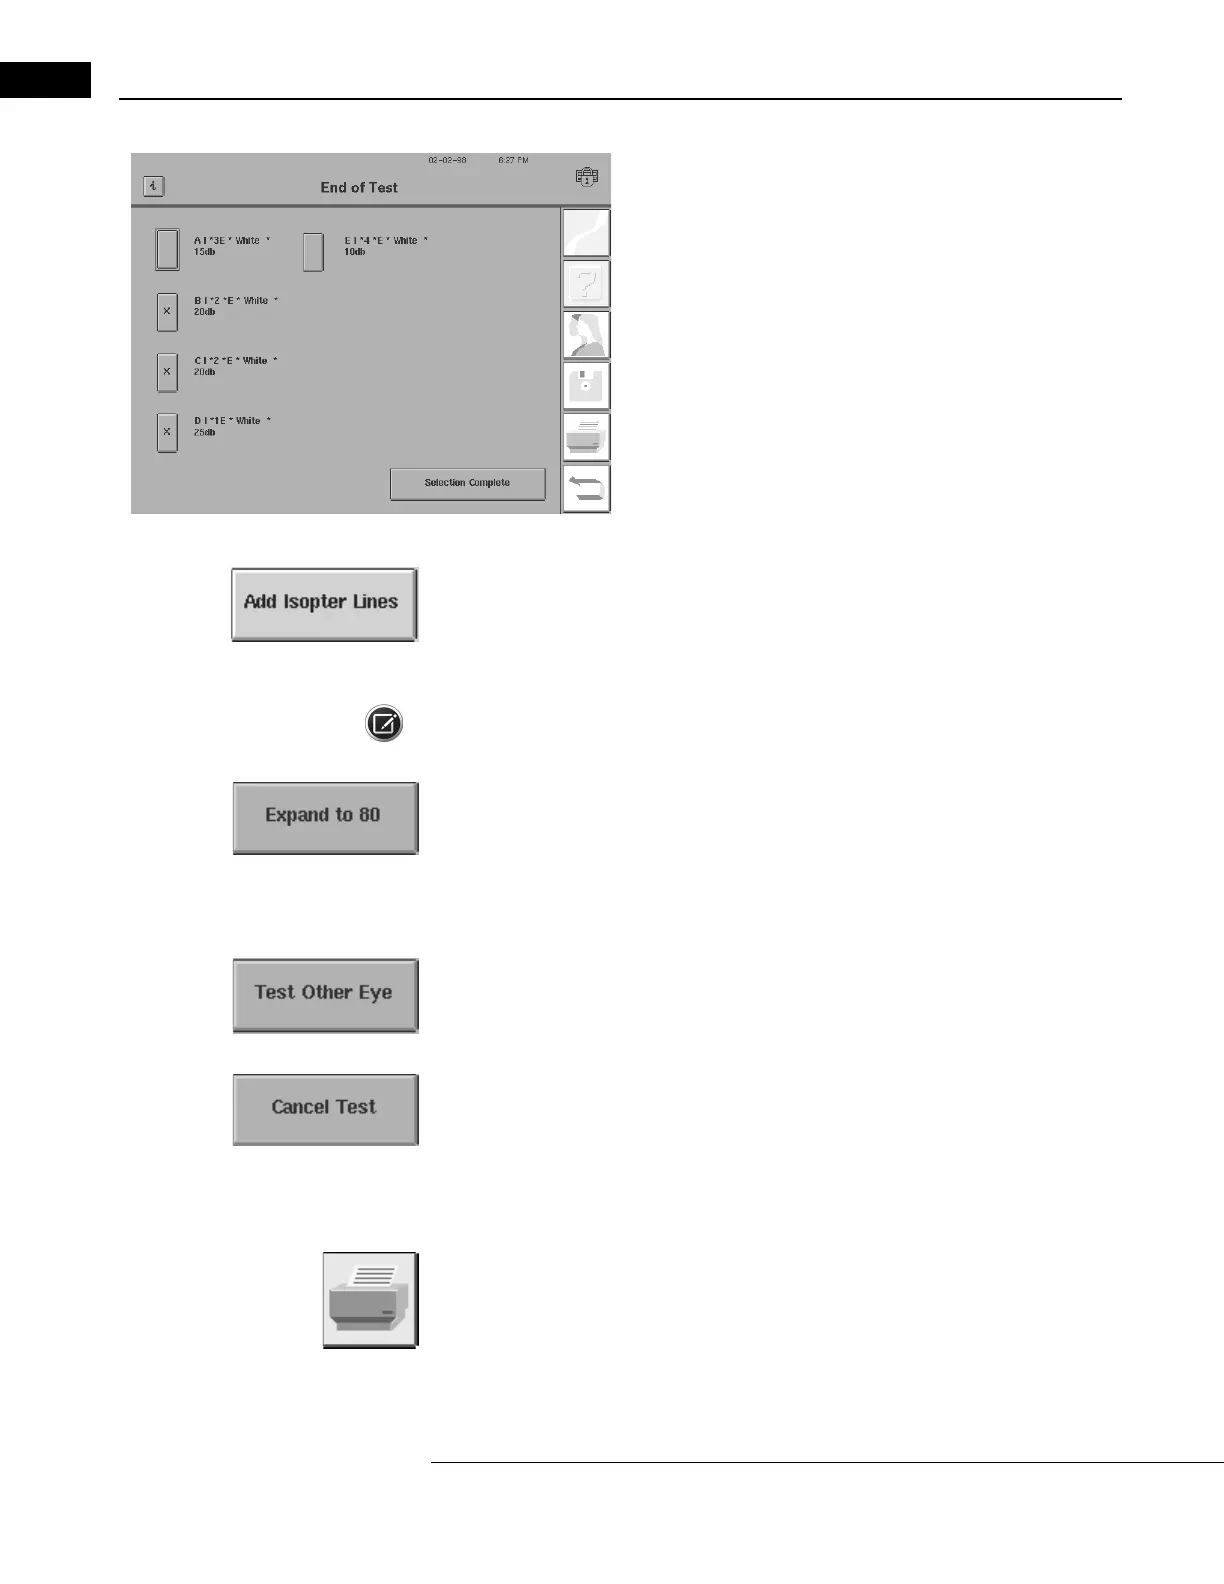
The alphabetic characters for the isopters currently being displayed
will each have an “X” in the box adjacent to it. To add or remove the
isopters that are displayed, choose the box next to each isopter to
select or deselect them. You can display a maximum of three (3) isop-
ters at any one time.
Press SELECTION COMPLETE to view only the chosen isopters.
ADD ISOPTER LINES
Pressing this button draws lines that connect the test points for each isopter chosen with SHOW
ALTERNATE ISOPTERS. The more points the instrument has to work with, the more accurately this
function will represent a patient’s isopter.
Note: Any locations mapped with Scotoma Mapping,
Blind Spot Map, and Custom Scan are not
connected with this feature.
ZOOM TO 30/EXPAND TO 80
This button toggles between the 30° and 80° field formats. This featur
e especially is useful when
you want to see the central 30° of an 80° field in detail. Pressing this button does not eliminate the
points outside of the central 30°. These peripheral points may be viewed again by pressing EXPAND
TO 80.
TEST OTHER EYE
Pressing this button allows you to begin testing on the pa
tient’s other eye. Only press this after the
first eye has finished being tested.
CANCEL TEST
This button deletes all data on the current test and t
akes you back to the Start of Test screen. A
dialog box warns you that the test will be canceled. Pressing YES will cancel the test. Pressing NO
will return you to the End of Test screen without affecting the test data. Even if a test is deleted
using CANCEL TEST, patient data will be unchanged.
Print
You can print using the
PRINT FUNCTIONS
icon on the right-hand side of the screen. After pressing
this icon, the Kinetic Printout Selection screen displays. Refer to step 5 in “Printing Sequence,” on
page 13-46. Also see “Printing Kinetic Tests,” on page 13-43 for further information.

 Loading...


