Humphrey Field Analyzer II-
i
series User Manual 2660021145640 A
Networking Reference
I-7
3 You now need to enter your Workgroup or Domain name. You can do so by pressing the
WORKGROUP NAME button. Note: In order to use a Shared Folder, you must enter a
Workgroup Name.
4 Select OK to accept the name.
5 Select ALLOW REMOTE CONFIGURATION so that an X is displayed in the button if you want to
allow the
EasyConnect
RCT to configure the HFA II-
i
instrument.
6 Select HFA NAME to display a pop-up keyboard and enter (or change) the name (up to 24
characters) you want for this HFA II-
i
instrument. Press ENTER.
Note: It is strongly recommended to name your HFA II-
i
instrument for ease in identification when
using the
EasyConnect
RCT. Creating a name for an instrument can also allow you to know the
location of the instrument.
7 If an error message appears, refer to “Network Troubleshooting Error Messages,” on page I-31
for assistance.
Note: Any time you change any of the IP addresses on this scre
en, it is necessary to power down the
HFA II-
i
and then restart.
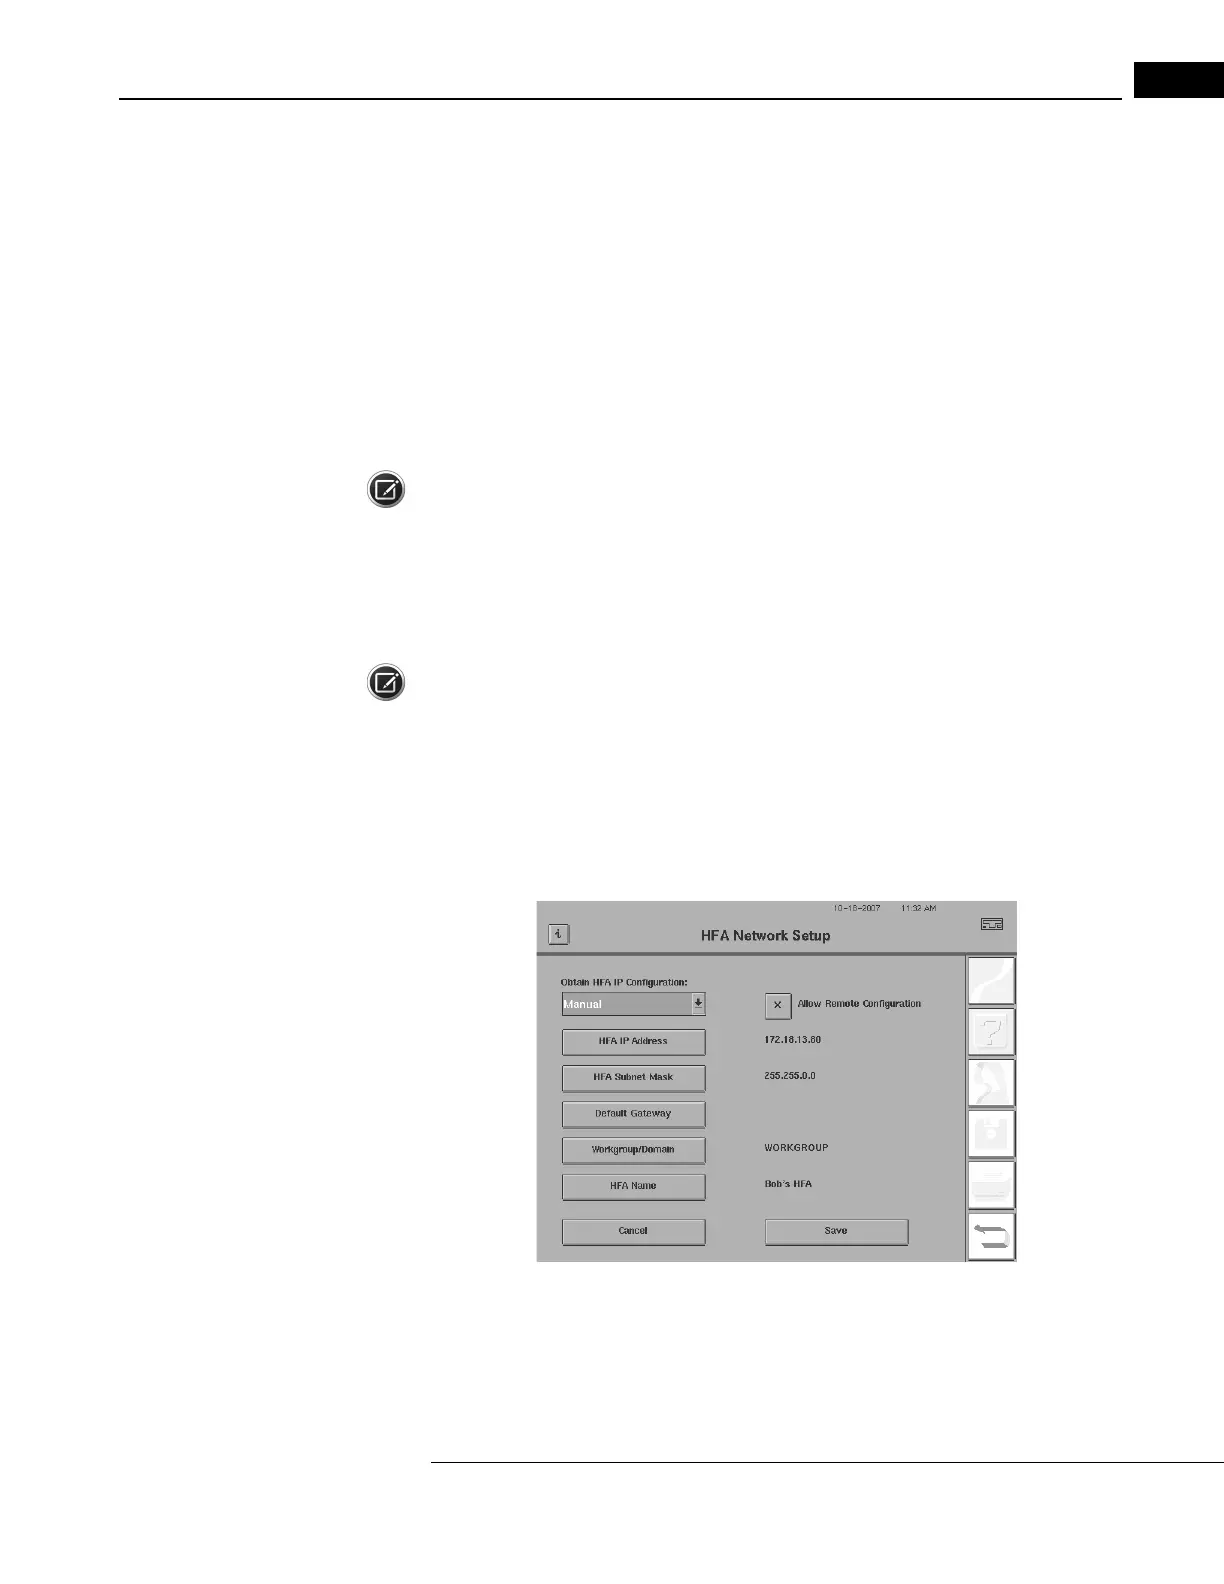
HFA Network: Manual Setup (Static IP)
If you wish to a manual network setup (static IP),
use the following procedure.
1 From the HFA Network Setup screen, select MANUAL from the OBTAIN HFA IP
CONFIGURATION drop-down box
(see Figure I.7).
Figure I.7 HFA Network Setup Screen – Manual
2 Select the HFA IP ADDRESS button and enter the IP address.
3 Select ENTER and the HFA’s IP address will appear to the right of the HFA IP ADDRESS button.
 Loading...
