General Operation
Humphrey Field Analyzer II-
i
series User Manual 2660021145640 A
2-26
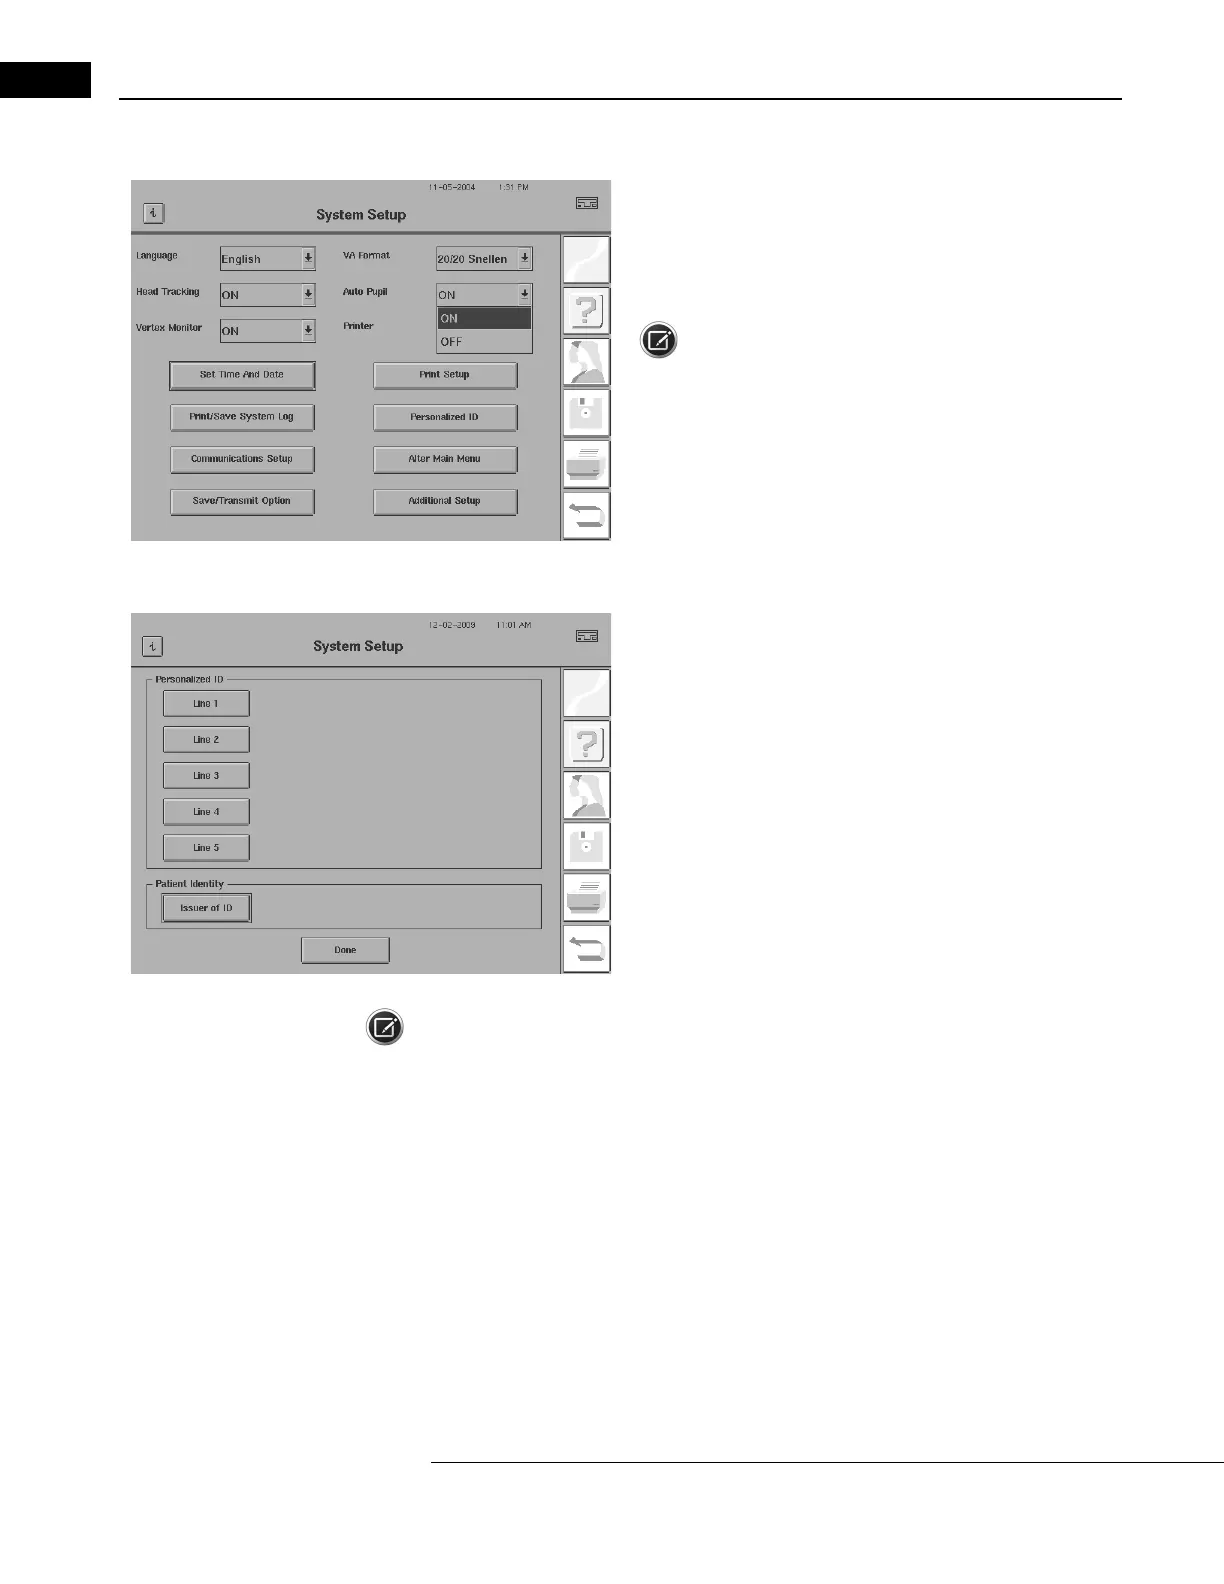
Selecting Auto Pupil (Model 750
i
Only)
1Start at the System Setup screen. Select the Auto Pupil drop-down
menu.
2Choose either ON or OFF.
Note: Auto Pupil only works if Gaze T
racking has been
initialized. For information on Gaze Tracking, see “Gaze Tracking
(Models 740i, 745i, 750i),” on page 5-4.
Personalizing Hard Copy Printouts
1Start on the System Setup screen. Select PERSONALIZED ID.
2Select the line button where you wish to enter text.
3Enter the desired text (maximum of 40 characters per line).
4Repeat steps 2-3 for other lines.
5Press DONE.
Note: This information is also shown when you select the
“
i
”
button, found in the upper left corner
of most screens
(see
“The Information Button,” on page 2-3).
Altering the Main Menu Screen
You can customize the 10 Main Menu screen test buttons
to organize your visual field tests
according to the specific needs of your office. All of these buttons may be altered. Any Screening,
Threshold, Specialty, Custom, or Kinetic test may be added or configured on the Main Menu.

 Loading...


