General Operation
Humphrey Field Analyzer II-
i
series User Manual 2660021145640 A
2-24
10The name and location of the shared printer will appear in the outlined box below the ENTER SHARED PRINTER button.
11Select PROCEED to save your Shared Printer Setup.
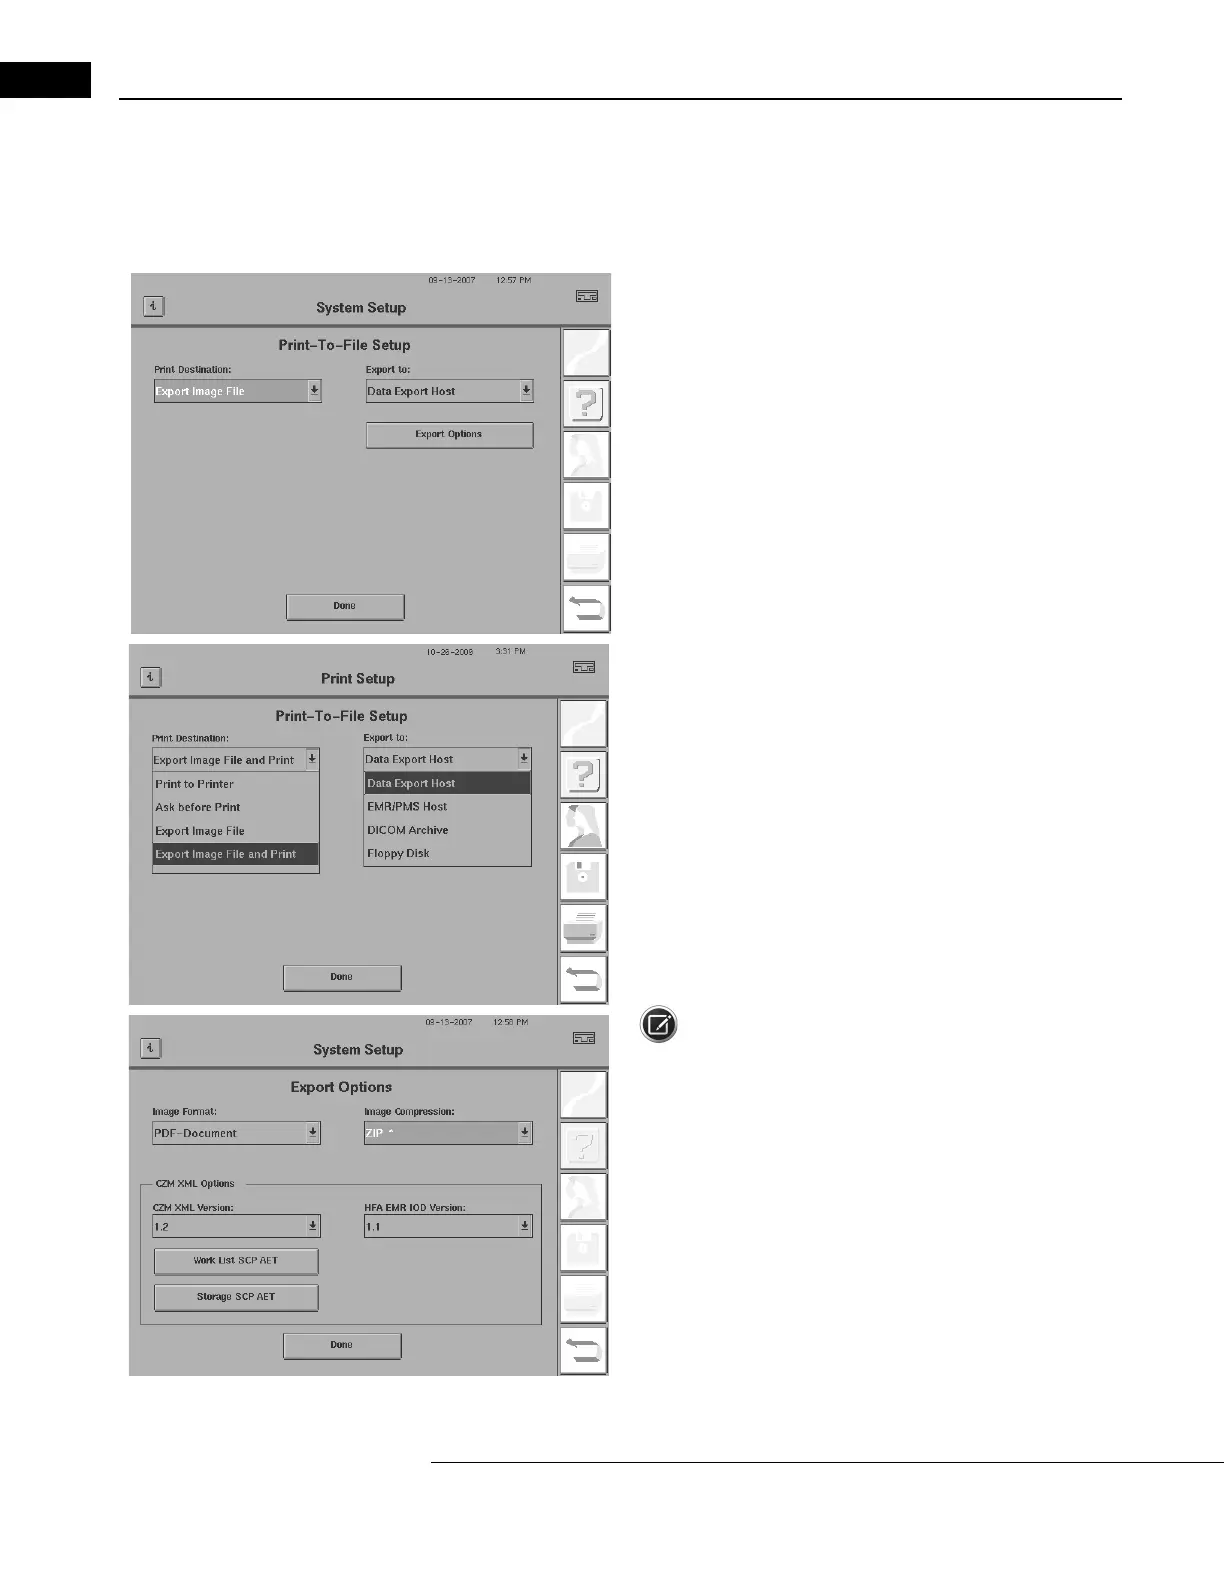
Choose the Print Destination and Options
12To choose your print destination and options, from the Print
Setup screen, select the PRINT-TO-FILE SETUP
button to display the
Print-To-File Setup screen shown on the left.
13Select the down-arrow of the PRINT DESTINATION: drop down
box. Select from:
•PRINT TO PRINTER (to generate hard copy paper printout).
•ASK BEFORE PRINT (if you wish to be asked if you want to print out test
results, upon the completion of each examination).
•For Networked HFA II-
i
instruments only:
•EXPORT IMAGE FILE (if you wish either to save an image file to floppy disk or
to export it via the network).
•EXPORT IMAGE FILE AND PRINT (if you wis
h to print both a hard copy paper
printout and export an image file via the network).
14If you selected ASK BEFORE PRINT, EXPORT IMAGE FILE or
EXPORT IMAGE FILE AND PRINT in previous step, press the
down-arrow of the
EXPORT TO: drop-down box to specify a destination
for your image file. Select your image file destination as DATA EXPORT
HOST, EMR/PMS HOST, DICOM ARCHIVE, or FLOPPY DISK. Refer to
Chapter (14), "Networking," for more information regarding the Print
Setup screen and other networking features.
Note: The Data Export Host or EMR/PMS Host option wi
ll not
appear on the list if you have not licensed HFA-NET Pro software on
your HFA II-
i
. The DICOM Archive option will not appear if you have
not licensed the DICOM Gateway 2.0 software on your HFA II-
i
. Refer
to Chapter (14), "Networking," for further details regarding these
network features.
15If you selected an image file destination in the previous step,
select the EXPORT OPTIONS button to display the Export Options
screen shown on the left.

 Loading...


