Humphrey Field Analyzer II-
i
series User Manual 2660021145640 A
Kinetic Testing
13-29
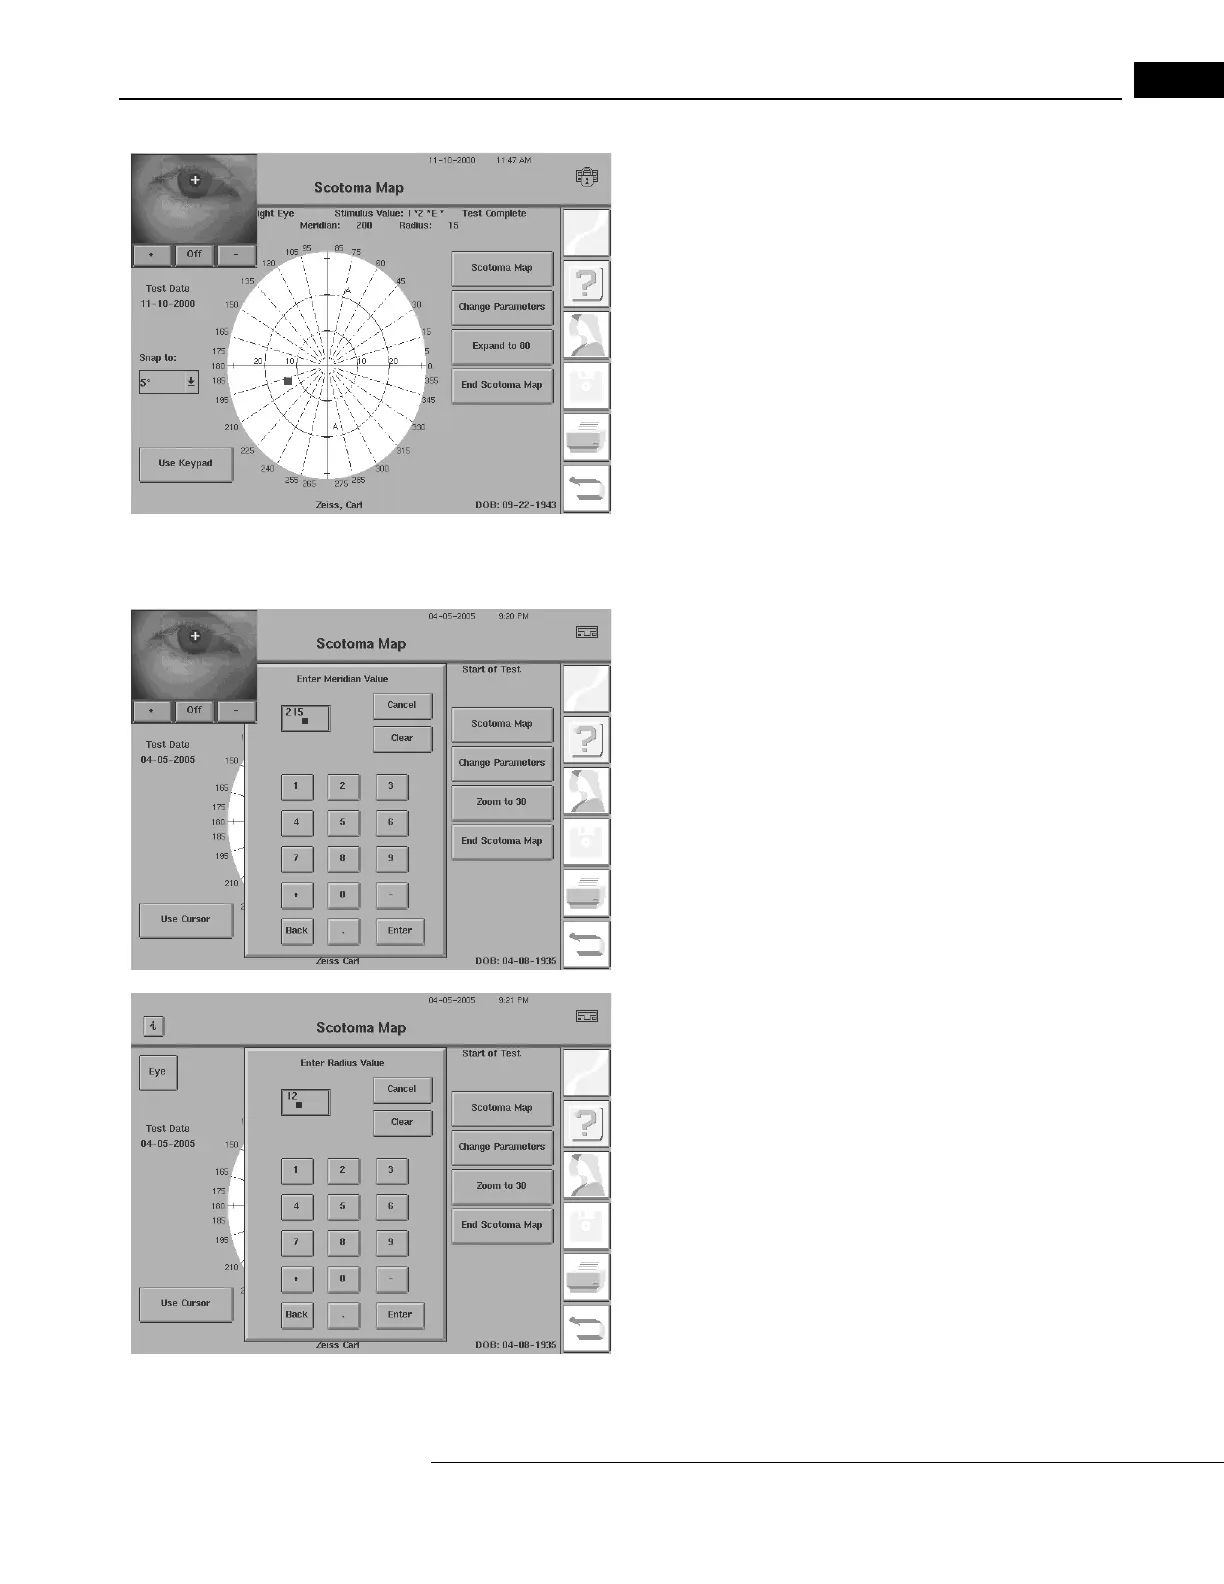
The easiest way to locate the central point is to use the Cursor
method. Move the cursor with the glidepad or finger on the touch
screen to the desired location. In this example, the cursor is positioned
to run the Scotoma Map from a point centered at Meridian: 200 and
Radius: 15. Skip to Step 5.
For Keypad Operation
3Press SCOTOMA MAP. A keypad will appear as a pop-up window.
Enter the meridian value (in degrees) wher
e you wish to place the cen-
ter of the scotoma map.
Press ENTER.
4Enter the radius (the distance in degrees from the fixation point)
where you wish to place the center of the scotoma map.
5Prepare the patient for the test. Explain that the light will not be
seen for a short time and then it will move into the patient’s field of
vision. Ask the patient to press the response button as soon as he or
she sees the light. See “Preparing the Patient,” on page 3-24, for
further details.
6Press ENTER/RETURN on your keyboard, or activate the Scotoma
Map button on the screen. After a slight pause, the HFA II-
i
will
automatically map the scotoma according to the meridian pattern that
you have chosen.

 Loading...


