Humphrey Field Analyzer II-
i
series User Manual 2660021145640 A
Setting-Up Tests
3-15
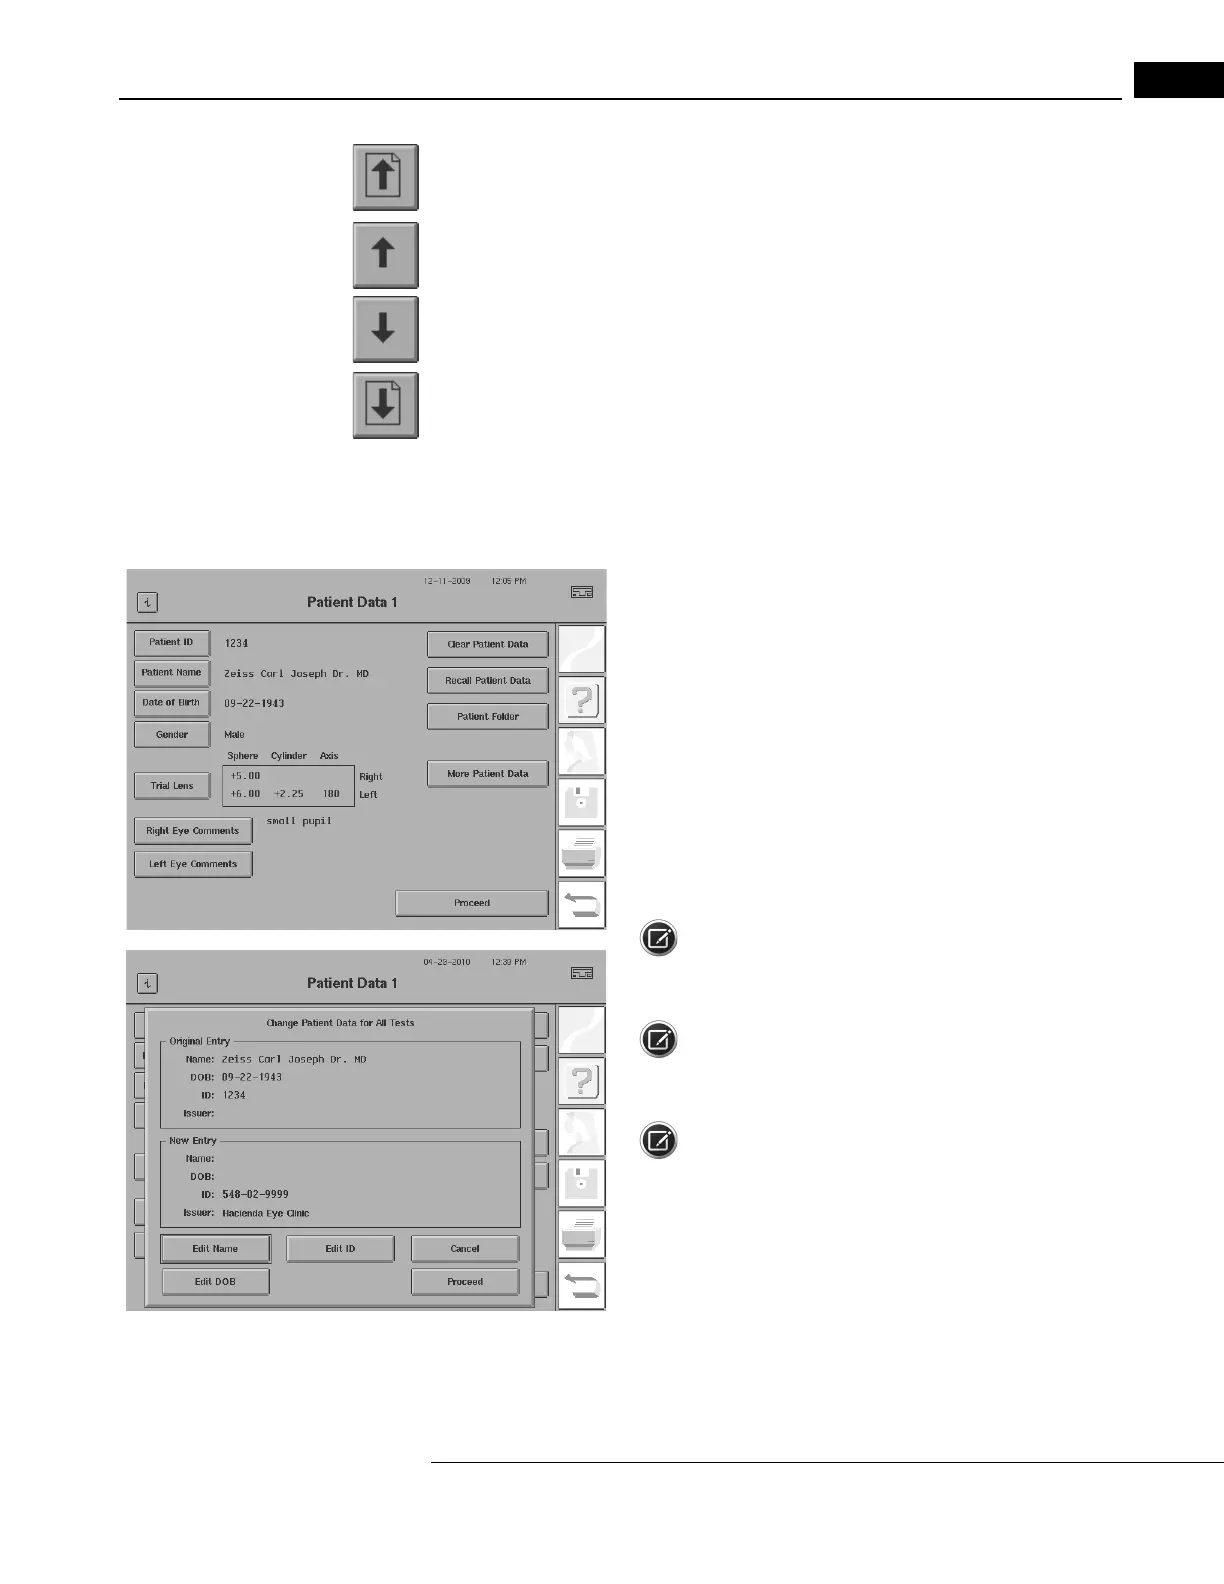
The “Page Up Arrow” scrolls up a full screen of patients.
The “One Up Arrow” scrolls up one patient.
The “One Down Arrow” scrolls down one patient.
The “Page Down Arrow” scrolls down a full screen of patients.
To locate a patient’s test quickly, access the PATIEN
T SEARCH button below the File Directory box.
Enter the patient’s name in the ENTER NAME TO FIND screen and press PROCEED. The HFA II-
i
will
search the database for that patient’s tests. If the name cannot be found, the name which follows
alphabetically will appear. The PATIENT SEARCH command regards names with multiple spaces or
different punctuation as identical.
5Edit patient information, as necessary. If the patient has been
recalled from the hard drive, you can edit the Patient ID, Patient
Name, Date of Birth, Gender, and Patient Folder. When selecting the
Patient ID, Patient Name, or Date of Birth button, the Change Patient
Data for All Tests function is launched. Select a field to edit. After
completing entry of the selected field, the keypad closes, but the
Change Patient Data dialog remains, with your entry displayed in the
New Entry section. You can then edit the other two identity fields if
you wish. Press PROCEED to save the edits and update the Patient
Data 1 screen. Press CANCEL to discard the changes and return to the
Patient Data 1 screen (see “To Change Patient Data:,” on page 10-14).
Note: If you change the Patient ID, then the Issuer of ID will
change to what is stored in
the system (see “Specifying Your Practice’s
Issuer of ID,” on page 14-40).
Note: If you are using an EMR/PMS/DICOM system, you should
only change the Patient ID, Patient Name, or Date of Birth on the
EMR/PMS/DICOM system, and not on the HFA, to avoid patient conflicts.
Note: The Patient ID, Patient Name, and Date of Birth buttons
are disabled when recalling patient data from any source other than
the HARD DRIVE (i.e., a USB storage device, WORK LIST, or DICOM
ARCHIVE).
Choose MORE PATIENT DATA to verify, change or add data on the
Patient Data 2 screen.
Choose PROCEED to go to the test screen.

 Loading...


