A
B
C
D
E
F
G
H
L
M
N
P
Uso e manutenzione
Use and Maintenance operations
sezione / section
D 5
64 749/749 DARK/749S Aggiornamento/Update - M.Y. 2006 - edizione/edition 00
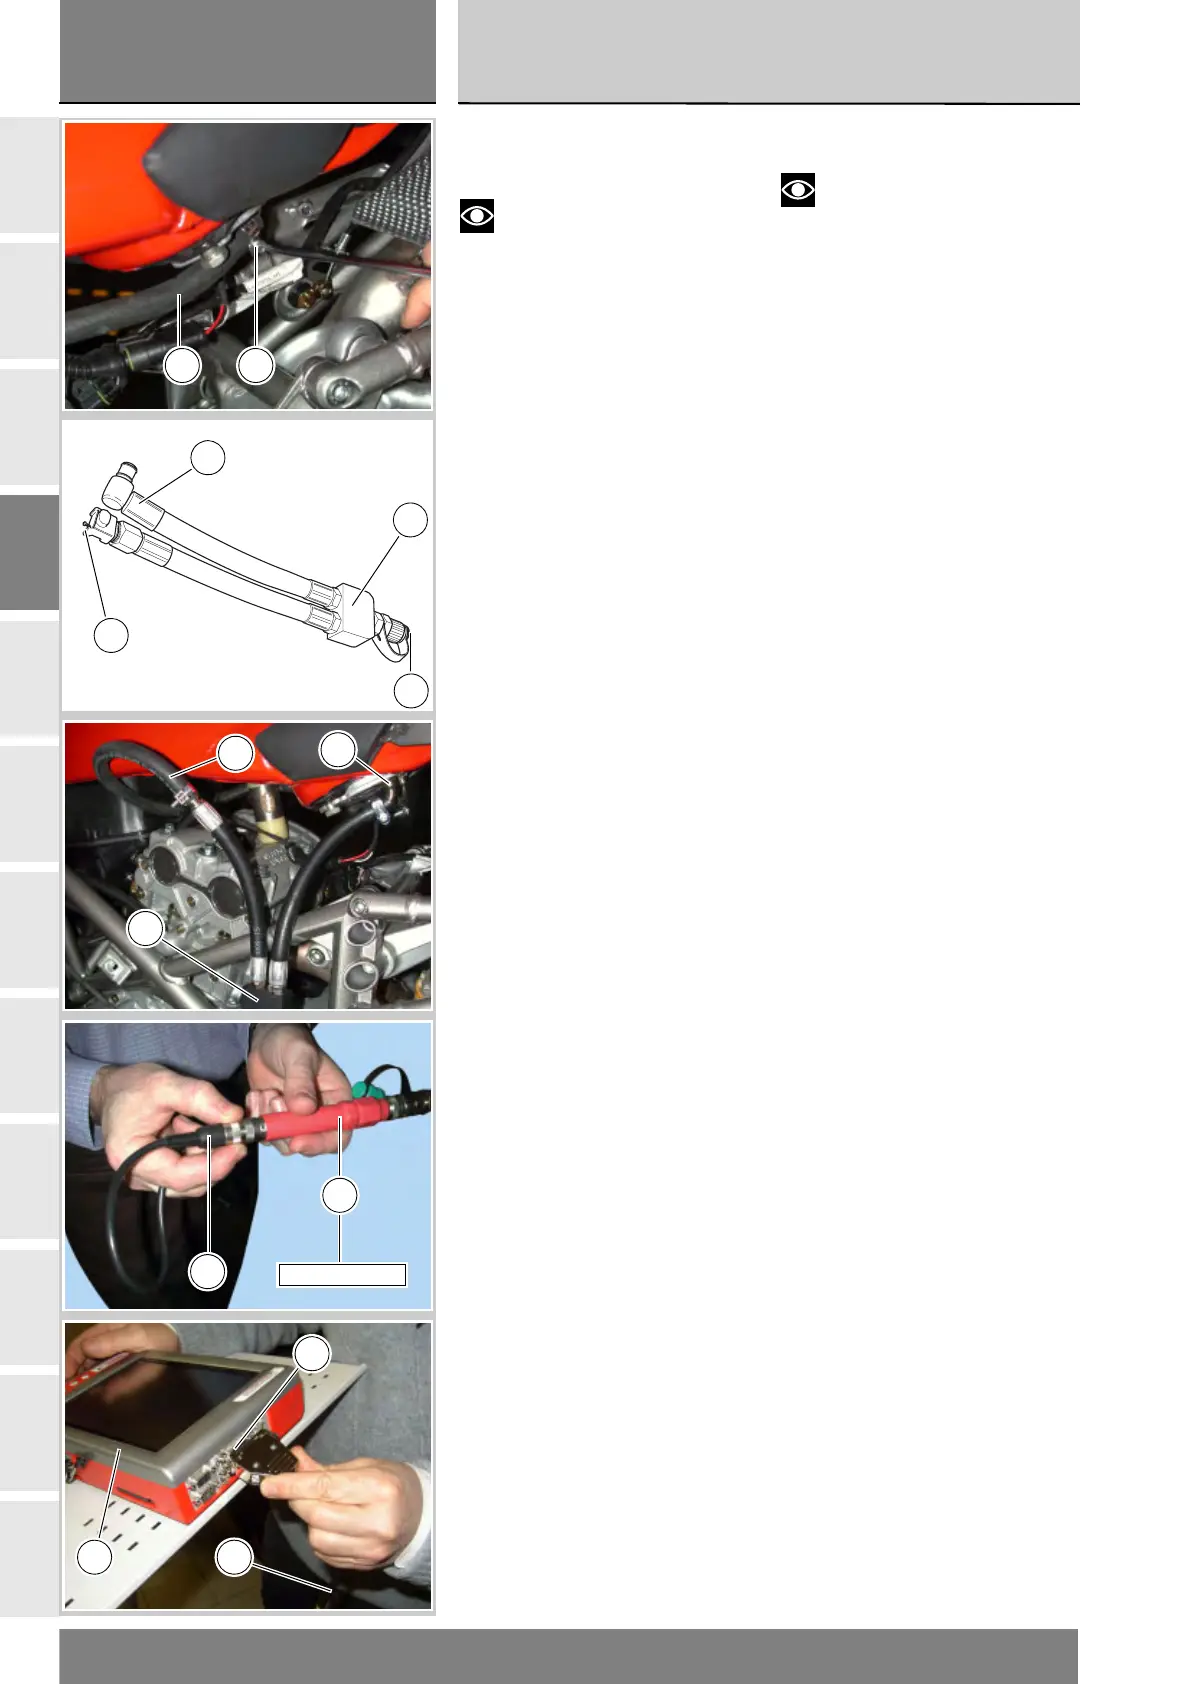
Controllo pressione
carburante
Note
I simboli delle icone utilizzate
nella procedura sono riportati in una
tabella alla fine della presente sezione.
Prima di eseguire questa operazione è
necessario procedere al distacco
dell’assieme serbatoio - sella - codone
(Sez. E 3) dal veicolo, senza rimuoverlo.
Alzare leggermente il serbatoio
installando sotto di esso un
tampone in modo tale da poter
operare sui raccordi della flangia.
Per verificare la pressione
carburante utilizzare il tubo
pressione carburante (17).
Rimuovere il tubo di mandata (D) sul
lato sinistro della flangia svitando
la fascetta (E).
Utilizzare il tubo pressione
carburante (17) collegandone
un'estremità (F) al raccordo del tubo
mandata al serbatoio e l'altra (G) sul
tubo mandata (D): in questo modo
si crea una presa (H) di pressione.
Collegare il sensore pressione (5),
alla presa (H) del tubo (17), per
trasformare il segnale di pressione
in segnale elettrico.
Accendere lo strumento DDS (1)
facendo riferimento al paragrafo
“Alimentazione dello strumento”.
Collegare il cavo alimentazione e
diagnosi (Modulo Misure) (3) al
connettore modulo misure (E)
dello strumento DDS (1).
Collegare il sensore pressione (5)
alla presa (A) o (C) del cavo (3).
Fuel pressure test
Notes
The on-screen icons used
during this procedure are explained in
a table at the end of this section.
Before carrying out this procedure, you
need to detach the fuel tank - seat – tail
guard assembly (Sect. E 3) from the
motorcycle but without removing it.
Slightly raise the fuel tank and place a
pad underneath it so as to be able to
access the fittings on the flange.
To test the fuel pressure use the fuel
pressure test pipe (17).
Remove the fuel tank outlet pipe (D)
on the left side of the flange by
unscrewing the clamp (E).
Connect one end (F) of the fuel
pressure test pipe (17) to the outlet
fitting on the tank and the other
end (G) to the outlet pipe (D) in this
way, we can measure the fuel
pressure at the test outlet (H).
Connect the pressure sensor (5) to
the test outlet (H) of pipe (17) to
transform the pressure signal into
an electrical signal.
Switch on the DDS tester (1); see
heading “Tester Power Supply”.
Connect the power and diagnostics
cable (Measurement Module) (3)
to the measurement module
connector (E) on the DDS tester (1).
Connect the pressure sensor (5) to
socket (A) or (C) of the cable (3).
D E
G
F
H
17
D
F
17
A
5
552.1.039.1A
E
1 3