Vestizione
Fairing
sezione / section
E 2
11 749/749 DARK/749S Aggiornamento/Update - M.Y. 2006 - edizione/edition 00
A
B
C
D
E
F
G
H
L
M
N
P
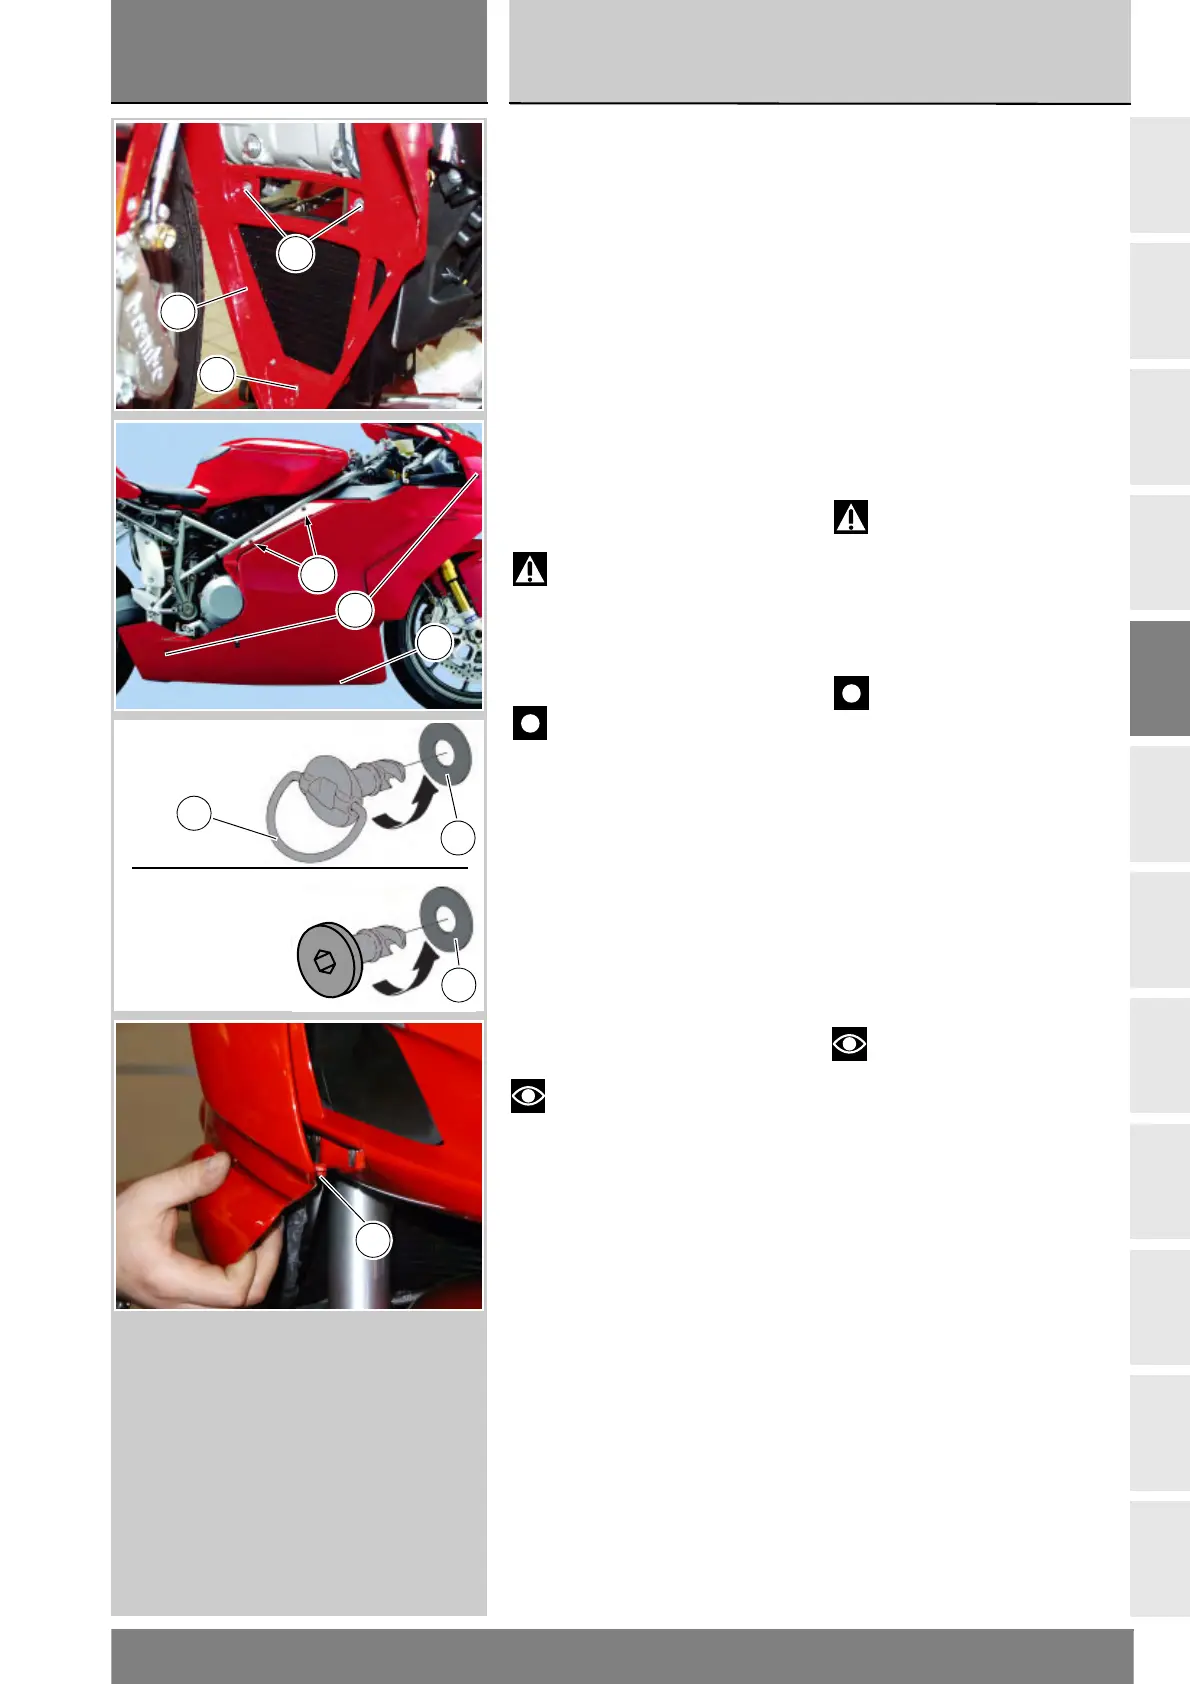
Smontaggio scudo frontale
Dopo aver rimosso le carene come
precedentemente descritto svitare le
viti (19) di fissaggio scudo frontale (16)
alla staffa di supporto della testa
verticale.
Sfilare lo scudo frontale (16) dalla sua
sede e recuperare le rosette (18).
Rimontaggio scudo
frontale
Nel rimontaggio serrare le viti (19) alla
coppia prescritta (Sez. C 3).
Rimontaggio carene
laterali
Attenzione
Il mancato o non corretto
rimontaggio di una delle parti rimosse
può causarne l’improvviso distacco
durante la marcia con la conseguente
perdita di controllo del motociclo.
Importante
Per non danneggiare le parti
verniciate ad ogni rimontaggio
posizionare sempre le rosette in
nylon (21) in corrispondenza delle
viti di fissaggio.
Posizionare sul veicolo la carena
laterale sinistra completa, facendo
corrispondere i perni (20) dei fissaggi
rapidi con le mollette (13) presenti sul
telaio e le viti (36) di fissaggio al
cupolino e al telaio.
Fare attenzione al cavalletto laterale
che deve essere inserito nell’apertura
presente sulla carena.
Note
Fare attenzione a inserire
correttamente il perno di riferimento
anteriore (29) nella relativa sede, in
corrispondenza del cupolino.
Fissare le carene ruotando i perni (20)
di un quarto di giro ed esercitando
contemporaneamente una lieve
pressione assiale.
Montare la carena destra accoppiandola
con lo scudo frontale e nella parte
inferiore con la carena sinistra.
Montare le viti (30) con rosetta (18) e
wellnut (31) in modo da unire le carene.
Serrare le viti (30) alla coppia
prescritta (Sez. C 3).
Removing the front shield
After removing the side fairings as
described above, undo the screws (19)
securing the front shield (16) to the
bracket on the vertical cylinder head.
Withdraw the front shield (16) from
its seat and recover the washers (18).
Refitting the front shield
When refitting the shield, tighten the
screws (19) to the specified torque
(Sect. C 3).
Refitting the side fairings
Warning
Failure to replace or incorrect
refitting of any of the components
removed could cause parts of the
fairing to come loose when riding
and the consequent loss of control
of the motorcycle.
Important
To avoid damage to painted
parts on reassembly, always fit the
nylon washers (21) in correspondence
with the fixing screws.
Position the complete LH side fairing
assembly on the motorcycle, aligning
the pins (20) with the clips (13) on
the frame and the screws (36)
securing the side fairing to the
headlight firing and frame.
Note that the side stand must be
inserted in the aperture provided in
the side fairing.
Notes
Make sure that the front
locating lug (29) is fully inserted in its
location in the headlight fairing.
Fix the fairings by rotating the pins
(20) through a quarter turn while
pressing down gently.
Fit the RH side fairing, attaching it
to the front shield and to the LH
side fairing at the bottom.
Fit the screws (30) with washers (18)
and wellnuts (31) to join the two
side fairings together.
Tighten the screws (30) to the
specified torque (Sect. C 3).
19
19
16
20
30
36
A
21
21
Monoposto/
Single-seater
Biposto/
Two-seater
29