A
B
C
D
E
F
G
H
L
M
N
P
Ruote - Sospensioni - Freni
Wheels - Suspensions - Brakes
sezione / section
G 8
51 749/749 DARK/749S - M.Y. 2005 - edizione/edition 00
Sostituzione anello di
tenuta su albero
secondario cambio
Note
Le immagini rappresentano un
motore rimosso dal telaio.
L’operazione è possibile anche con
motore installato sul motociclo.
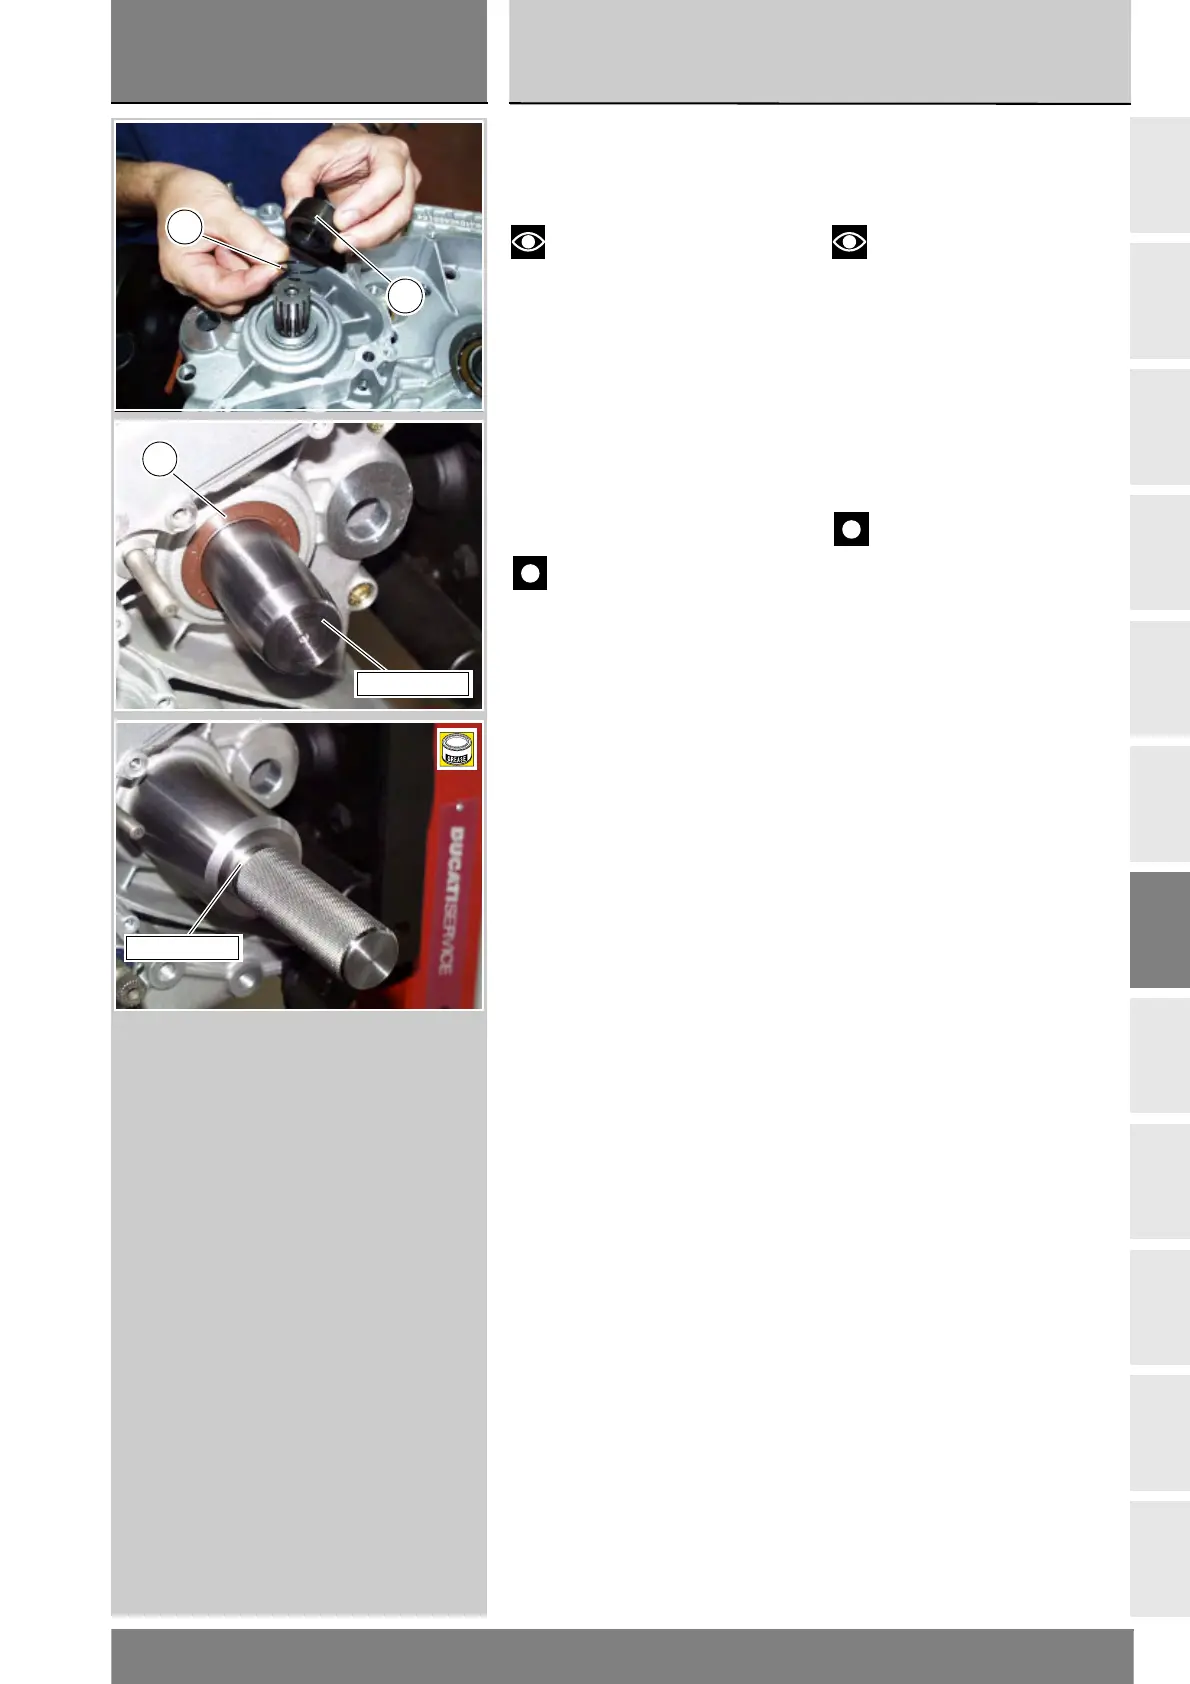
Dopo aver rimosso il pignone motore,
come precedentemente illustrato,
sfilare dall’albero secondario il
distanziale (16) con guarnizione
O-Ring (17).
Utilizzando la punta di un cacciavite
scalzare dal carter l’anello di
tenuta (18).
Importante
L’anello di tenuta (18) e la
guarnizione O-Ring (17) vanno
sempre sostituiti dopo ogni
smontaggio.
Ingrassare la guarnizione OR di
tenuta (17) e installarla sul
distanziale (16) del pignone catena.
Introdurre il distanziale, dal lato con
guarnizione, sull’albero secondario e
portarlo in battuta sull’anello interno
del cuscinetto.
Installare sull’albero secondario la
bussola dell’attezzo cod. 88713.2060
e dopo averlo lubrificato,
accompagnare in sede l’anello di
tenuta (18) nuovo, disposto con il lato
provvisto di molla verso il motore.
Con il tampone dell’attrezzo, portare
in battuta l’anello di tenuta sul
cuscinetto del semicarter.
Rimontare il pignone catena come
descritto al paragrafo precedente.
Replacing the seal ring
on the gearbox
secondary shaft
Notes
For clarity purposes, the figures
show the engine removed from the
frame. The procedure can also be
executed with the engine mounted.
After having removed the engine
sprocket as explained above, extract
the spacer (16) and O-ring (17)
from the secondary shaft.
Use a screwdriver to prise the seal
ring (18) out of the casing.
Important
The seal ring (18) and O-ring (17)
must be replaced after every
disassembly.
Grease the O-ring (17) and install it on
the chain ring spacer (16).
Fit the spacer, from the gasket side,
on the secondary shaft and drive
it fully home against the bearing's
inner ring.
Install onto the secondary shaft the
bushing of tool part no. 88713.2060
and after lubricating it, seat the new
seal ring (18), with the spring-
equipped side towards the engine.
Using the tool's drift, drive the seal
ring fully home onto the casing
bearing.
Refit the front sprocket as described
in the previous paragraph.
17
16
88713.2060
18
88713.2060
B