A
B
C
D
E
F
G
H
L
M
N
P
Impianto di alimentazione / Scarico
Fuel system / Exhaust system
sezione / section
L 2
8 749/749 DARK/749S - M.Y. 2005 - edizione/edition 00
Smontaggio e
sostituzione gruppo
tappo carburante
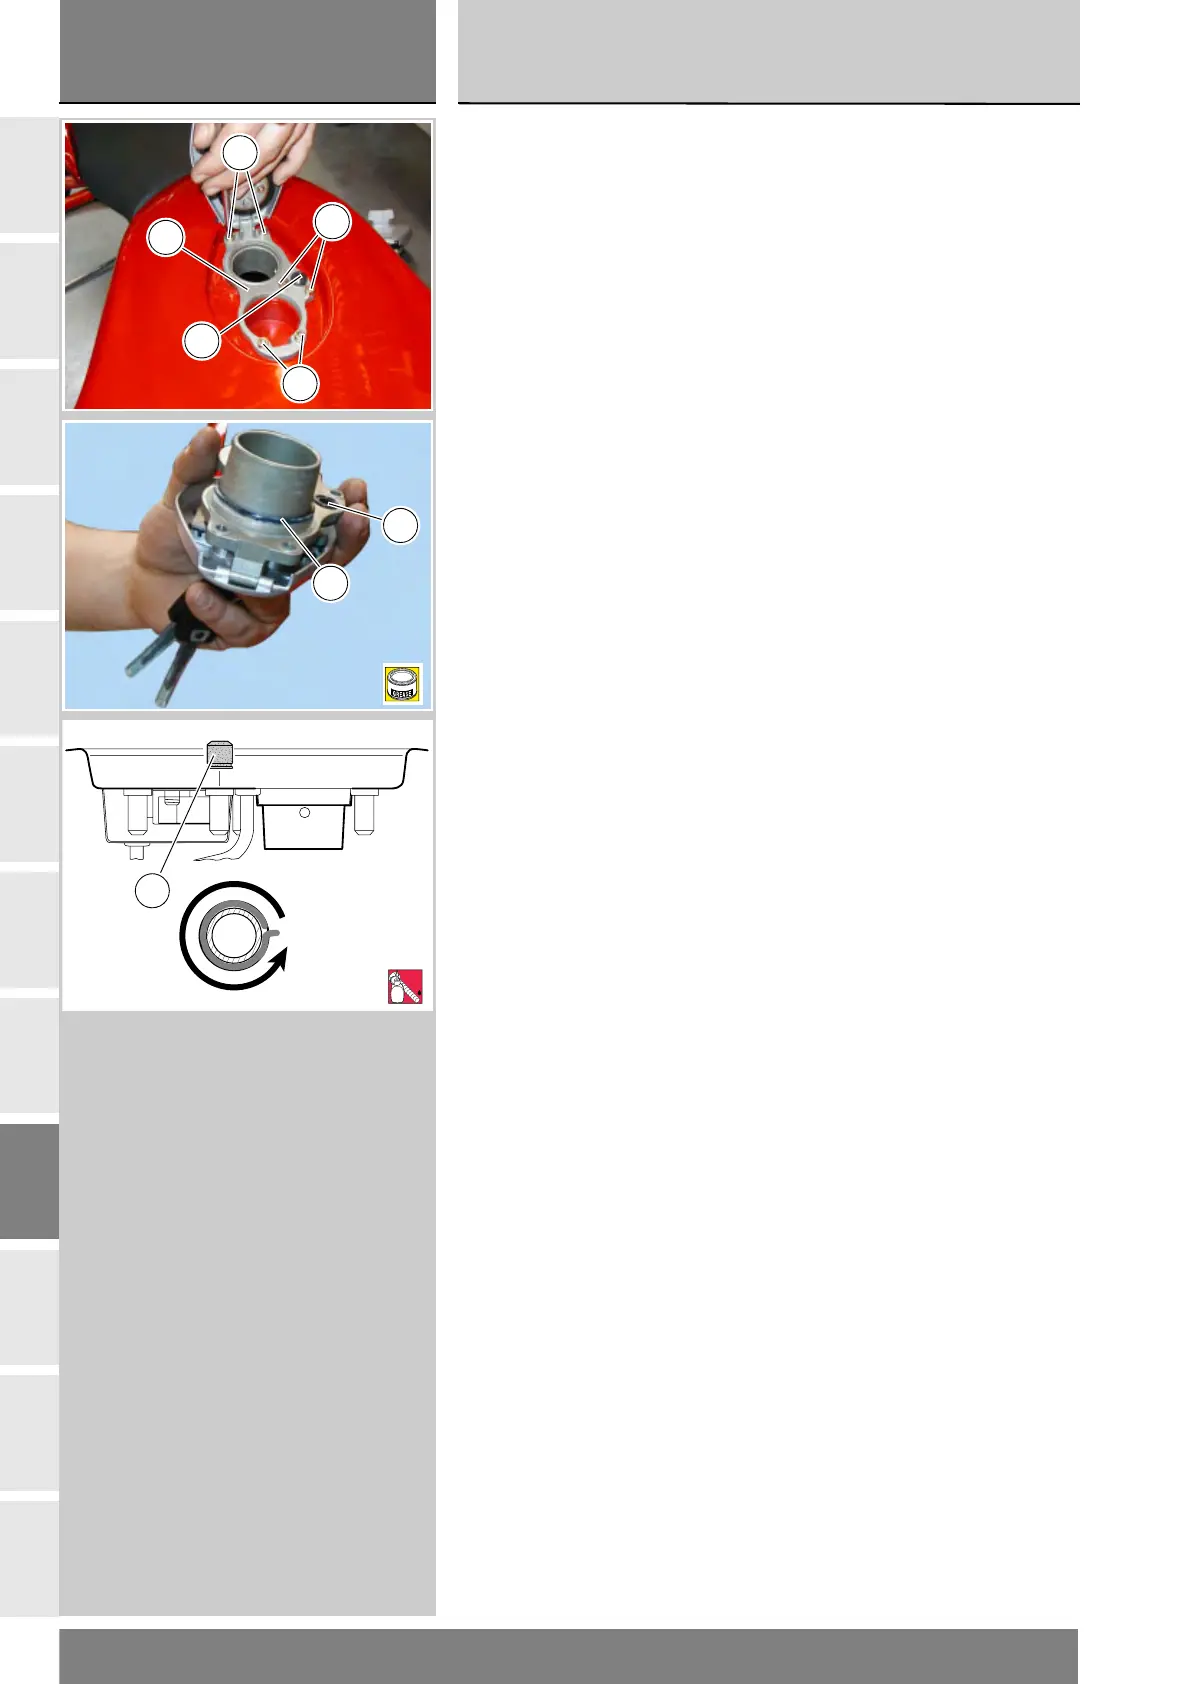
Smontaggio tappo carburante
Aprire il tappo di carico.
Svitare le viti (5) che fissano la base
del tappo (6) al serbatoio carburante.
Rimuovere il tappo (6) e recuperare la
guarnizione OR (7).
Nel tappo serbatoio è presente il
gommino (4) di sfiato.
In caso di sostituzione, applicare
uniformemente su tutto il perimetro
della gola del gommino (4) un adesivo
istantaneo.
Installare il gommino facendolo
aderire perfettamente nella sede del
tappo in modo che sbordi nella parte
inferiore del tappo serbatoio.
In questo modo si avrà la certezza che
faccia tenuta con il serbatoio.
Rimontaggio tappo carburante
Ingrassare opportunamente la nuova
guarnizione OR (7) e la relativa sede
del serbatoio.
Rimontare il tappo (6) nella sede del
serbatoio e serrare le viti (5) alla
coppia prescritta (Sez.C 3).
Removing and changing
the fuel filler cap
assembly
Removing the fuel filler cap
Open filler cap.
Undo the screws (5) securing the
base of the cap (6) to the fuel tank.
Remove the cap (6) and recover the
O-ring (7).
The breather hose rubber block (4) is
inside the filler cap.
When fitting a new seal, apply
a uniform film of speed bonder
along the groove that accommodates
seal (4).
Install the rubber block making sure it
adheres perfectly in its groove in the
filler cap and protrudes from the
lower part of the cap.
This ensures that it will make a seal
with the fuel tank itself.
Refitting the fuel filler cap
Grease the new O-ring (7) and its
groove in the fuel tank.
Refit the cap (6) in its seat in the tank
and tighten down the screws (5) to
their specified torque (Sect. C 3).
5
5
5
4
6
7
4
A
4
7
LOCK