A
B
C
D
E
F
G
H
L
M
N
P
Ruote - Sospensioni - Freni
Wheels - Suspensions - Brakes
sezione / section
G 4
29 749/749 DARK/749S Aggiornamento/Update - M.Y. 2006 - edizione/edition 00
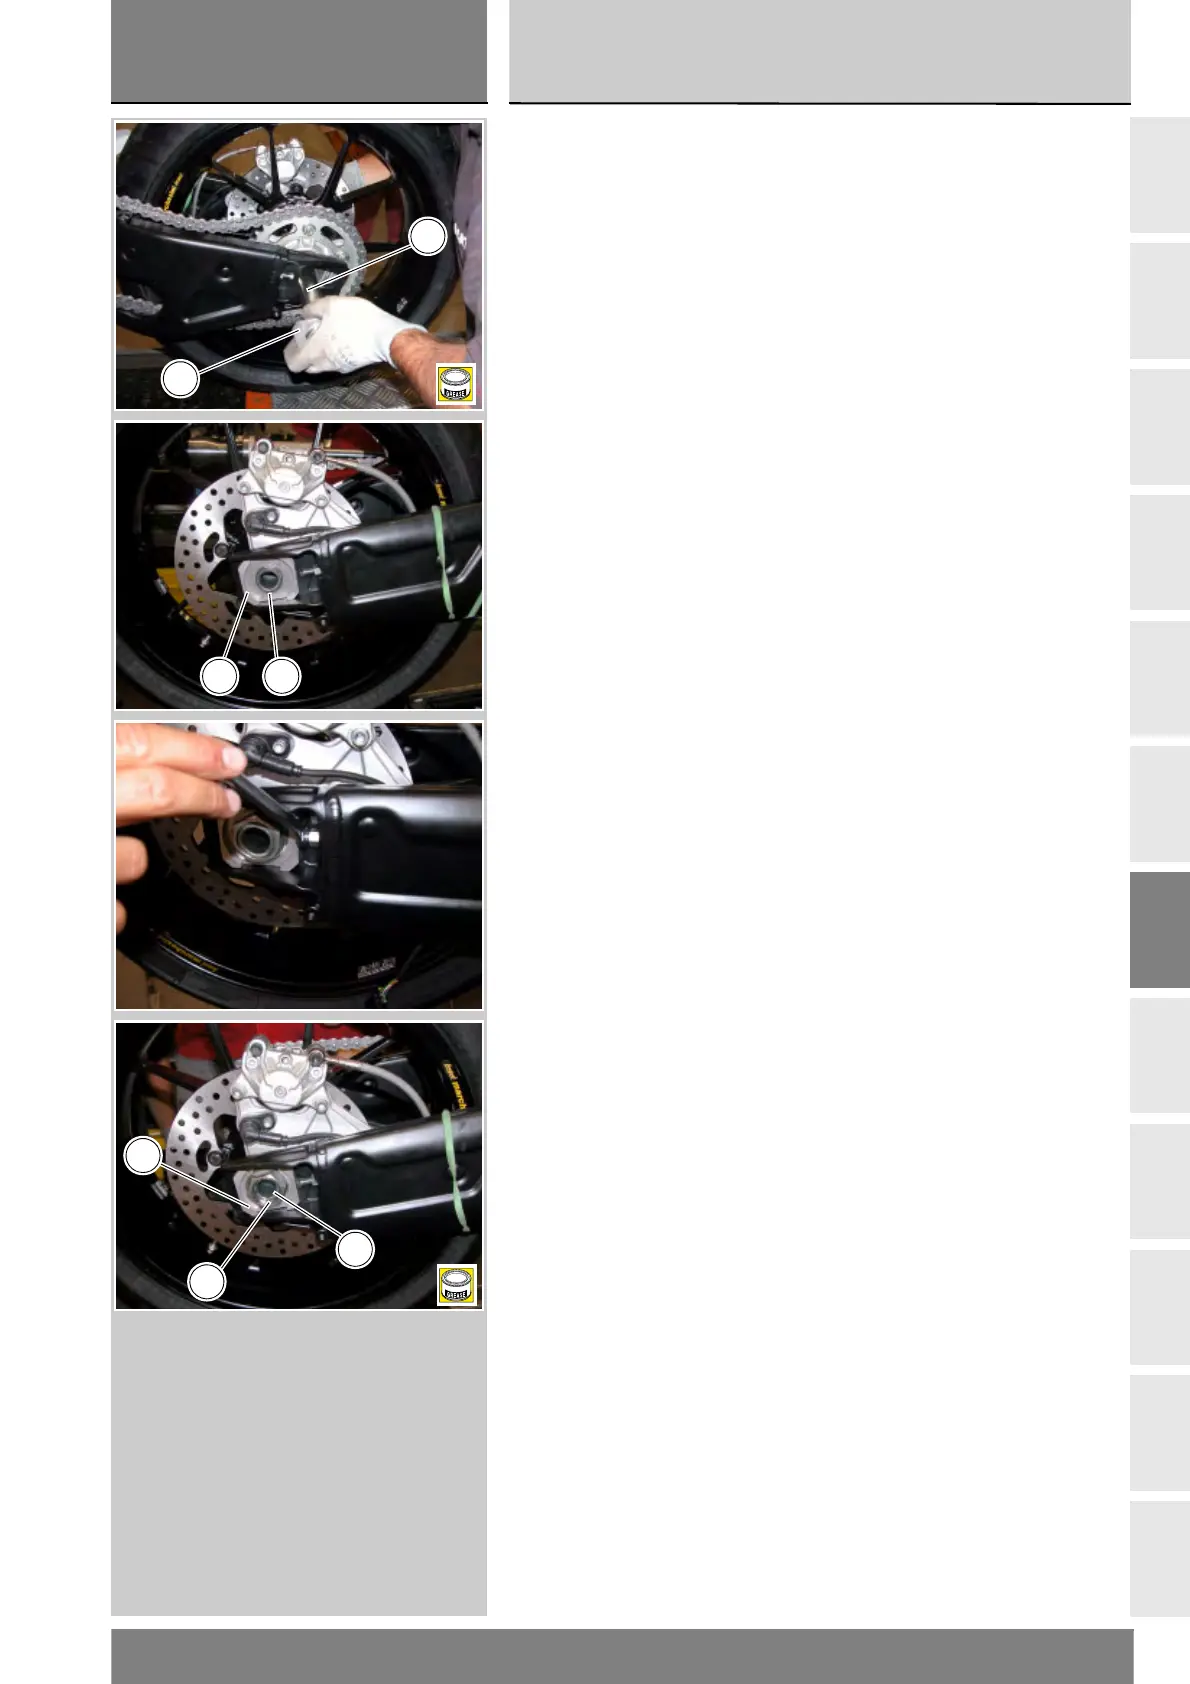
Introdurre la ruota completa all'interno
del forcellone e spingerla in avanti in
modo da inserire la catena sulla corona.
Applicare grasso sul filetto del perno
ruota (1) e sul piano di contatto del
dado (6). Inserire il perno ruota (1)
dal lato sinistro del forcellone.
Spingere il perno ruota (1) fino a
battuta, facendolo passare nell’asola
del cursore sinistro (4), nel mozzo
ruota, nell'asola della piastra
portapinza e nell'asola del cursore
tendicatena destro (5).
Impuntare il dado a mano (6) sul perno
ruota (1), fino a battuta sul cursore (5)
dopo averlo accuratamente ingrassato.
Eseguire le operazioni di tensione
catena e di allineamento ruota
(Sez. D 4).
Verificare che il tubo freno non risulti
schiacciato o eccessivamente piegato.
Bloccare il dado (6) sul perno ruota (1)
alla coppia prescritta (Sez. C 3).
Rimontare la pinza freno posteriore
(Sez. G 6).
Fit the complete wheel assembly to
the swing arm and push it forwards
to seat the chain on the sprocket.
Apply grease to thread of the wheel
spindle (1) and to the contact face of
the nut (6). Insert the wheel spindle (1)
from the left side of the swing arm.
Push the wheel spindle (1) fully home,
passing it through the slot in the LH
adjustment slider (4), the wheel hub,
the slot in the calliper support plate
and the slot in the RH adjustment
slider (5).
Grease and screw the nut (6) on to
the wheel spindle (1) until it is tight up
against the adjustment slider (5).
Proceed with the chain tensioning and
wheel alignment operations(Sect. D 4).
Check that the brake pipe is not
pinched or excessively bent. Tighten
the nut (6) on the wheel spindle to its
specified torque (Sect. C 3).
Refit the rear brake calliper (Sect. G 6).
1
4
B
15
5
1
6
B