Network Names and IP Addresses
5-40 Hardware Installation
Step 6. Highlight the TCP/IP in the Protocols window and click on Properties brings up
the Internet Protocol TCP/IP Properties window of Figure 5-34
Step 7. Enter an IP Address for this device using one of the Recommended IP
Addresses for that type of device given in Table 5-1.
Step 8. Enter a Default Gateway for this device. Use the factory default value.
Step 9. Click OK to close the Microsoft TCP/IP Properties, OK again to close the
Network window, and then close the Control Panel.
Step 10. Shutdown and Restart the device to return to the Windows Main Menu.
After setting Host Names and IP Addresses, Network Interface Card (NIC)
configurations must also be verified. The following steps give the procedure for verifying
the NIC configuration for the Server.
Step 11. Click on Start, Settings and Control Panel to open the Control Panel.
Step 12. Double click on the Network and Dial-up Connections icon to open the
Network and Dial-up Connections window.
Step 13. Right click on the Hospital LAN icon and select Properties. The Hospital LAN
Properties window shown in Figure 5-35 opens.
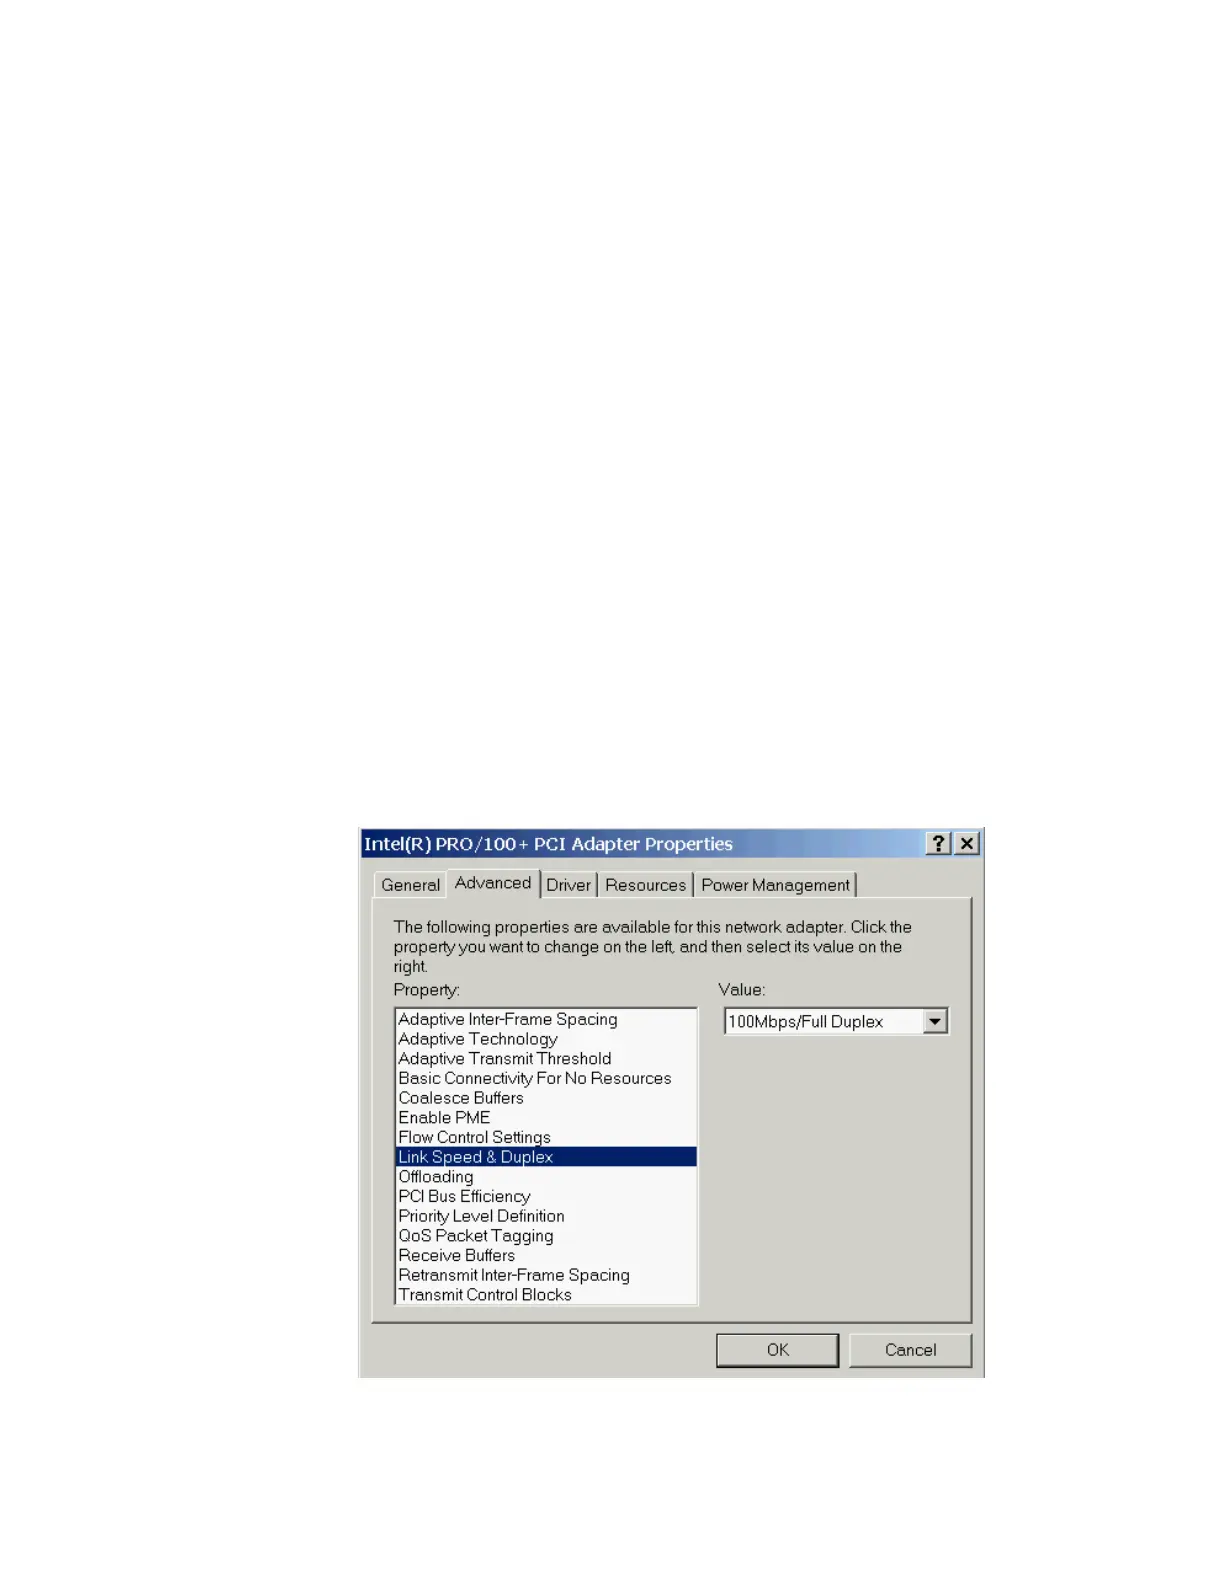
Step 14. Click the Configure button. Click on the Advanced tab.
Step 15. Verify the value in the field shown in Figure 5-37.
Figure 5-37 M3154 Server HLAN Speed/Duplex Setting
 Loading...