Configuration
Software Installation & Configuration
6-59
Buttons at the bottom of Database Server’s Service windows, see for example Figure 6-18,
do the following:
Activating the
Network/
Server
System
When all Information Centers and Clients have been configured, the complete system can be
activated as follows:
Step 1. Reconnect the Network cables of all Information Centers and Clients on the
Network to cause them to reconnect to the Network.
Step 2. Configure Unit Settings for all Information Centers and Clients on the Network.
Note If clinical Unit Settings have been configured when the Information Center or Client was in
Local Database Mode, they will be lost when the device reconnects to the Network. Therefore,
Unit Settings must be configured after the Network connection has been made.
Button Description
Main Screen
Returns to the Service Password window of Figure 6-18 in a locked out mode
requiring the Service password to be reentered
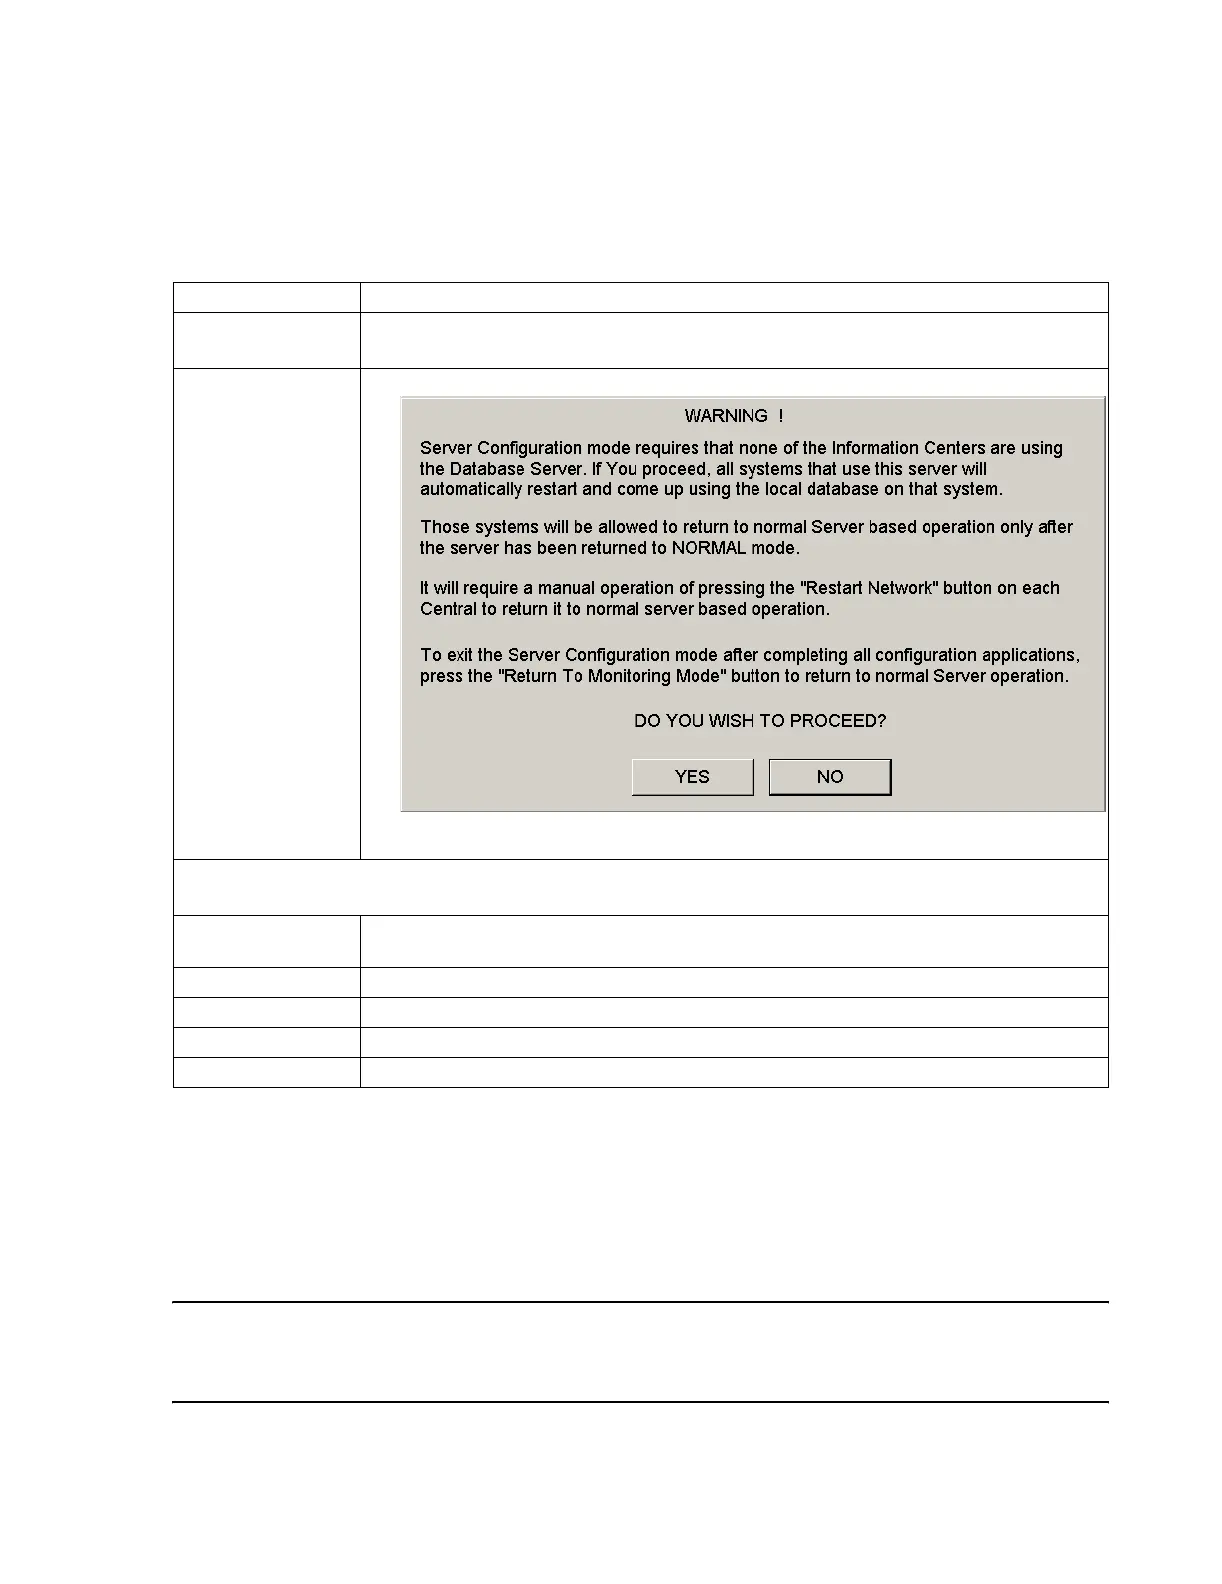
Enter Config Mode Opens the WARNING window:.
Clicking Yes causes all Information Centers and Clients on the Network to reboot and go into
Local Mode and the Server stops storing patient data.
The remaining buttons indicate the status of Information Centers and Clients on the Network. Following are
the status indicators and their meanings:
OFF-LINE Indicates the device is off, in Desktop, start-up, or its connection to the Network is not functioning.
When the Server is being configured, all devices are shown as OFF-LINE
MONITORING Indicates the device is connected to the Server and in Monitoring Mode
SERVICE Indicates the device is connected to the Server and in Service mode
LOCAL MON Indicates the device is in Monitoring Mode; storing a limited set of data locally, not on the Server
LOCAL SVC Indicates the device is not accessing the Server and is in Service mode
 Loading...