Details on Procedure Space Constructions
Figure J.4. Selecting a Wire
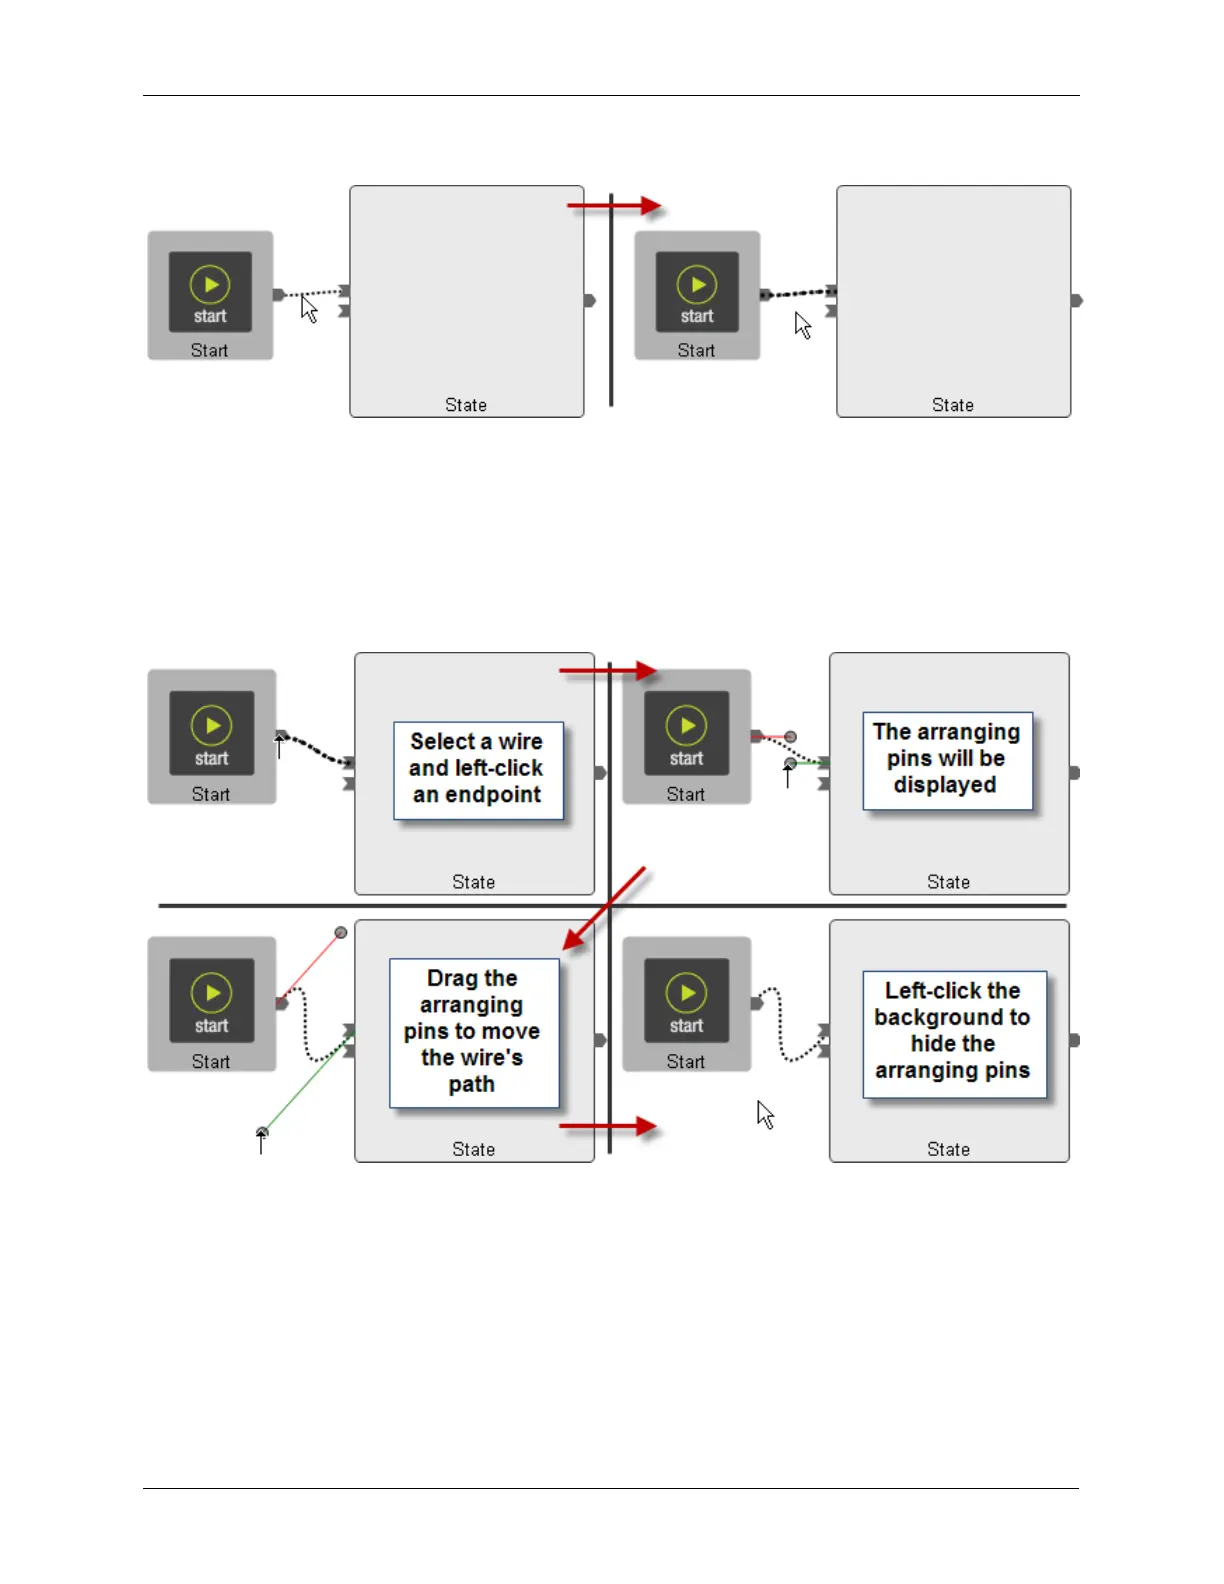
Next click the mouse on the pin on either end of the wire. Arranging pins will appear on both ends of the
wire as shown in the figure below. Click the mouse on the head of one of the “arranging pins.” While
holding the mouse button down, drag the pin and watch how the connecting line moves. The pin can be
rotated and dragged to change the length and arc of the connecting line. The pin on the other end of the
line can also be dragged around to further optimize the routing of the connecting line. When the line
positioning is complete, click the mouse on the background of the procedure to fix the position of the
connecting line and to remove the arranging pins.
Figure J.5. Using the Arranging Pins
J.4. Deleting a Connecting Line
To delete an existing connection line, first select the line by clicking on it. It will turn from a normal light
dotted line to a dark dotted line. Pressing the Delete key on the keyboard will delete the line.