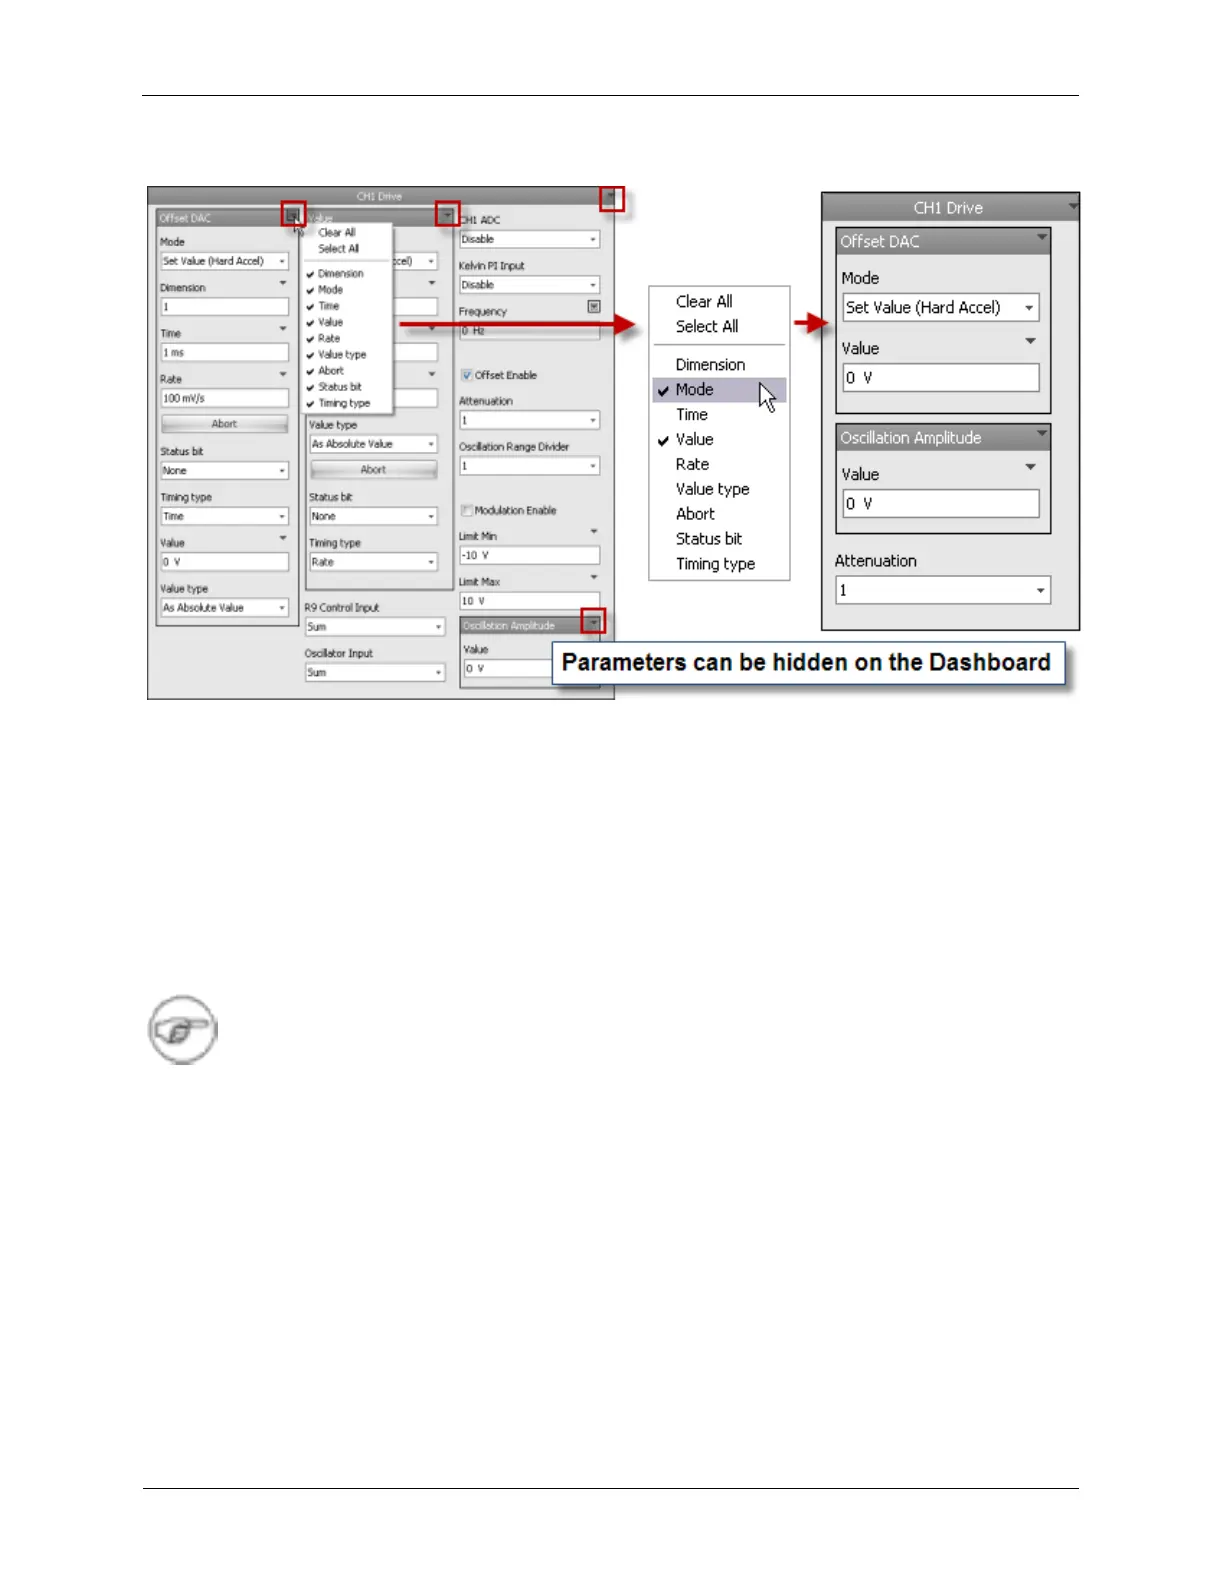
Figure A.2. Hiding Dashboard Controls
This Hardware Item, the Channel 1 Drive, is a simple icon with only one output pin. This output pin
represents the bias output that is connected to the sample in the STM though the Channel 1 Drive. The
Dashboard for this Hardware Item tells a different story. In this view, the rich set of features that this item
owns can be seen and brought to the service of you experiment's needs.
The above illustration shows a great number of possible parameters for the Channel 1 Drive. Many of
these parameters are set once and rarely changed. Other parameters are changed regularly. Do not
allow the great number of parameters to concern you. The rarely used parameters are hidden from view
during normal operation. Only the commonly used parameters are left open in the Dashboard view. R9 is
designed so the casual user can easily utilize the system for their experiments while providing the
advanced user complete control over every setting.
Note
Many of the parameters are common to many of the hardware items, so once you spend a
few minutes to understand how one control works, you will have learned how this control
works on the other hardware items.
In the CH1 Drive panel, there are three sub panels, two check boxes, and two edit boxes. As seen
above, the full set of visible parameters can be greatly reduced, leaving the Dashboard clean and easily
accessible.
A.2. Hiding Dashboard Panels to Ribbon
The Dashboard Panels can be minimized to the ribbon bar In order to maximize the use of space. This is
useful when a Panel is used infrequently, such as the Current Input and Current Filter (in the case of
STM). Press the “up” arrow on a Dashboard Panel to hide it. Dashboard panels can also be opened and
closed from the Panels menu on the ribbon bar.