1. Scan Controls: These controls are used to Start acquiring an image, Pause image acquisition,
causes the image acquisition Stop Immediately, Stop acquisition at the End of the image scan, and
Save the image if autosave is disabled (see the Save tab of the expanded Scan Area Window).
2. Procedure Selection: Different procedures may be available depending on the Scan Mode. The
default Image Procedure is Comb with Offset. Adding Spectroscopy Procedures may add to this list
when the Scan Mode is Spectroscopy.
3. Scan Area Information Bar: The Scan Area Information Bar provides quick information about the
Scan Area Window Display such as the current Zoom magnification and Maximum Scan Area.
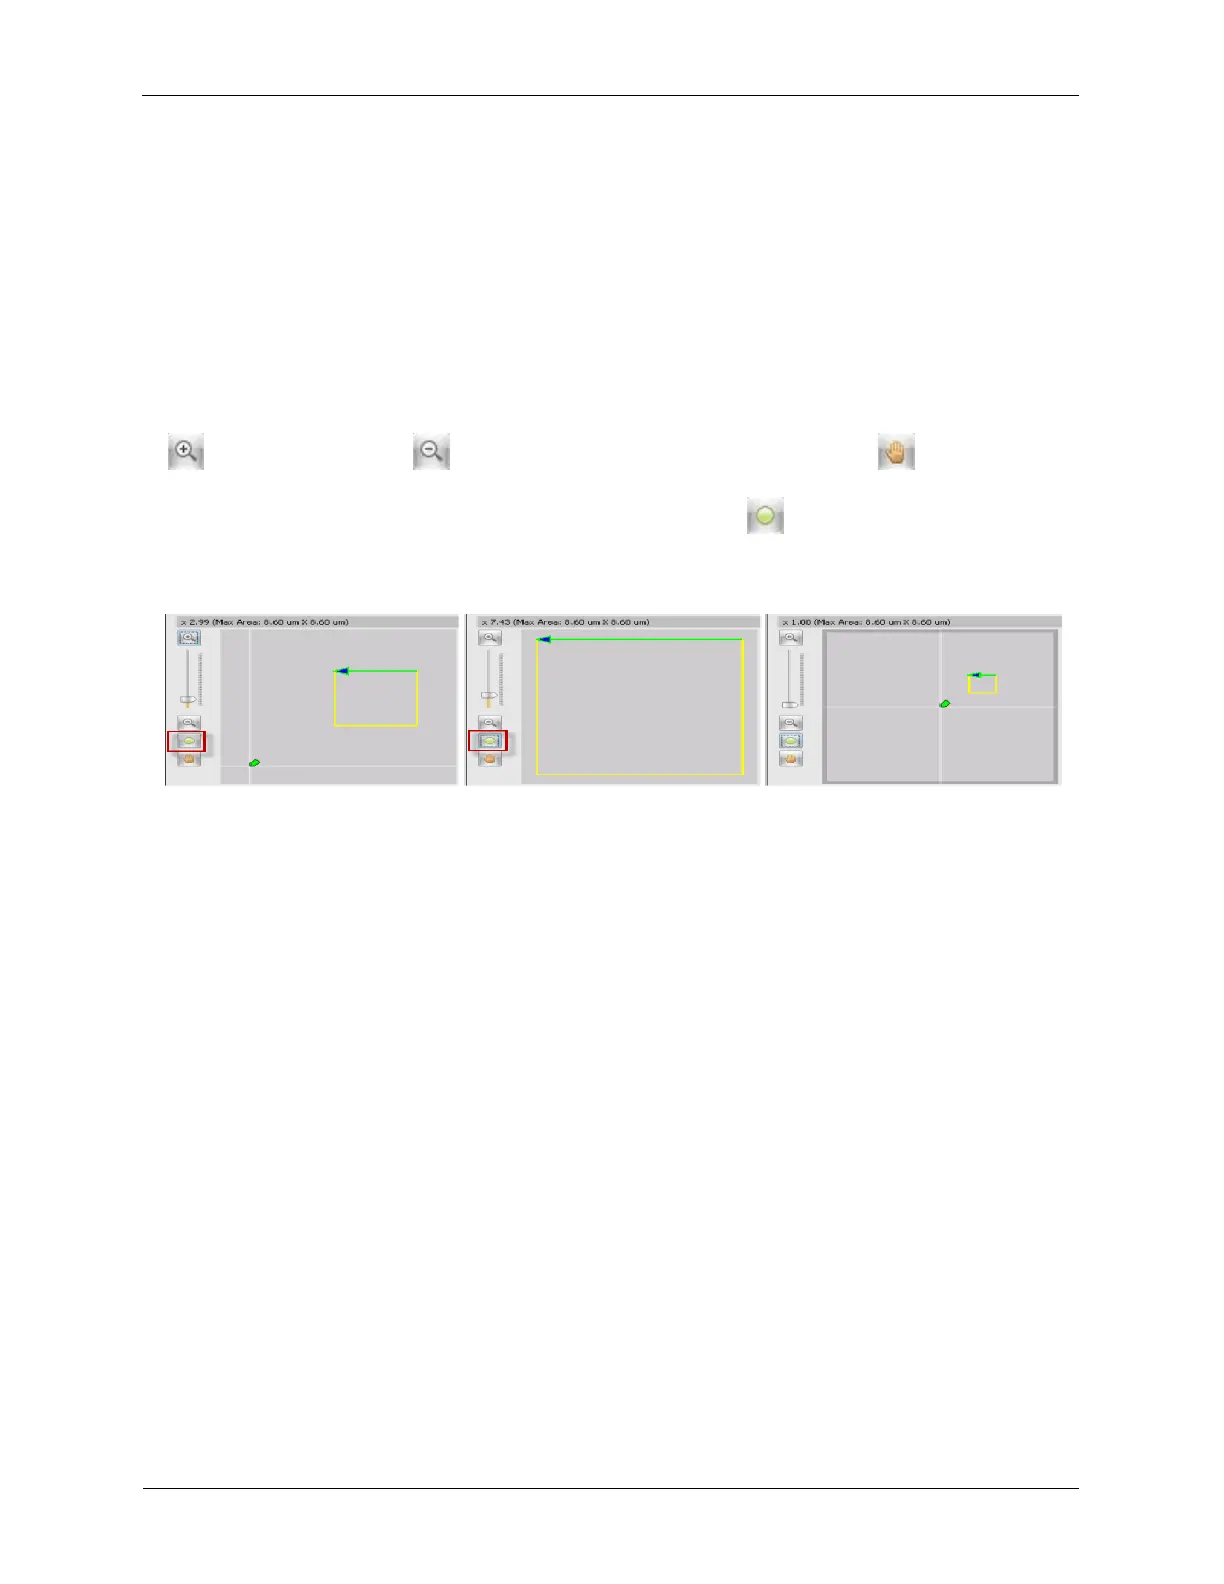
4. Zoom and Pan: The Zoom and Pan controls allow magnification and shifting of the Scan Area Window
Display. This can be helpful when scanning relatively small areas. The Zoom Slider, Zoom In button
, and Zoom Out button control the magnification level. The Pan button allows the shifting
of the Scan Area Window Display if it has been zoomed in. The mouse cursor will change to a hand to
indicate that the Pan mode is active. The Toggle Zoom button will toggle the Zoom level to be
either Zoomed to Scan Area or Zoomed Out.
Figure K.2. Toggle Zoom
5. Scan Area Window Display: The Scan Area (Yellow Box) and the Tip Position (Green Arrow) can be
seen on the Scan Area Window Display. Right-clicking on the Scan Area Window Display will open its
context menu with some additional options:
• Modify Scan Area: Allows the user to move and resize the Scan Area by left-clicking and dragging
inside the Scan Area or any of the anchor points on the Scan Area box.
• Add Spec Location: Allows the user to left-click inside the Scan Area to mark spectroscopy locations
based on the Spec Location mode that is selected from the drop-down menu found on the
Spectroscopy tab of the expanded Scan Area Window.
• Move Tip: The tip will move to a new location using the selected Move Tip procedure found on the
expanded Scan Area Window.
• Move to Center: moves the Scan Area to the center of the Scan Range by setting the XY Offsets to
0.
• Export: Allows the user to export the Scan Area Window Display as an image file.
• Show Histogram: this opens the Image Manipulation tab of the expanded Scan Area Window.
• Ref Image: Clear All: Clears all the previously displayed images from the Scan Area Window
Display.
• Ref Image: Clear: This clears the selected image from the Scan Area Window Display.