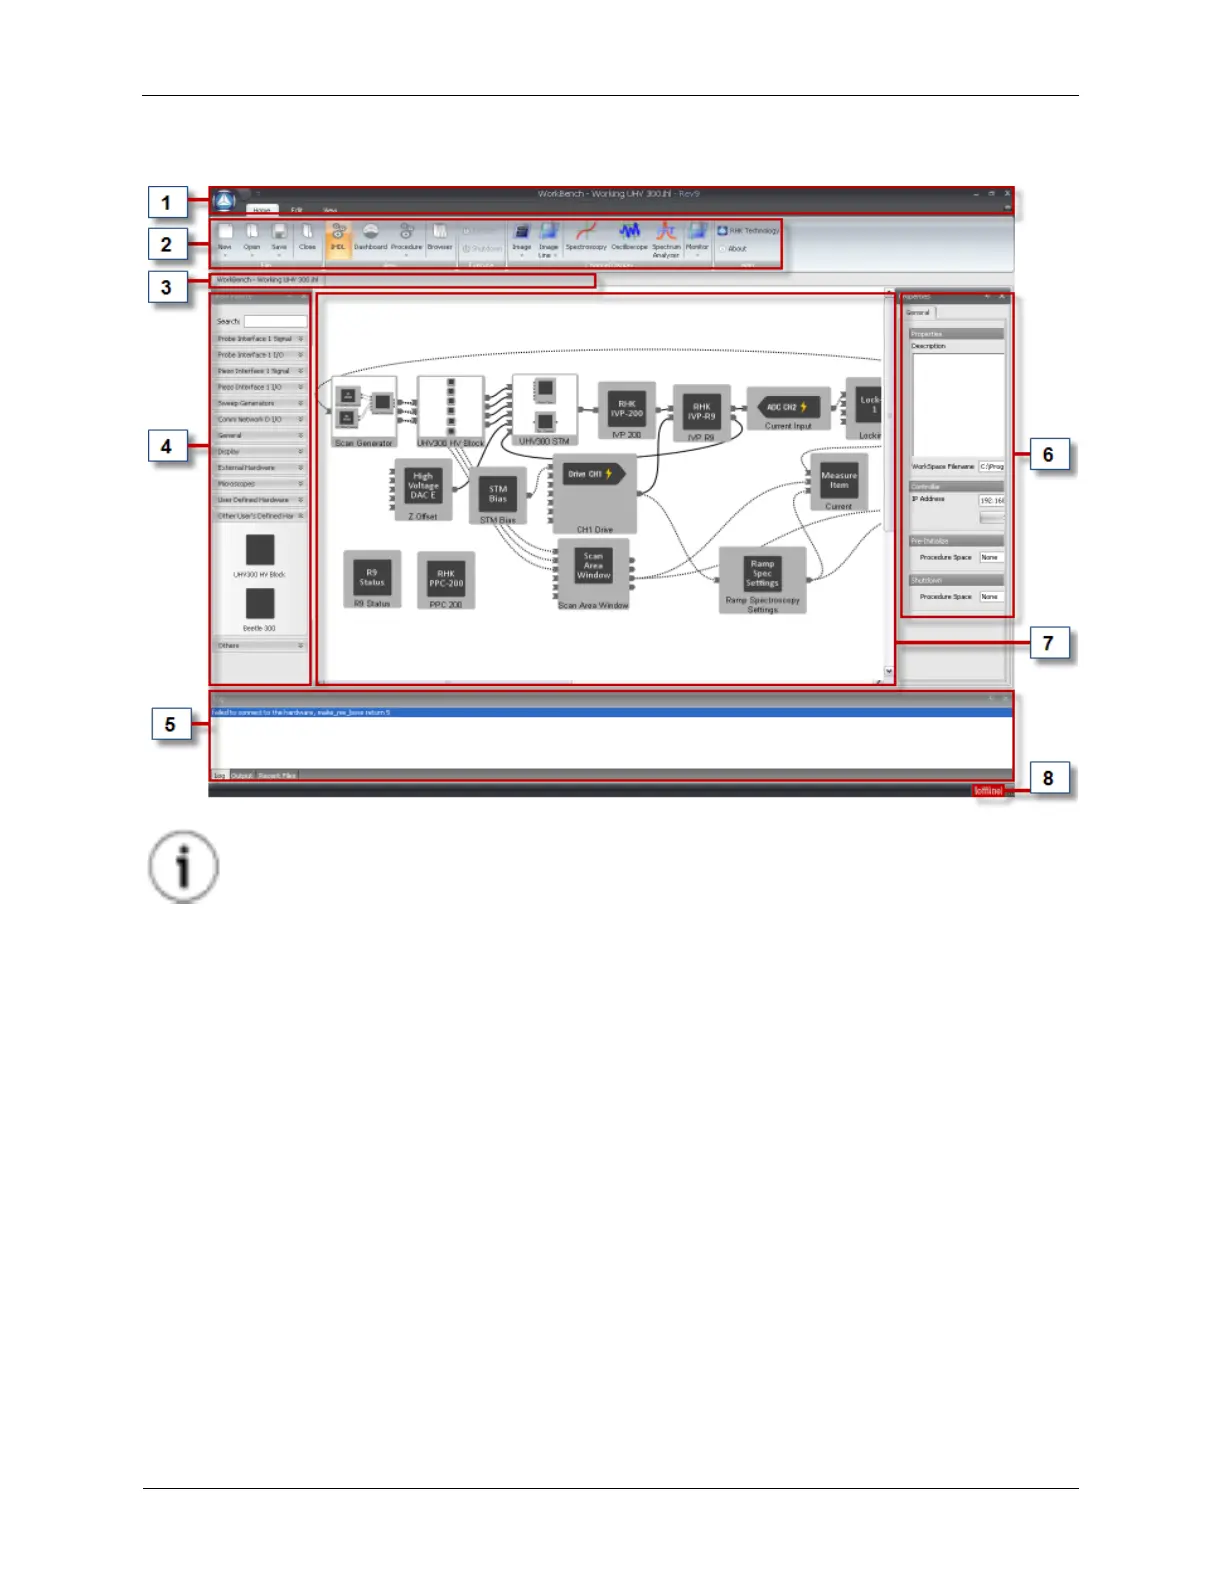
Figure 1.8. UHV 300 STM Hardware Workbench Overview
Tip
Do not let the Workbench scare you! In the next section we will show you how this reflects
your real hardware wiring in the lab. Further, in most preconfigured cases, little to no
modification will be required.
1.4.4 Workbench User Interface Component Overview
The User Interface for the Hardware Workbench has the following components:
1. Quick Access Toolbar: Notice that this toolbar has a small arrow in the upper left near the RHK logo
and notice there is a raised hemisphere icon right under the window control icons (minimize, maximize,
and close). These elements provide access to menus for controlling elements of the overall look and
feel of the Workbench toolbar.
2. Workbench Toolbar: This toolbar provides quick access to commonly used controls. From the
Workbench toolbar, the R9 Software can be switched between Hardware Space, Procedure Space,
and the Dashboard. Also, Procedures can be opened, the Browser can be launched, and the various
Channel Display windows can be opened.
3. IHDL™ Tabs: These tabs allow the user to view the hardware configuration in Hardware Space, and
Procedures in Procedure Space. The left-most tab will be the Hardware Space. The other tabs will be
for opened Procedures belonging to the configuration defined in Hardware Space.
4. Item Palette: The Item Palette holds the components that can be used in Hardware Space. The
components are divided into groups with other components that have similar functionality or purpose.