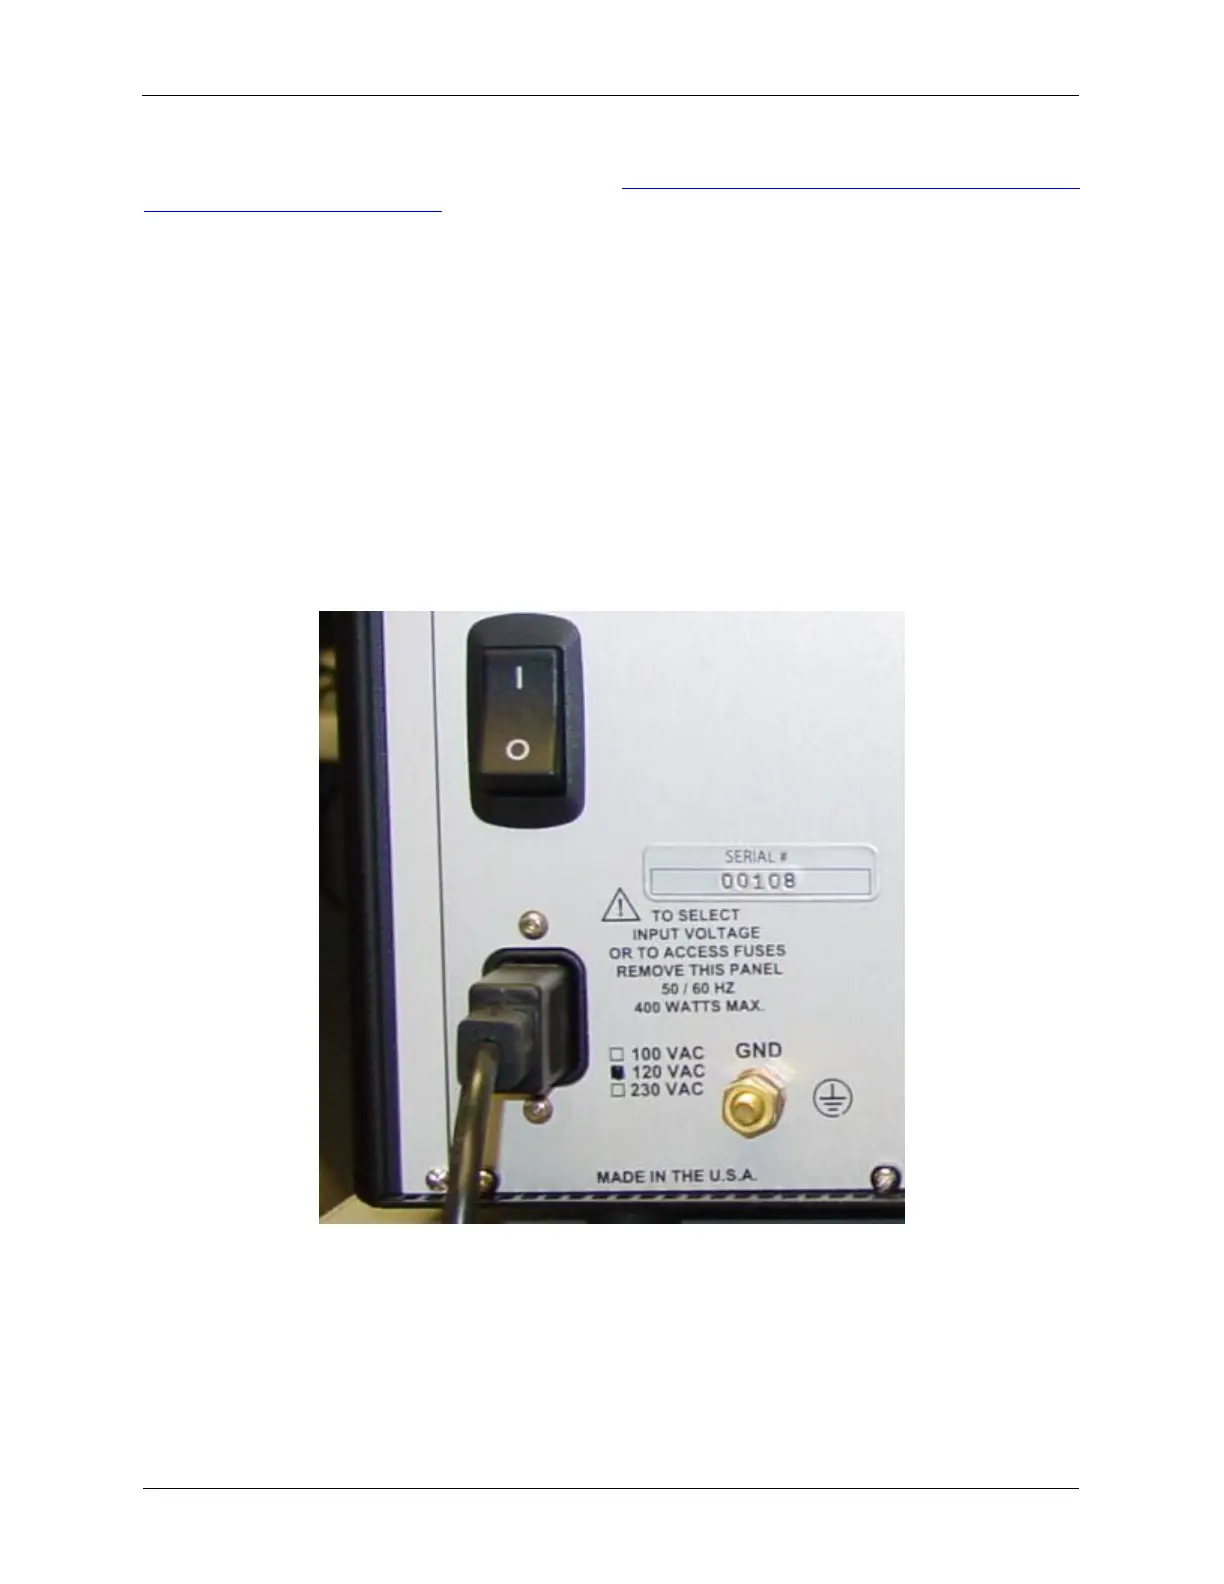
The R9 Controller has its power voltage and frequency ratings marked in the lower left corner of the rear
panel next to the power input connector as shown in Figure 1.2, “Location of Power, Frequency, Voltage
and Serial Number Information”. The mark in the indicator box indicates how the equipment was
configured at RHK before it was shipped. The choices are:
• 100 VAC
• 120 VAC
• 230 VAC
All units will operate with either 50 or 60 Hz input power frequency. Please make sure the power supply
configuration matches the power available in your laboratory. All systems are shipped with power cords.
Note that you may need to adapt this power plug to the exact power socket standard in your country and
laboratory. If your laboratory power voltage is different from what is indicated as the shipping
configuration, the configuration may be modified to any of the three configurations shown above. Contact
RHK Support if the Power Supply voltage needs to be changed. A blue LED will light up when the main
power switch is activated and the R9 Controller receives power.
Figure 1.2. Location of Power, Frequency, Voltage and Serial Number Information
1.3 Connecting the Ethernet
For the initial offline testing of the hardware, the R9 controller will not be connected to a microscope. This
is to be sure that all the electronics are working as expected before attempting to control a real
microscope.