Configuration Guide 720
Configuring SNMP & RMON RMON Configurations
Specify the entry ID, the port to be monitored, and the owner name of the entry. Set the
entry as valid or underCreation, and click Create.
ID Enter the ID of the entry.
Port Click Choose to specify an Ethernet port to be monitored in the entry, or enter the
port number in the format of 1/0/1.
Owner Enter the owner name of the entry with1 to 16 characters.
Status Set the entry as valid or underCreation. By default, it is valid.
Valid: The entry is created and valid.
underCreation: The entry is created but invalid.
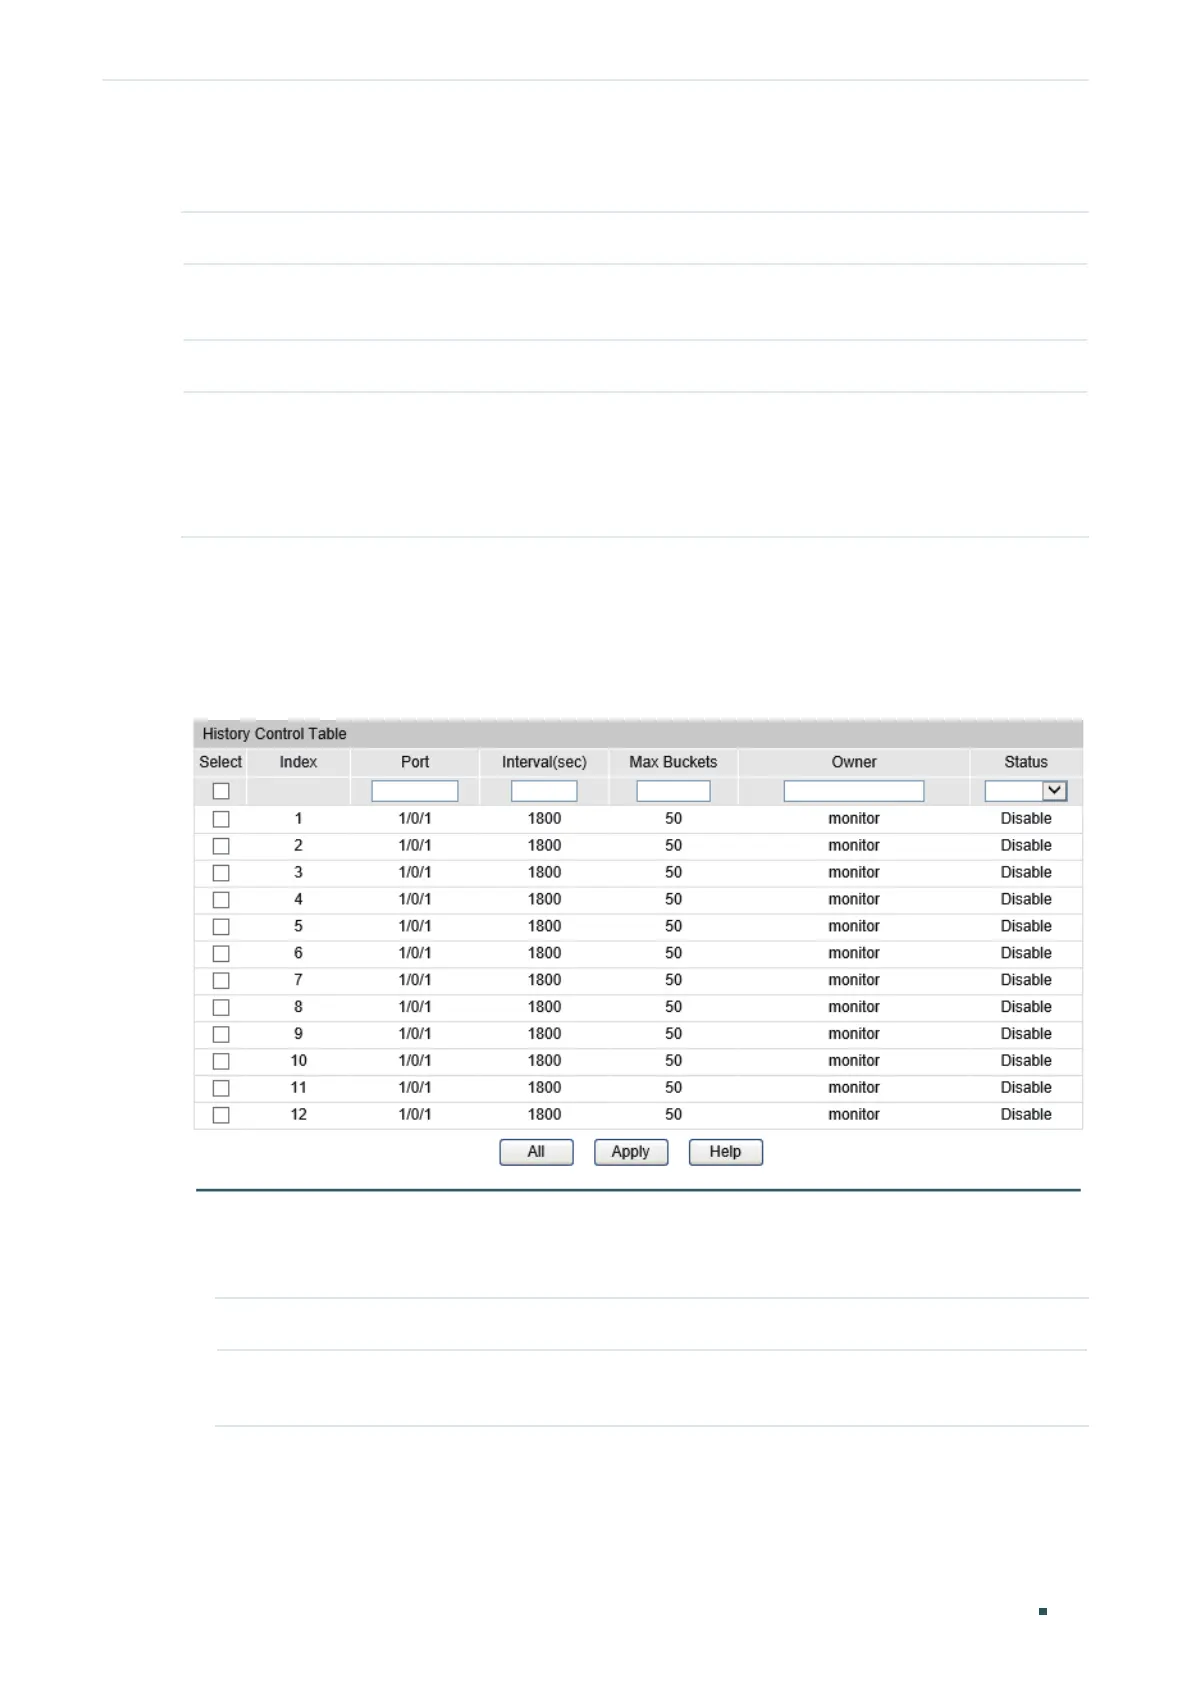
5.1.2 Configuring History
Choose the menu SNMP > RMON > History to load the following page.
Figure 5-2 History Control Table
Follow these steps to configure history:
1) Select a history entry, and specify a port to be monitored.
Index Displays the index of history entries. There are 12 history entries all together.
Port Specify a port in 1/0/1 format to be monitored. To change the port, please
enable the entry first.
2) Set the sample interval and the maximum buckets of history entries.
 Loading...