Configuring Static Routing Example for Static Routing
Configuration Guide
401
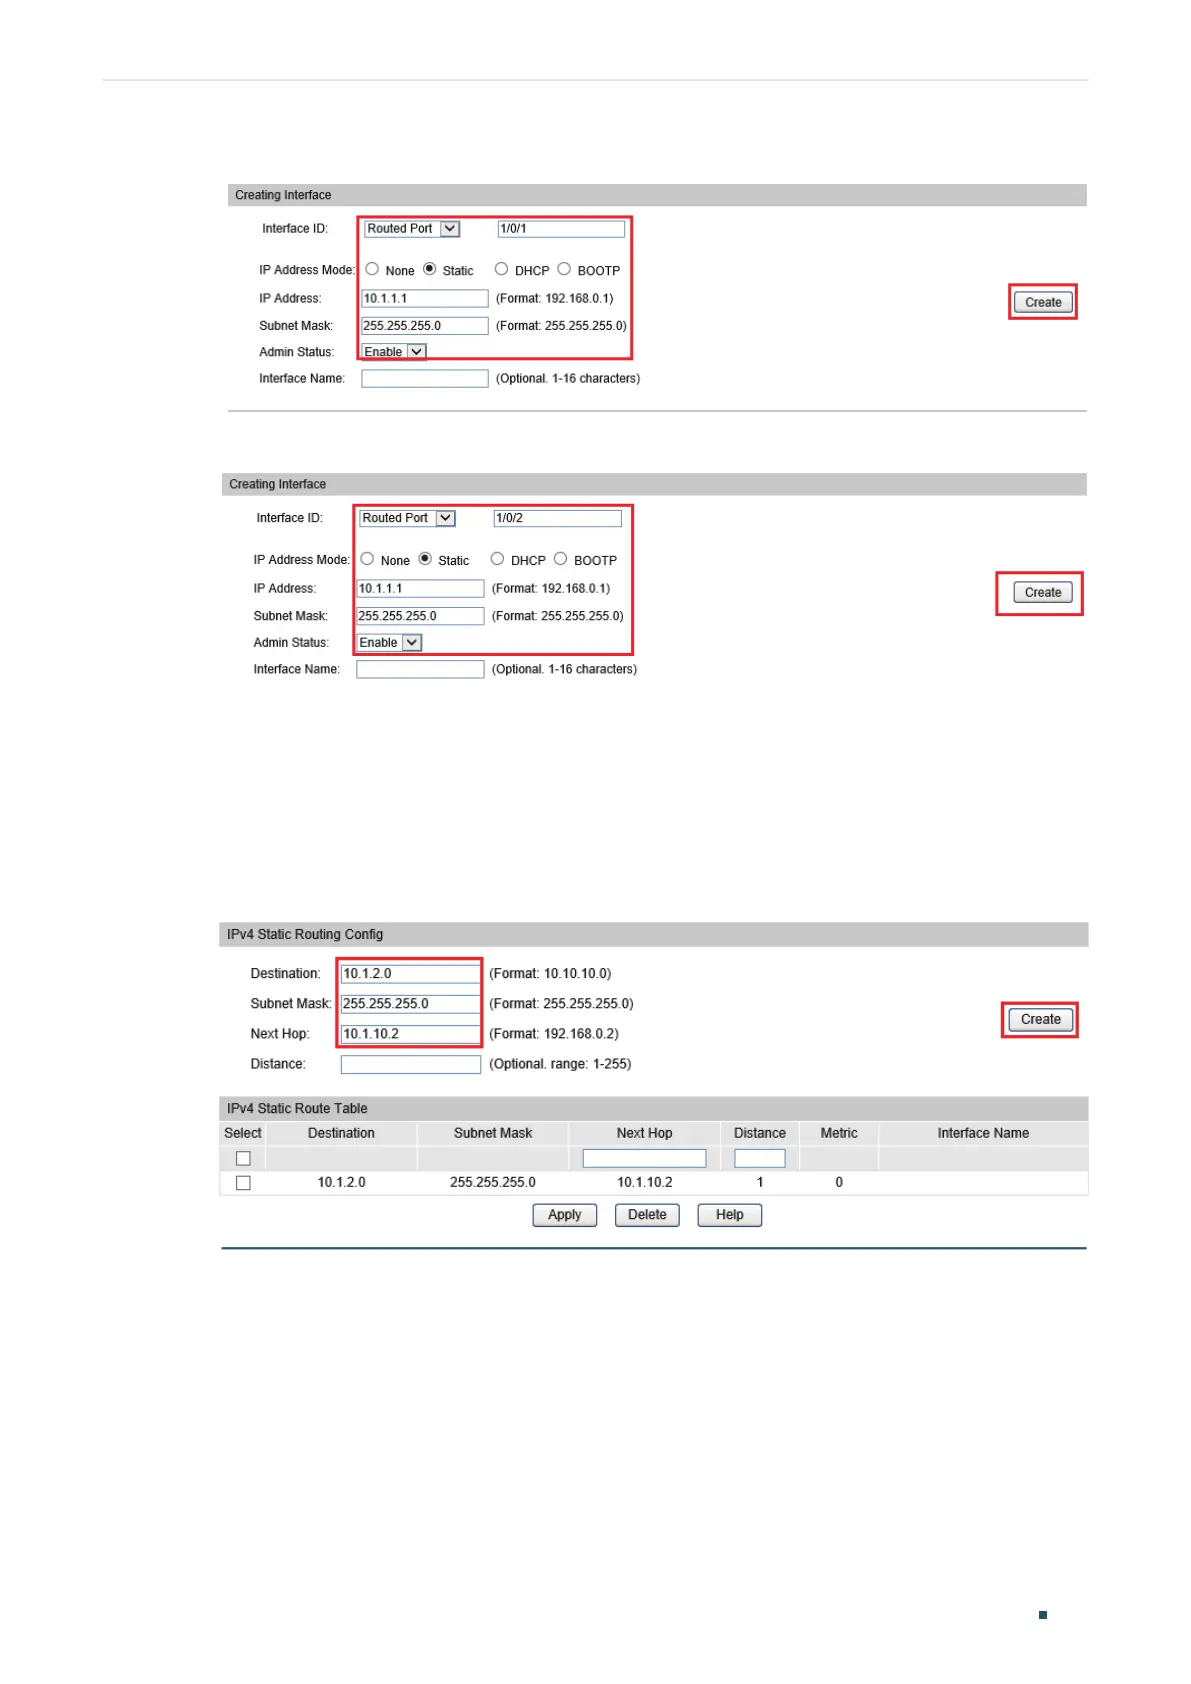
Figure 5-2 Create a Routed Port Gi1/0/1 for Switch A
Figure 5-3 Create a Routed Port Gi1/0/2 for Switch A
2) Choose the menu Routing> Static Routing > IPv4 Static Routing Config to load the
following page. Add a static route entry with the destination as 10.1.2.0, the subnet
mask as 255.255.255.0 and the next hop as 10.1.10.2. For switch B, add a static route
entry with the destination as 10.1.1.0, the subnet mask as 255.255.255.0 and the next
hop as 10.1.10.1.
Figure 5-4 Add a Static Route for Switch A
5.4 Using the CLI
The configurations of Switch A and Switch B are similar. The following introductions take
Switch A as an example.
1) Create a routed port Gi1/0/1 with the mode as static, the IP address as 10.1.1.1, the
mask as 255.255.255.0 and the admin status as Enable. Create a routed port Gi1/0/2