Humphrey Field Analyzer II-
i
series User Manual 2660021145640 A
File Functions
10-15
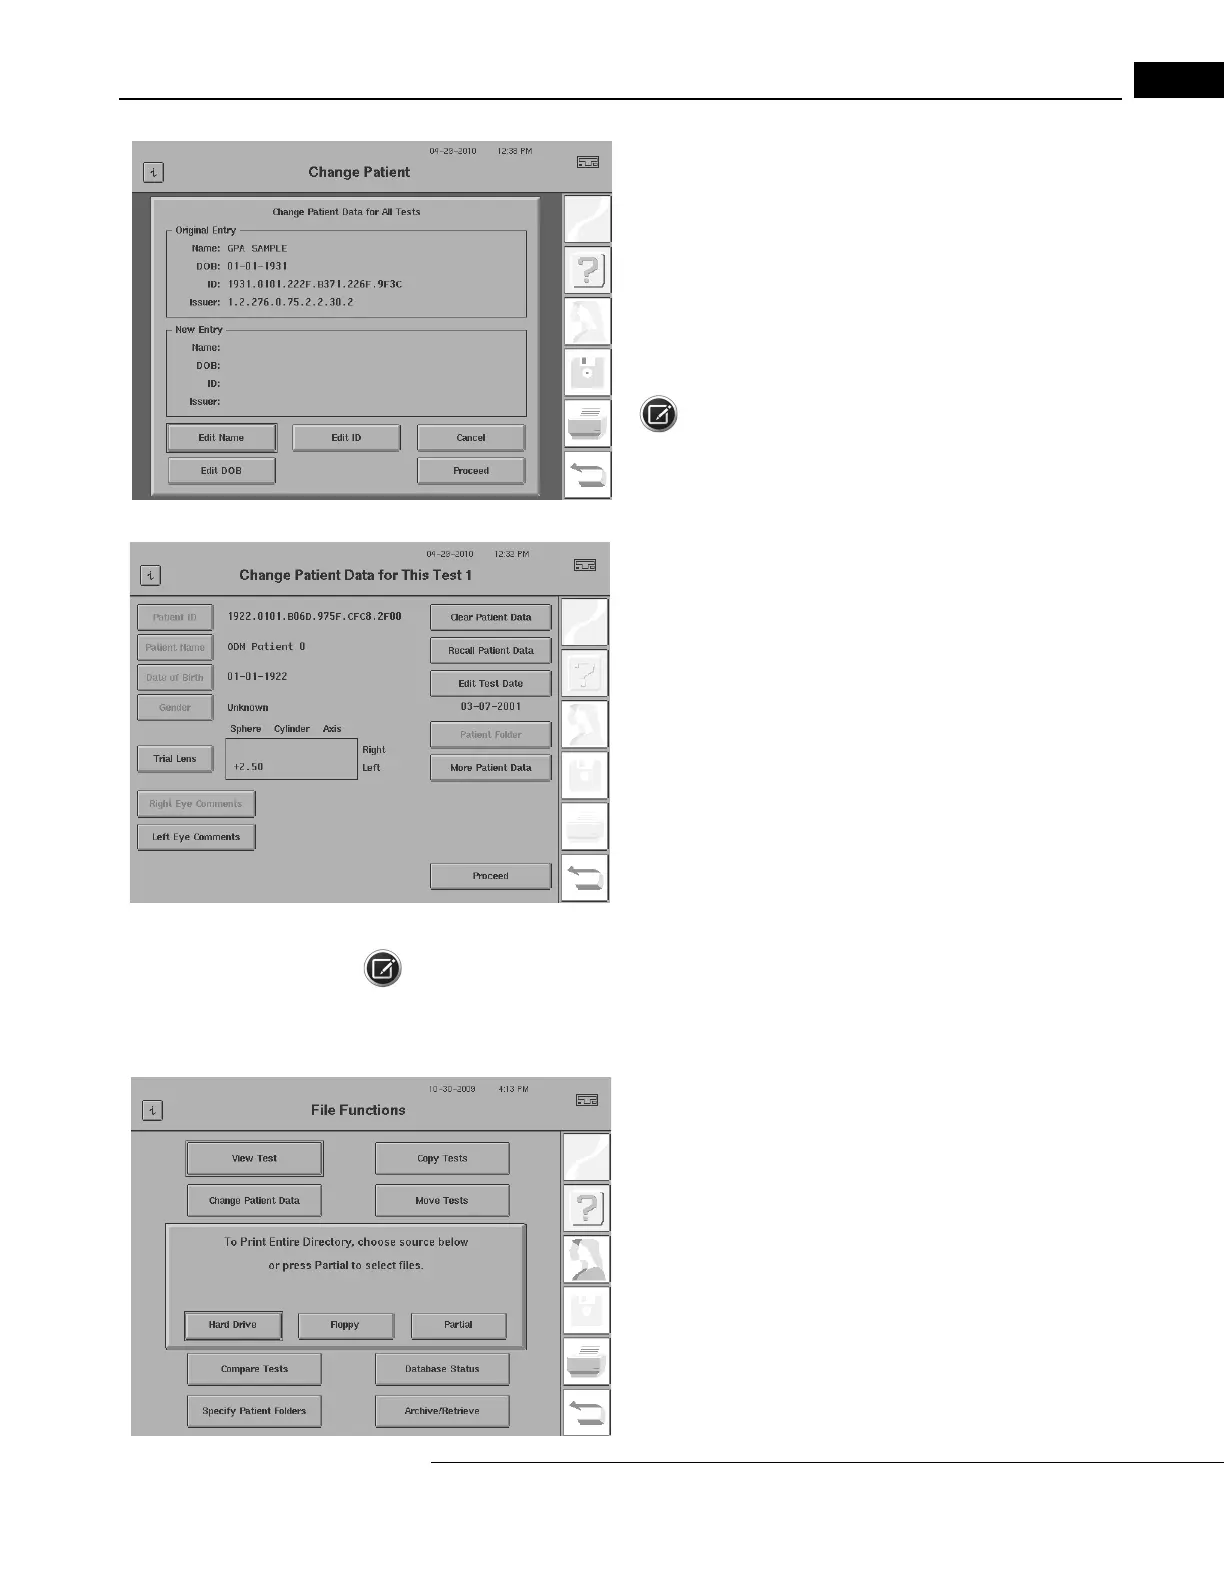
4When selecting All Tests, you can edit the Patient ID, Patient Name,
and Date of Birth. Select EDIT NAME, ED
IT DOB, or EDIT ID to enter a
new name, date of birth, or Patient ID with the keyboard. After
completing entry of the selected field, the keypad closes, but the
Change Patient Data dialog remains, with your entry displayed in the
New Entry section. You can then edit the other two identity fields if
you wish. Press PROCEED to save the edits. Press CANCEL to discard
the edits.
Note: If you change the Patient ID, then the Issuer of ID will
change to what is stored in
the system (see “Specifying Your Practice’s
Issuer of ID,” on page 14-40).
1To change patient data on a single test for a given patient, select
ONE TEST in Step 1 above. Choose the Source and the Directory Order
on the Disk Options screen. Use the keyboard to locate the desired
patient and select the desired test.
2
After selecting the test from the directory and pressing PROCEED, the
Change Patient Data for This Test 1 screen appears. To move this test to an
existing patient, select RECALL PATIENT. To move this test to a new patient,
select CLEAR PATIENT DATA to clear the existing patient information, and
then enter new patient information. If the patient is changed, all data in
the Trial Lens, Patient Data 2 screen, and Eye Comments fields will be
cleared. Therefore, the data in these fields should be re-entered after the
correct patient is selected, or a new patient created.
Note: If you are changing patient data at the end of a test, the EDIT TEST DATE button and test date
are not shown on the Change Patient Data for This Test 1 screen.
To Print a File Directory:
1From the File Functions menu select PRINT DIRECTORY.
2Select either HARD DRIVE or FLOPPY to indicate which directory
you want to print from. If you wish to print a partial directory of either,
or from a USB storage device, choose PARTIAL.
3If you select HARD DRIVE, a message will appear telling you how
many tests will be listed on the directory. Pressing YES will initiate
printing the directory in Name order.

 Loading...


