Humphrey Field Analyzer II-
i
series User Manual 2660021145640 A
Custom Testing
12-7
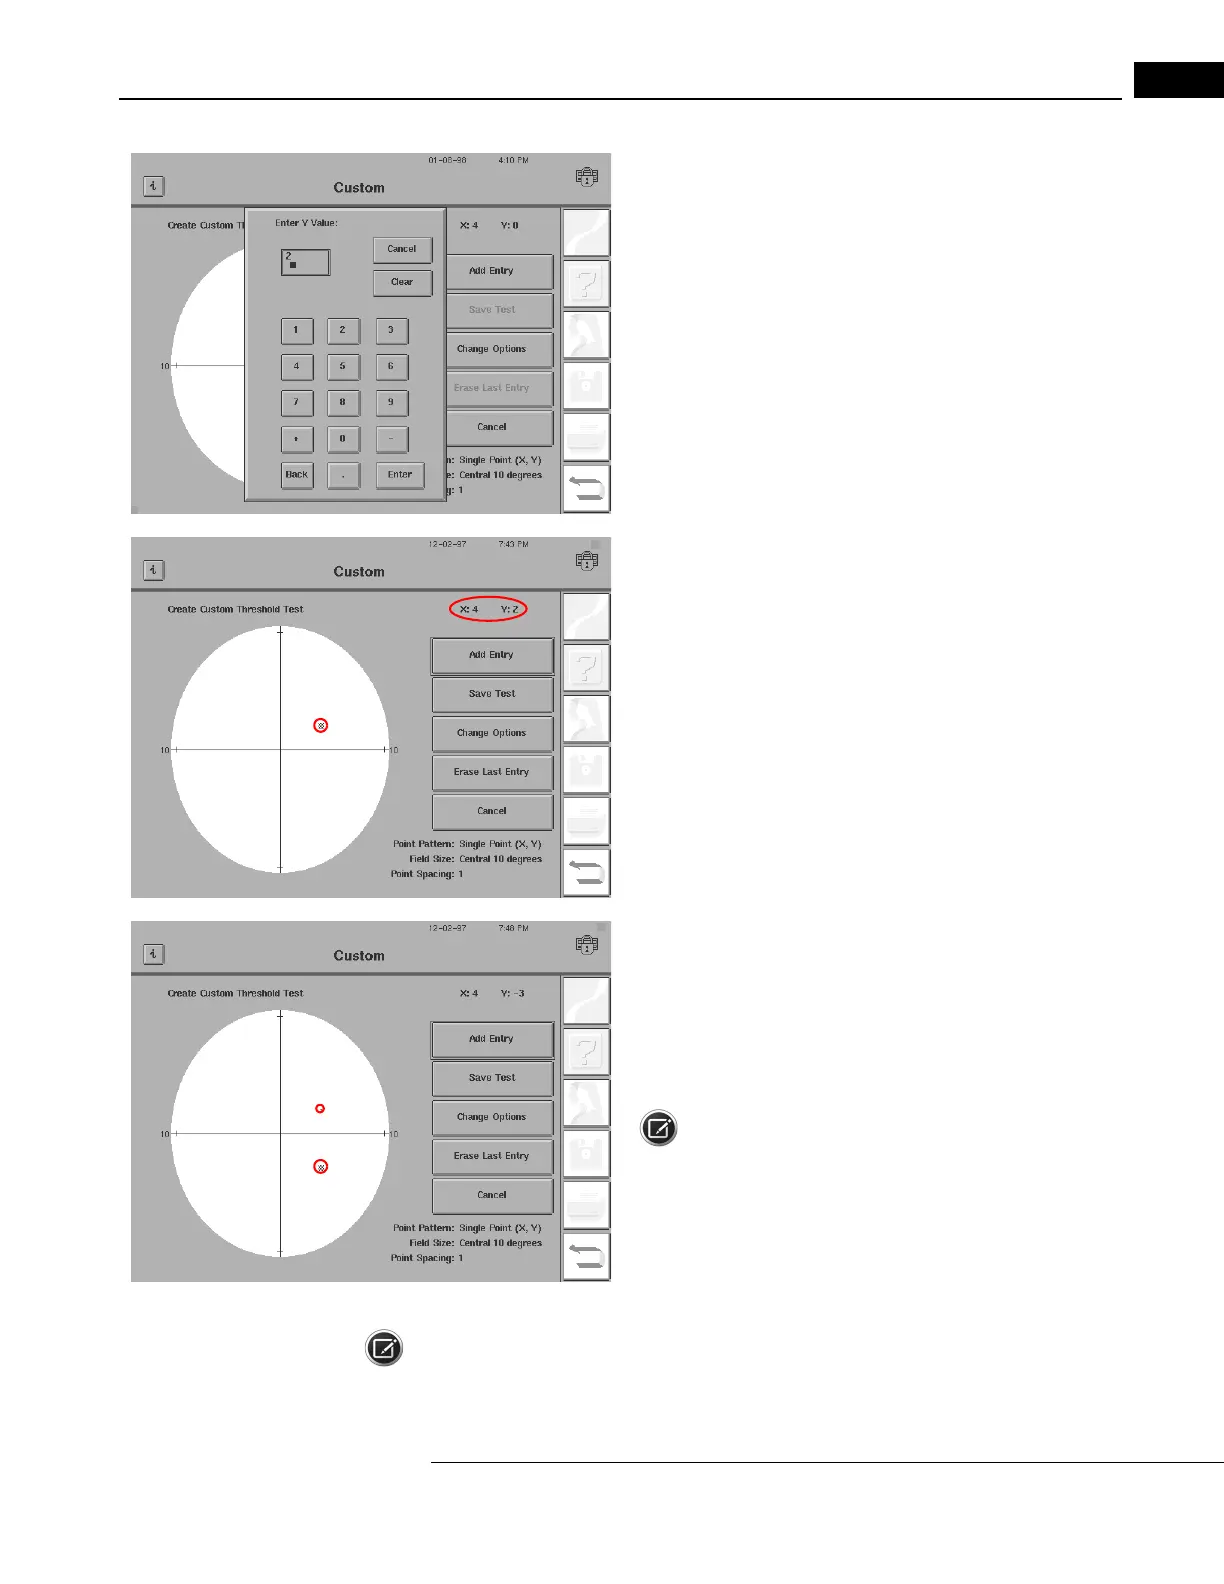
3Input the “Y” value of the same point. Press ENTER.
4The Custom screen now displays this point.
The entered point’s (X, Y) coordinate value is displayed
in the upper,
right-hand portion of the screen. Note that the circle and the oval that
are shown in the illustration are there to help you locate the areas we
are referring to. The circle and oval will not appear on the screen of
your HFA II-
i
.
5To add an additional point, repeat steps 1 through 4. Your next
point will also appear on the screen, once you enter the values.
When you have completed the entry of Custom points, you need to
save the pattern for future testing. Please review “Saving Custom
Tests,” on page 12-11 for additional information.
Note: The last point you enter will appear as a small square,
not a point. The previously entered point will turn from a square into a
point. This is only to make the most recent entry more noticeable on
the Custom screen. This will not affect the size of the point projected
during the test.
Note: If you add a point that is either too close to a previously entered point or completely outside of
the selected field size, the HFA II-
i
will reject your selection. Change the point spacing either by

 Loading...


