C
HAPTER
14
| Basic Administration Protocols
Simple Network Management Protocol
– 365 –
WEB INTERFACE
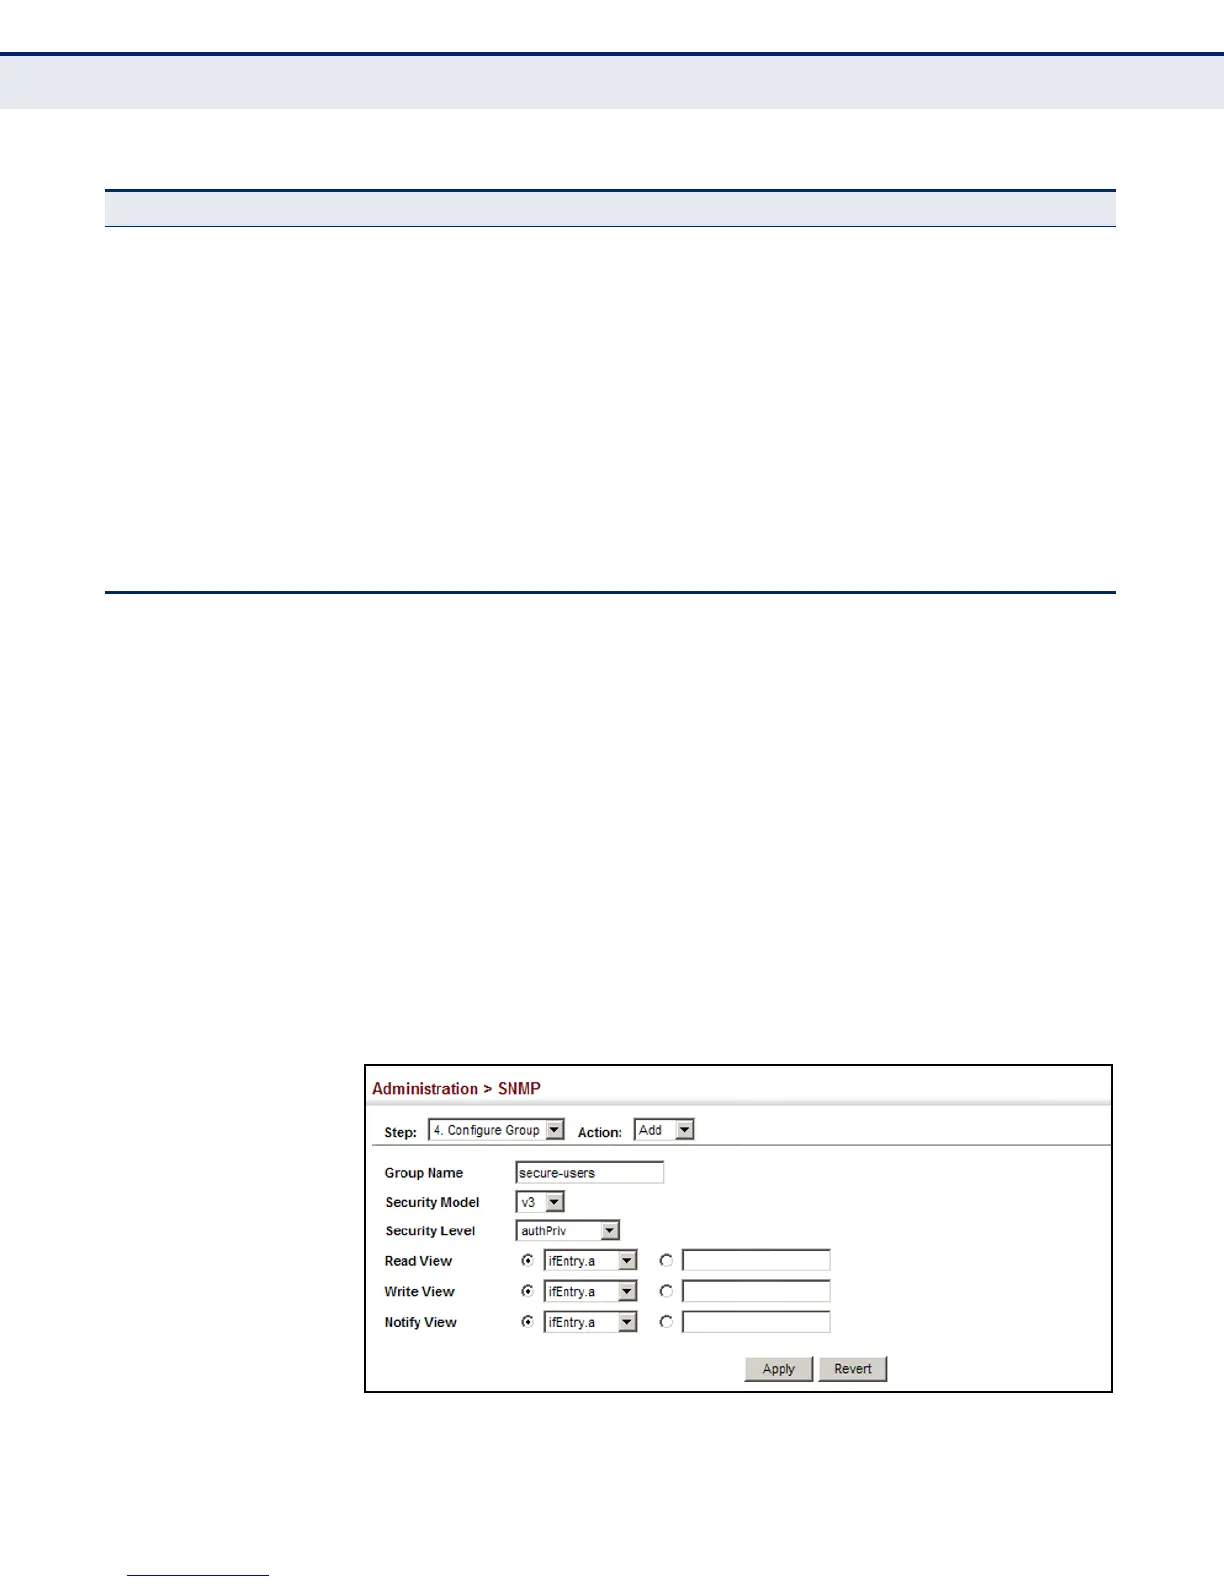
To configure an SNMP group:
1. Click Administration, SNMP.
2. Select Configure Group from the Step list.
3. Select Add from the Action list.
4. Enter a group name, assign a security model and level, and then select
read, write, and notify views.
5. Click Apply
Figure 203: Creating an SNMP Group
swLoginSucceedTrap 1.3.6.1.4.1.259.10.1.5.2.1.0.67 This trap is sent when login succeeds via
console,telnet, or web.
swLoopbackDetectionTrap 1.3.6.1.4.1.259.10.1.5.2.1.0.95 This trap will be sent when loopback BPDUs
have been detected.
networkAccessPortLinkDetectionTrap 1.3.6.1.4.1.259.10.1.5.2.1.0.96 This trap is sent when a
networkAccessPortLinkDetection event is
triggered.
swCpuUtiRisingNotification 1.3.6.1.4.1.259.10.1.5.2.1.0.107 This notification indicates that the CPU
utilization crossed cpuUtiRisingThreshold.
swCpuUtiFallingNotification 1.3.6.1.4.1.259.10.1.5.2.1.0.108 This notification indicates that the CPU
utilization crossed cpuUtiFallingThreshold.
swMemoryUtiRisingThresholdNotification 1.3.6.1.4.1.259.10.1.5.2.1.0.109 This notification indicates that the memory
utilization crossed memoryUtiRisingThreshold.
swMemoryUtiFallingThresholdNotification 1.3.6.1.4.1.259.10.1.5.2.1.0.110 This notification indicates that the memory
utilization crossed memoryUtiFallingThreshold.
* These are legacy notifications and therefore must be enabled in conjunction with the corresponding traps on the SNMP
Configuration menu.
Table 22: Supported Notification Messages (Continued)
Model Level Group
 Loading...
