2 - 136
Chapter 2 Troubleshooting
FIP-1.77 077-300: IOT Cover Front Open
Step Check
Remedy
Yes No
Possible causative parts:
COVER ASSY FRONT (PL1.2.1)
PWBA LVPS (PL8.2.12)
HARN ASSY INTERLOCK AIO (PL8.1.1)
PWBA MCU (PL8.3.6)
HARNESS ASSY LVPS MAIN MG AIO (PL9.1.3)
1
Checking the COVER ASSY FRONT (Front Cover) for
shape.
Are there any damages on the COVER ASSY FRONT?
Replace the
COVER ASSY
FRONT. (Refer to
REP1.10.)
Go to step 2.
2
Checking the COVER ASSY FRONT for latching.
Open and close the COVER ASSY FRONT.
Is the COVER ASSY FRONT latched correctly?
Go to step 3.
Reseat or replace
the COVER ASSY
FRONT. (Refer to
REP1.10.)
3
Checking the interlock switch for operation.
Does the number on the screen increase by one, when the
COVER ASSY FRONT is closed and opened?
Checked by [Digital Input] - [Cover Open Sensor] in [IOT
Diag] of diagnosis.
Replace the KIT
PWBA MCU.
(Refer to
REP8.10.)
Go to step 4.
4
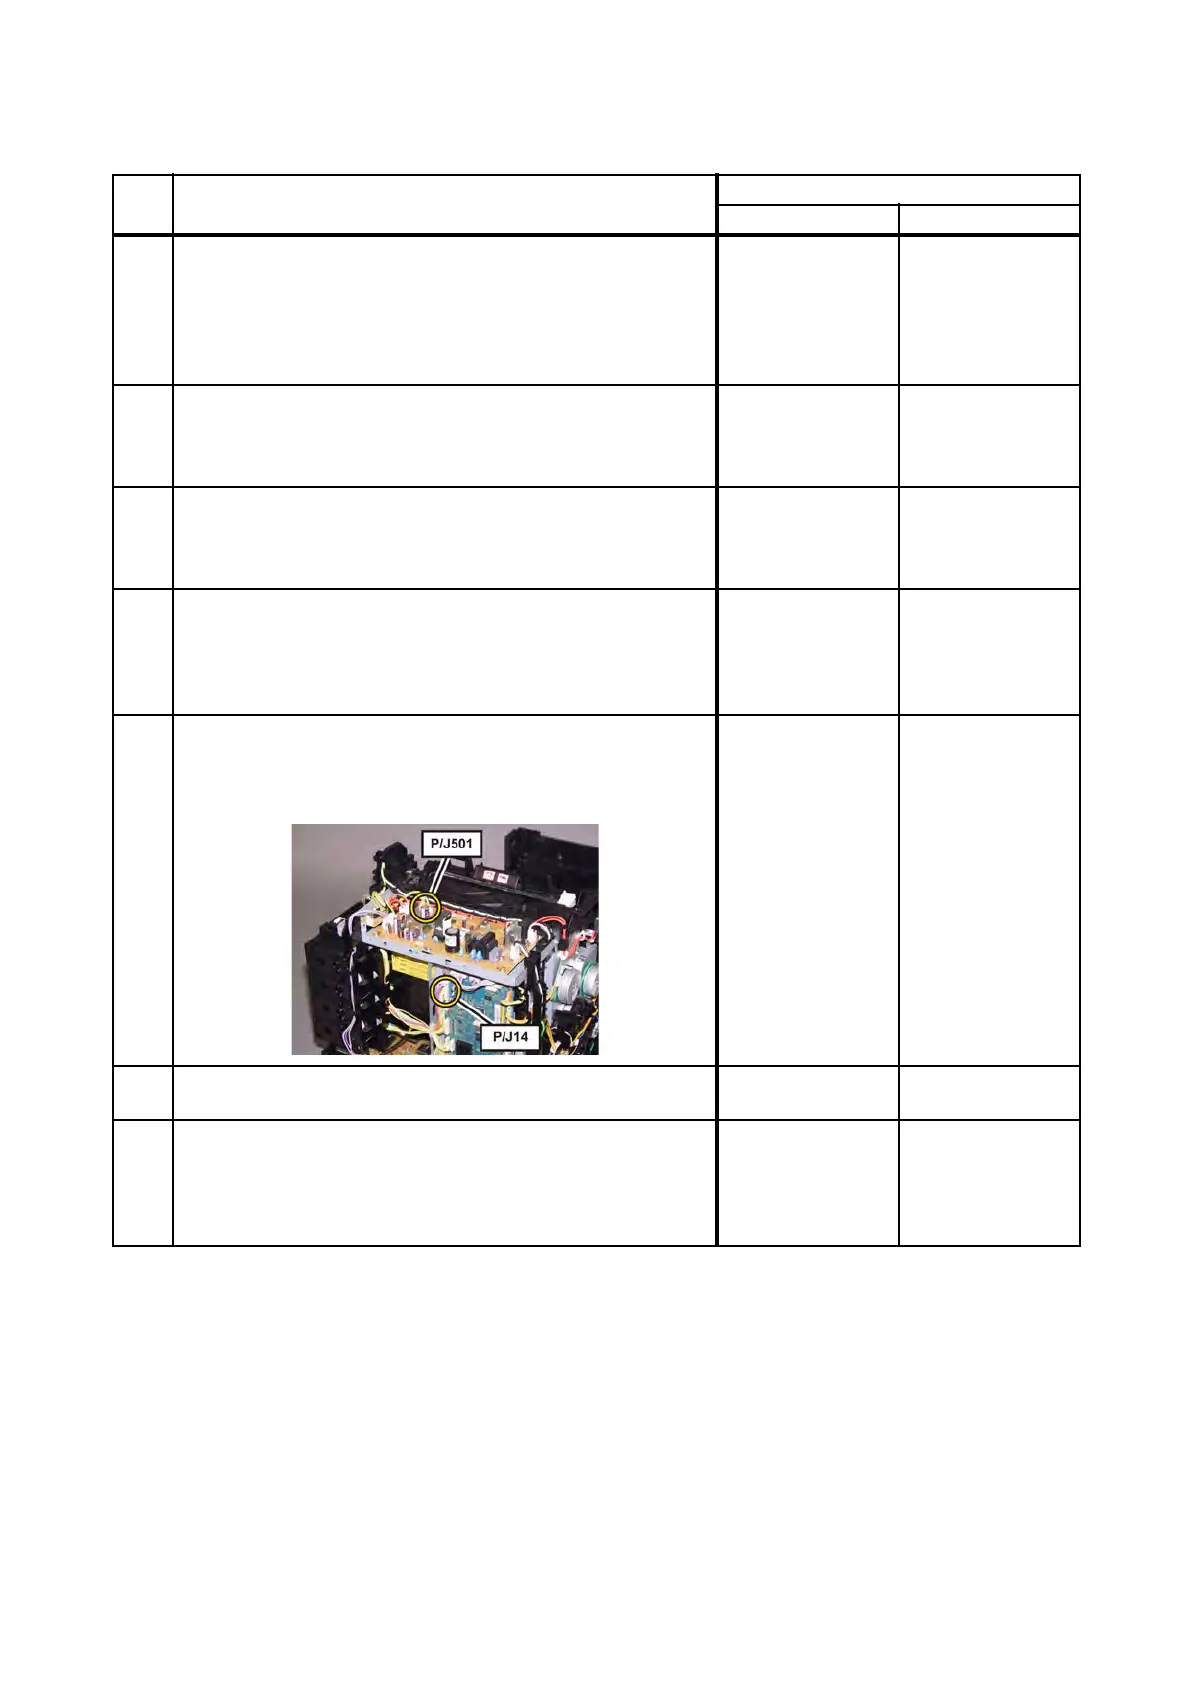
Checking the connectors for connection.
Check the connections between PWBA MCU and PWBA
LVPS.
Are P/J14 and P/J501 connected correctly?
Go to step 6.
Reconnect the
connector(s) P/
J14 and/or P/J501
correctly, then go
to step 5.
5
Does the error still occur when the power is turned OFF and
ON?
Go to step 6. End of work.
6
Checking the HARNESS ASSY LVPS MAIN MG AIO for
continuity.
Disconnect J14 from the PWBA MCU.
Disconnect J501 from the PWBA LVPS.
Is each cable of J14 <=> J501 continuous?
Go to step 7.
Replace the
HARNESS ASSY
LVPS MAIN MG
AIO.
 Loading...


