2 - 131
Chapter 2 Troubleshooting
FIP-1.74 077-104 / 077-105: IOT Exit Off JAM / IOT Exit Off early JAM
Step Check
Remedy
Yes No
Possible causative parts:
FUSING UNIT (PL6.1.1)
PWBA MCU (PL8.3.6)
HARNESS ASSY FUSING UNIT MG AIO (PL6.1.2)
1
Checking the error.
Replace to known good paper.
Does the error still occur when printing?
Go to step 2. End of work.
2
Checking the Exit Sensor for operation.
Does the number on the screen increase by one, when the
actuator of the Exit Sensor in the FUSING UNIT is
operated?
Checked by [Digital Input] - [Exit Sensor] on [IOT Diag] of
diagnosis.
Warning: Start the operation after the FUSING UNIT has
cooled down.
Go to step 7. Go to step 3.
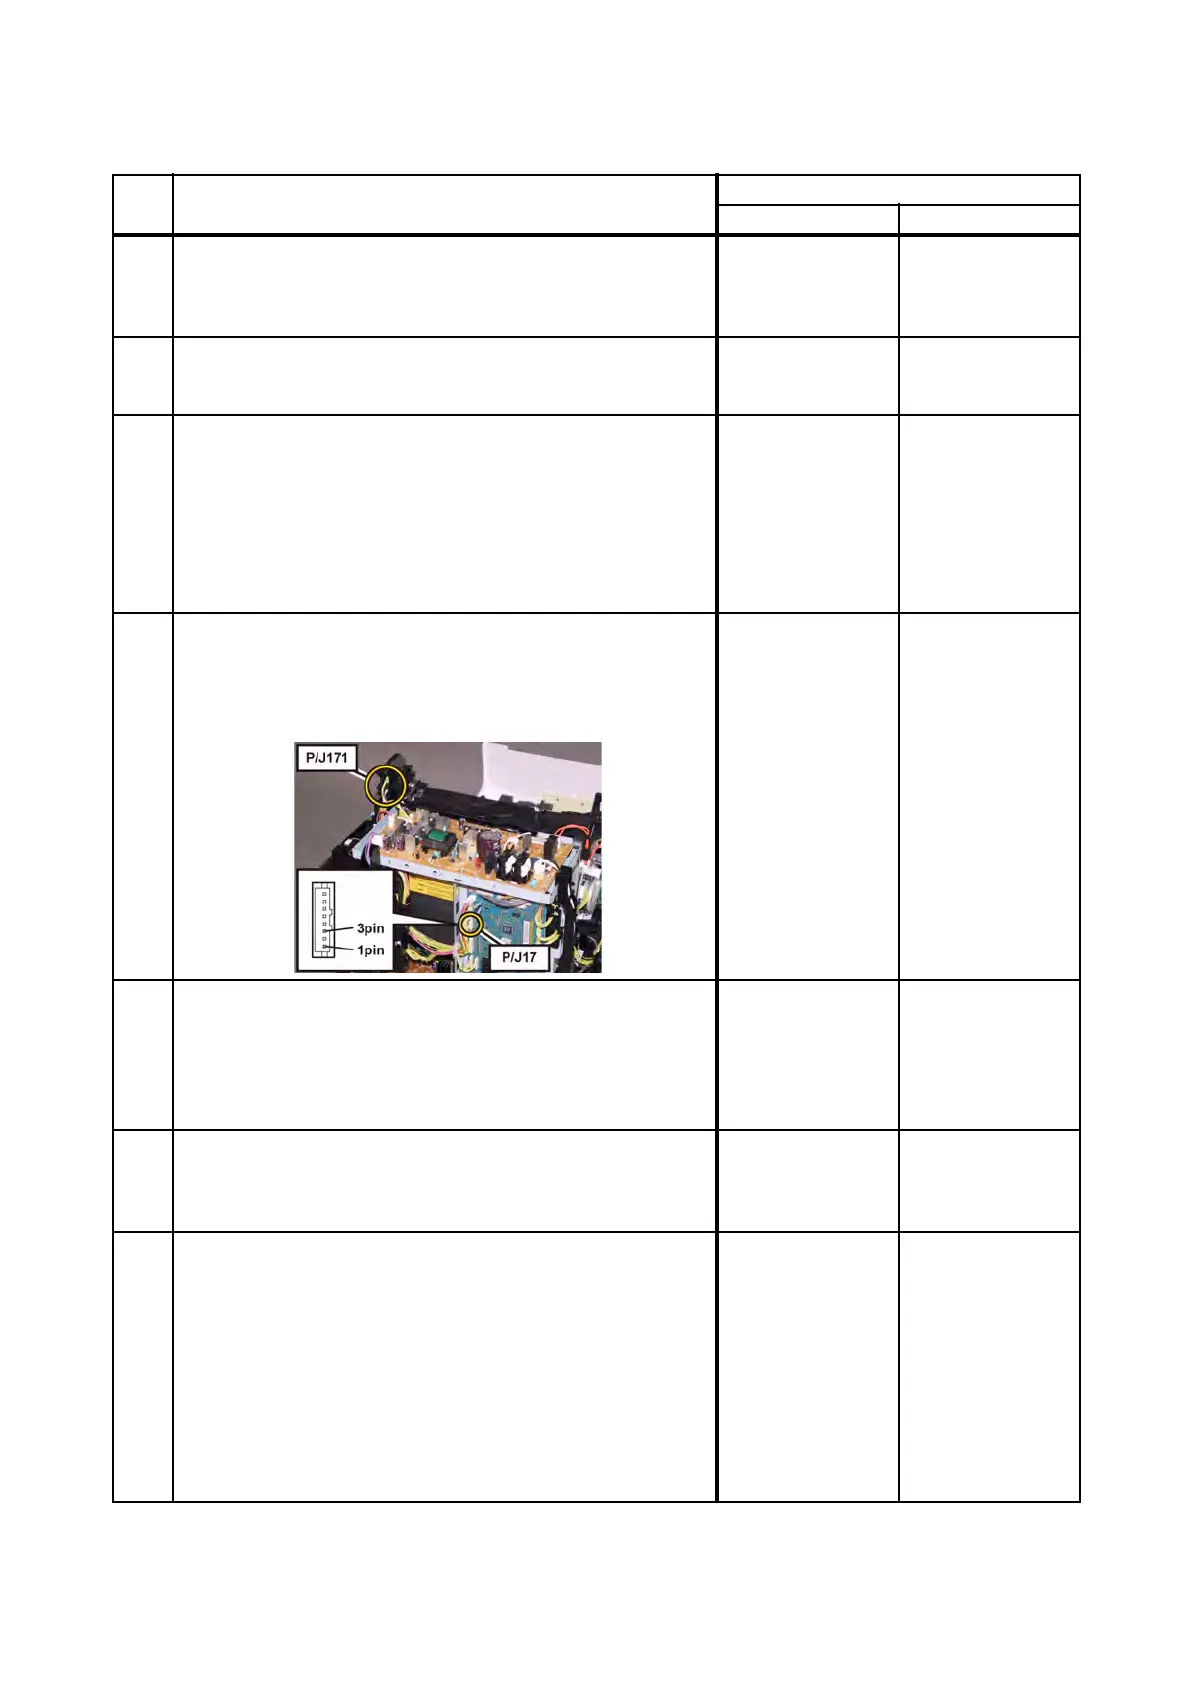
3
Checking the connectors of the Exit Sensor in the FUSING
UNIT for connection.
Check the connections between the PWBA MCU and
FUSING UNIT.
Are P/J17 and P/J171 connected correctly?
Go to step 4.
Reconnect the
connector(s) P/
J17 and/or P/J171
correctly.
4
Checking the HARNESS ASSY FUSING UNIT MG AIO for
continuity.
Remove the FUSING UNIT.
Disconnect J17 from the PWBA MCU.
Is each cable of J17 <=> P171 continuous?
NOTE: P171 is attached to the frame.
Go to step 5.
Replace the
HARNESS ASSY
FUSING UNIT MG
AIO.
5
Checking the power to the Exit Sensor in the FUSING UNIT.
Disconnect the connector of J17 on the PWBA MCU.
Is the voltage across J17-1pin <=> ground on the PWBA
MCU, about +3.3 VDC?
Go to step 6.
Replace the KIT
PWBA MCU.
(Refer to
REP8.10.)
6
Checking the Exit Sensor for operation.
Check the voltage across J17-3pin <=> ground on the
PWBA MCU.
Does the voltage change, when the actuator of the Exit
Sensor is operated?
Replace the KIT
PWBA MCU.
(Refer to
REP8.10.)
Warning: Start the
operation after the
FUSING UNIT has
cooled down.
Replace the
FUSING UNIT.
(Refer to REP6.1.)
After replacement,
be sure to clear
the life counter
value.
 Loading...


