3 - 21
Chapter 3 Image Quality Troubleshooting
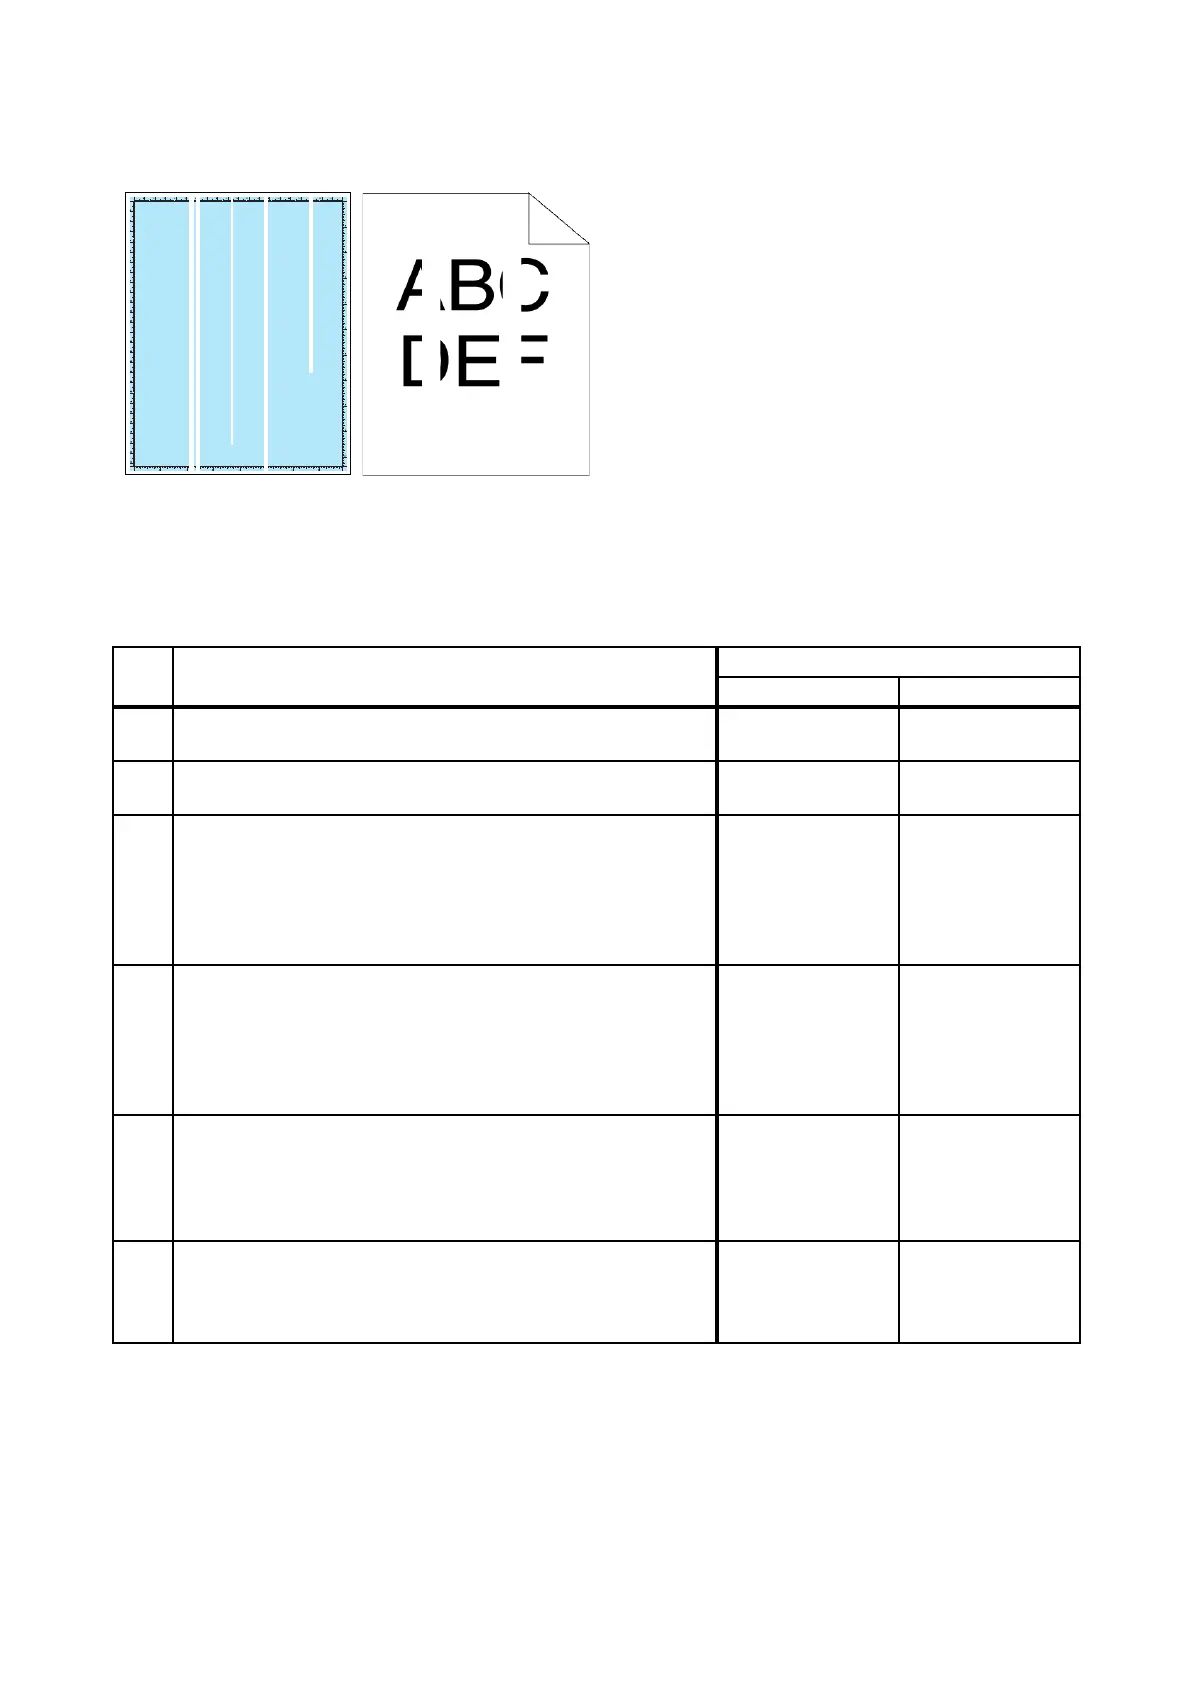
FIP-1.P8 Vertical blanks
ESS and possible causative parts
- PHD ASSY (PL4.1.21)
- TRANSFER ASSY (PL6.1.7)
- ROS ASSY (PL4.1.1)
- FUSING UNIT (PL6.1.1)
Before commencing troubleshooting, check the paper transfer path. Make sure there is no foreign
materials on the transfer path, such as staples, paper clips, scraps of paper and so on.
Step Check
Remedy
Yes No
1
Checking the error mode.
Does the error occur only during copying?
Go to step 2. Go to step 3.
2
Checking the original.
Is the original color clean?
Go to step 4.
END, change the
original.
3
Checking the Print.
Checked by [Test-Print] - [Contamination check] in
diagnosis.
Is the image printed correctly?
Printing data is
incorrect,then
check the printing
data which the
problem
generated.
Go to step 4.
4
Checking the paper.
Is the installed paper with a new and dry one?
or does the paper satisfy the specification?
Go to step 5.
Replace the paper
with a new and dry
one. or Change
the paper to the
one that satisfies
the specification.
5
Checking for foreign objects in the paper transfer path.
Remove any foreign objects in the paper transfer path
between the KIT TRANSFER ASSY and the FUSING UNIT.
Does the printout have vertical blank lines (white stripes in
the paper feed direction)?
Go to step 6. End of work.
6
Checking the belt surfaces of the TRANSFER ASSY.
Are there any damages on the belt surface of the
TRANSFER ASSY?
Replace the KIT
TRANSFER
ASSY. (Refer to
REP6.3.)
Go to step 7.
 Loading...


