4 - 36
Chapter 4 Disassembly / Assembly and Adjustments
REP1.10 COVER ASSY FRONT (PL1.2.1)
[Removal]
1) Remove the CASSETTE ASSY 250 MG AIO. (REP2.1)
2) Open the COVER ASSY FRONT (PL1.2.1).
Cover the drum of the PHD ASSY to avoid exposure to light.
3) Remove the PHD ASSY. (REP4.6)
The FUSING UNIT part is very hot. Take added care not to get burned when
performing the service operation.
4) Remove the FUSING UNIT. (REP6.1)
5) Remove the COVER ASSY SIDE R AIO. (REP1.8)
6) Remove the COVER ASSY SIDE L AIO. (REP1.9)
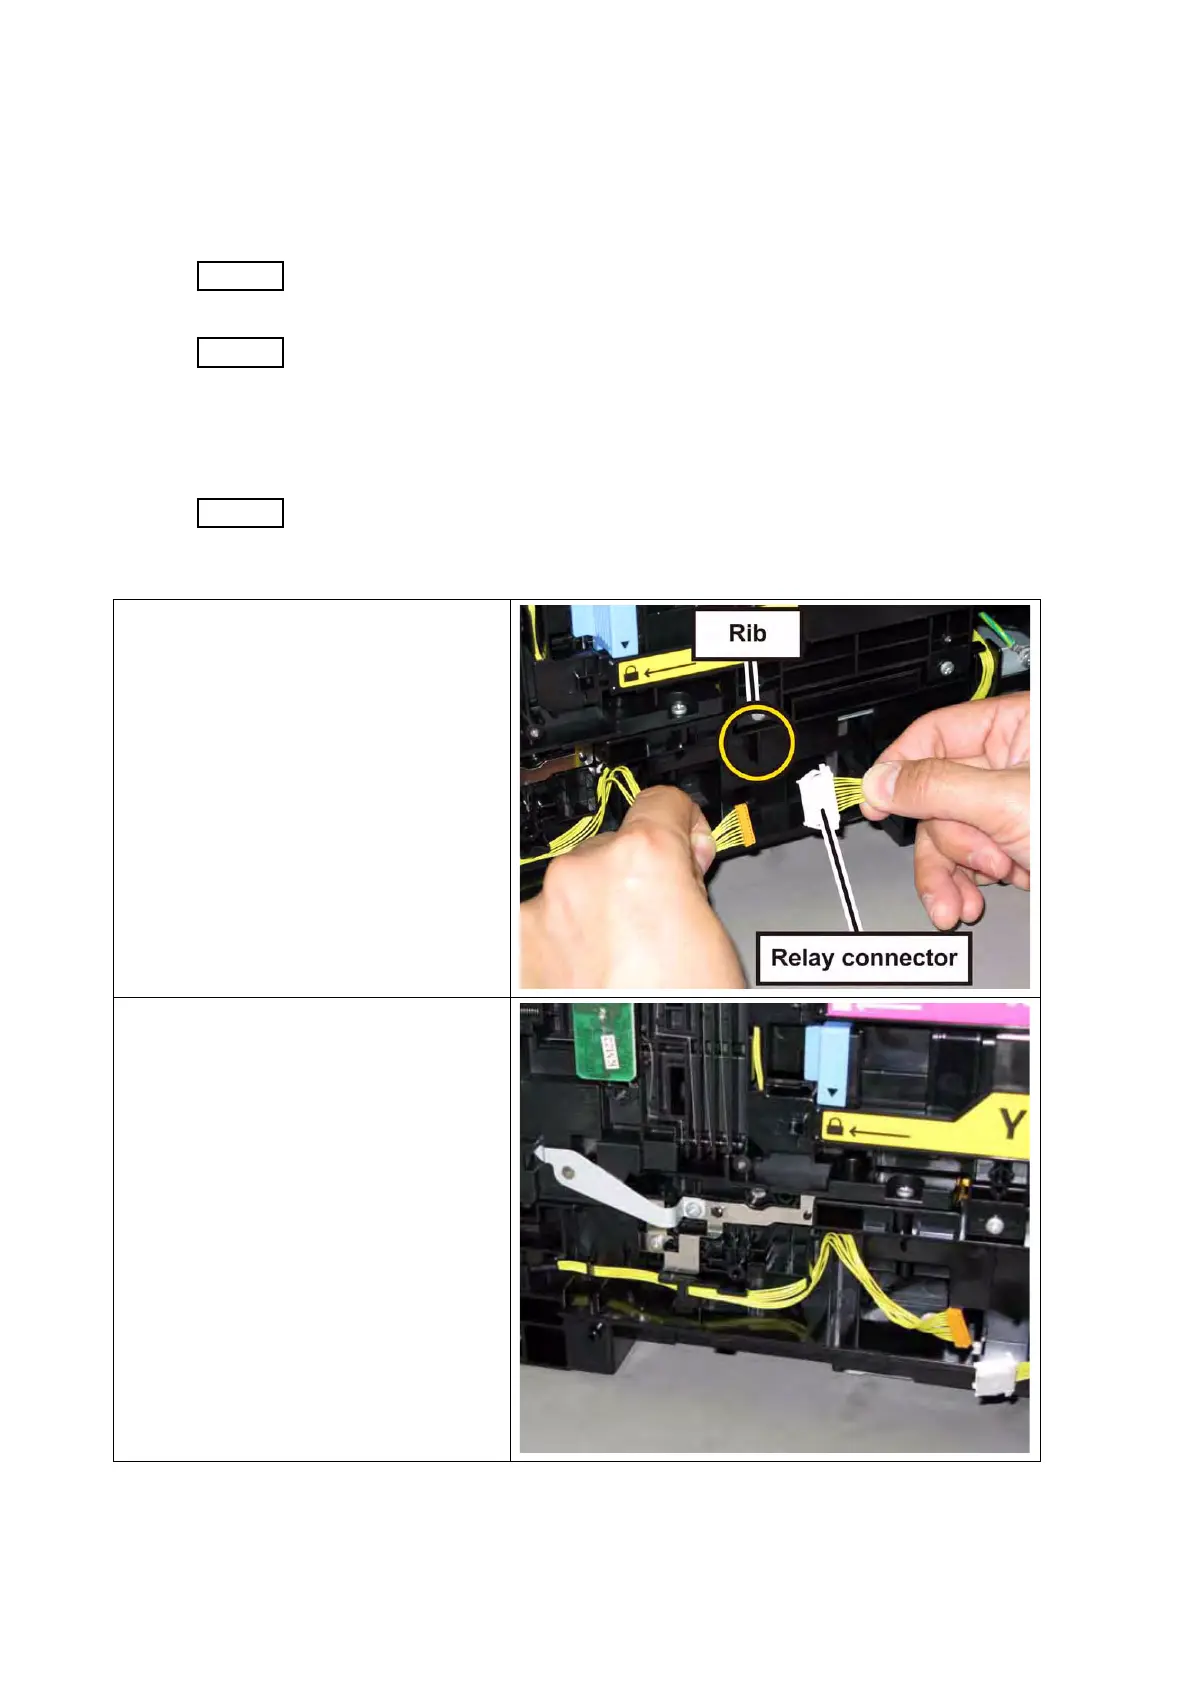
When carrying out the work described next procedure, leave the relay connector
on the printer harness side.
7) Release the relay connector from the
rib of the printer, disengage the con-
necter (P/J271) of the HARNESS
ASSY DUP STD MG AIO
(PL11.1.14).
8) Release the HARNESS ASSY DUP
STD MG AIO from the hooks of the
printer.

 Loading...


