2 - 141
Chapter 2 Troubleshooting
FIP-1.80 077-901: IOT Remain Registration JAM
Step Check
Remedy
Yes No
Possible causative parts:
HARNESS ASSY L SIDE MG AIO (PL3.1.18)
ACTUATOR REGI IN (PL3.2.11)
SENSOR PHOTO (PL3.2.13)
PWBA MCU (PL8.3.6)
1
Checking the error.
Replace to known good paper.
Does the error still occur when printing?
Go to step 2. End of work.
2
Checking the Regi Rolls installation.
Open the Front Cover and check the Regi Rolls installation.
Is the ROLL REGI METAL pressed against the ROLL ASSY
REGI by the spring pressure?
Go to step 3.
Replace the
printer.
3
Checking the Regi Clutch.
Does the clutch noise occur?
Checked by [Digital Output] - [Regi Clutch] in [IOT Diag] of
diagnosis.
Go to step 4.
Replace the
printer.
4
Checking the Regi Sensor for operation.
Does the number on the screen increase by one, when the
actuator (ACTUATOR REGI IN) is operated?
Checked by [Digital Input] - [Regi Sensor] on [IOT Diag] of
diagnosis.
Replace the KIT
PWBA MCU.
(Refer to
REP8.10.)
Go to step 5.
5
Checking the ACTUATOR REGI IN for shape and operation.
Remove the CHUTE LOW CST (PL3.2.35) once to check
the shape and operation.
Are the shape and operation of the ACTUATOR REGI IN
normal?
Go to step 6.
Reseat the
ACTUATOR REGI
IN. (Refer to
REP3.5.)
If broken or
deformed, replace
it.
6
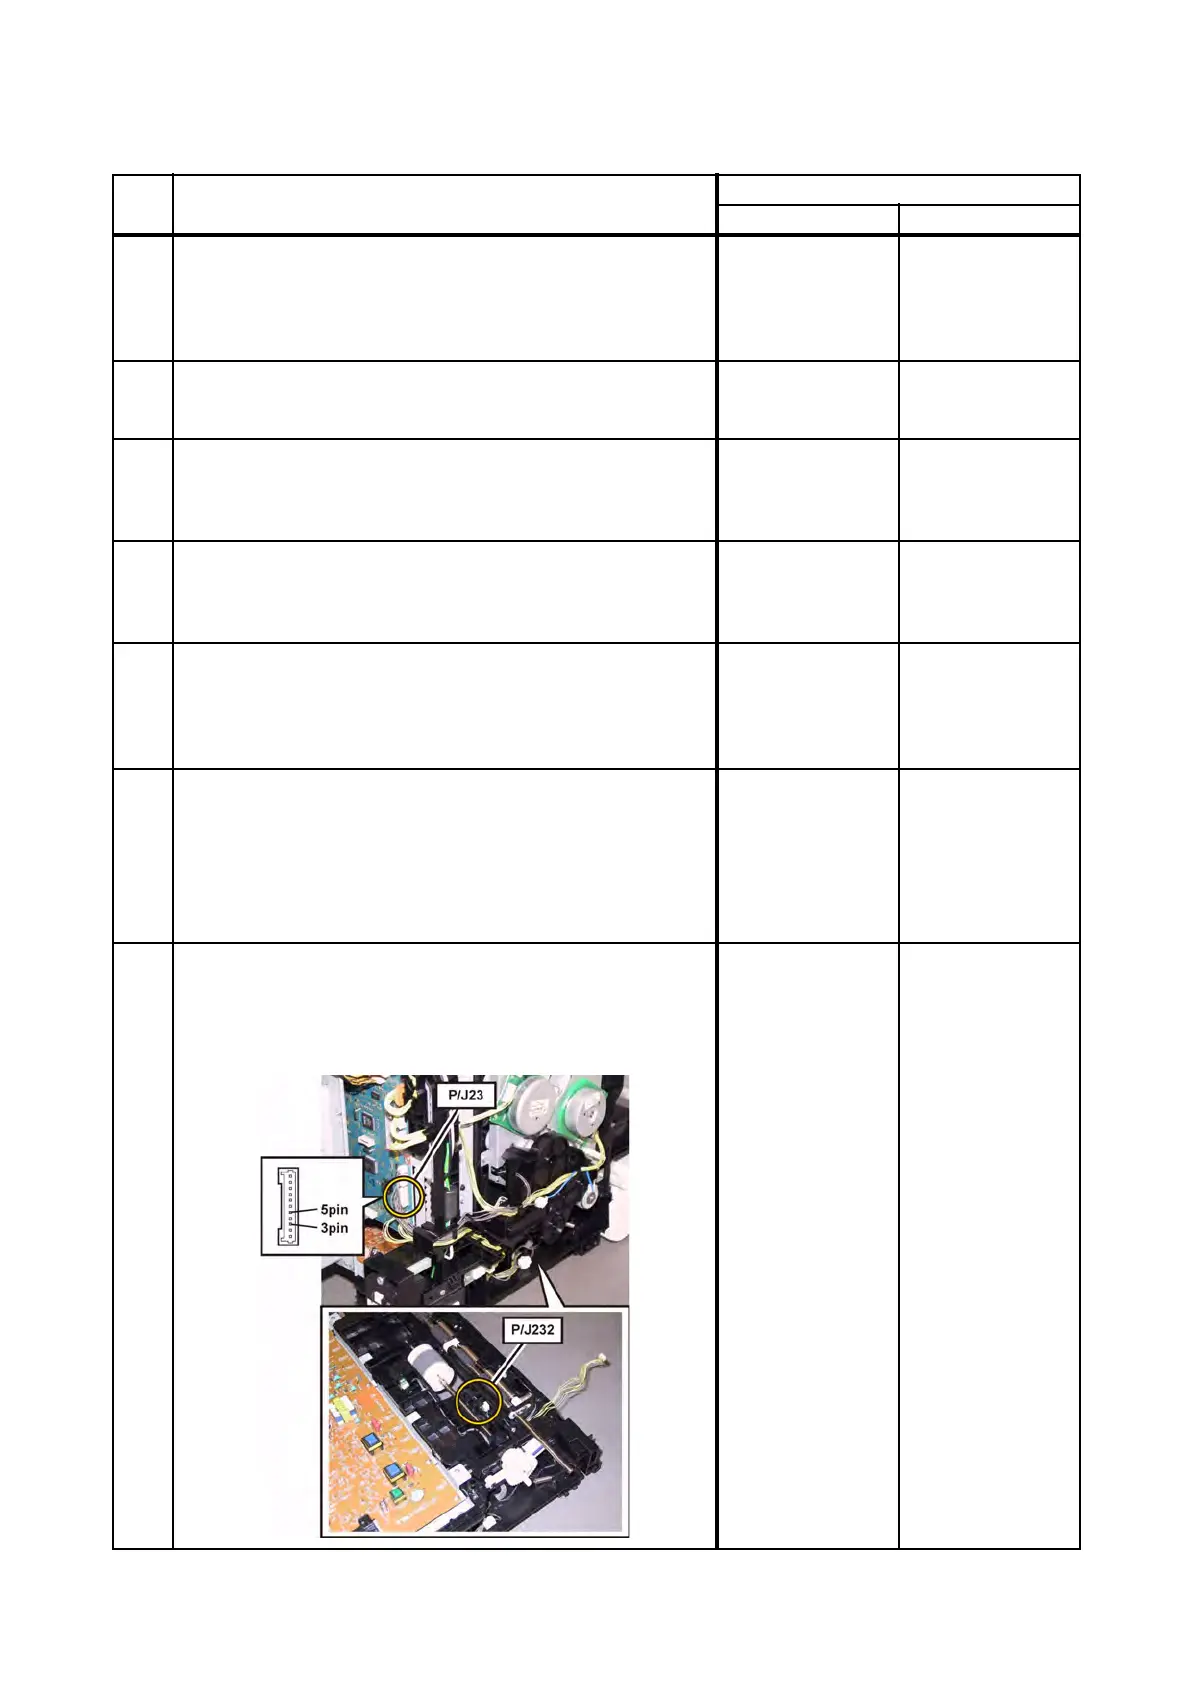
Checking the connectors of the SENSOR PHOTO (REGI
SENSOR) for connection.
Check the connections between the PWBA MCU and
SENSOR PHOTO.
Are P/J23 and P/J232 connected correctly?
Go to step 7.
Reconnect the
connector(s) P/
J23 and/or P/J232
correctly.
 Loading...


