3 - 25
Chapter 3 Image Quality Troubleshooting
7
Checking the erase lamps.
Open the COVER ASSY FRONT, and remove the PHD
ASSY.
Cheat the safety interlock switch.
Does the four erase LEDs light correctly?
Go to step 10. Go to step 8.
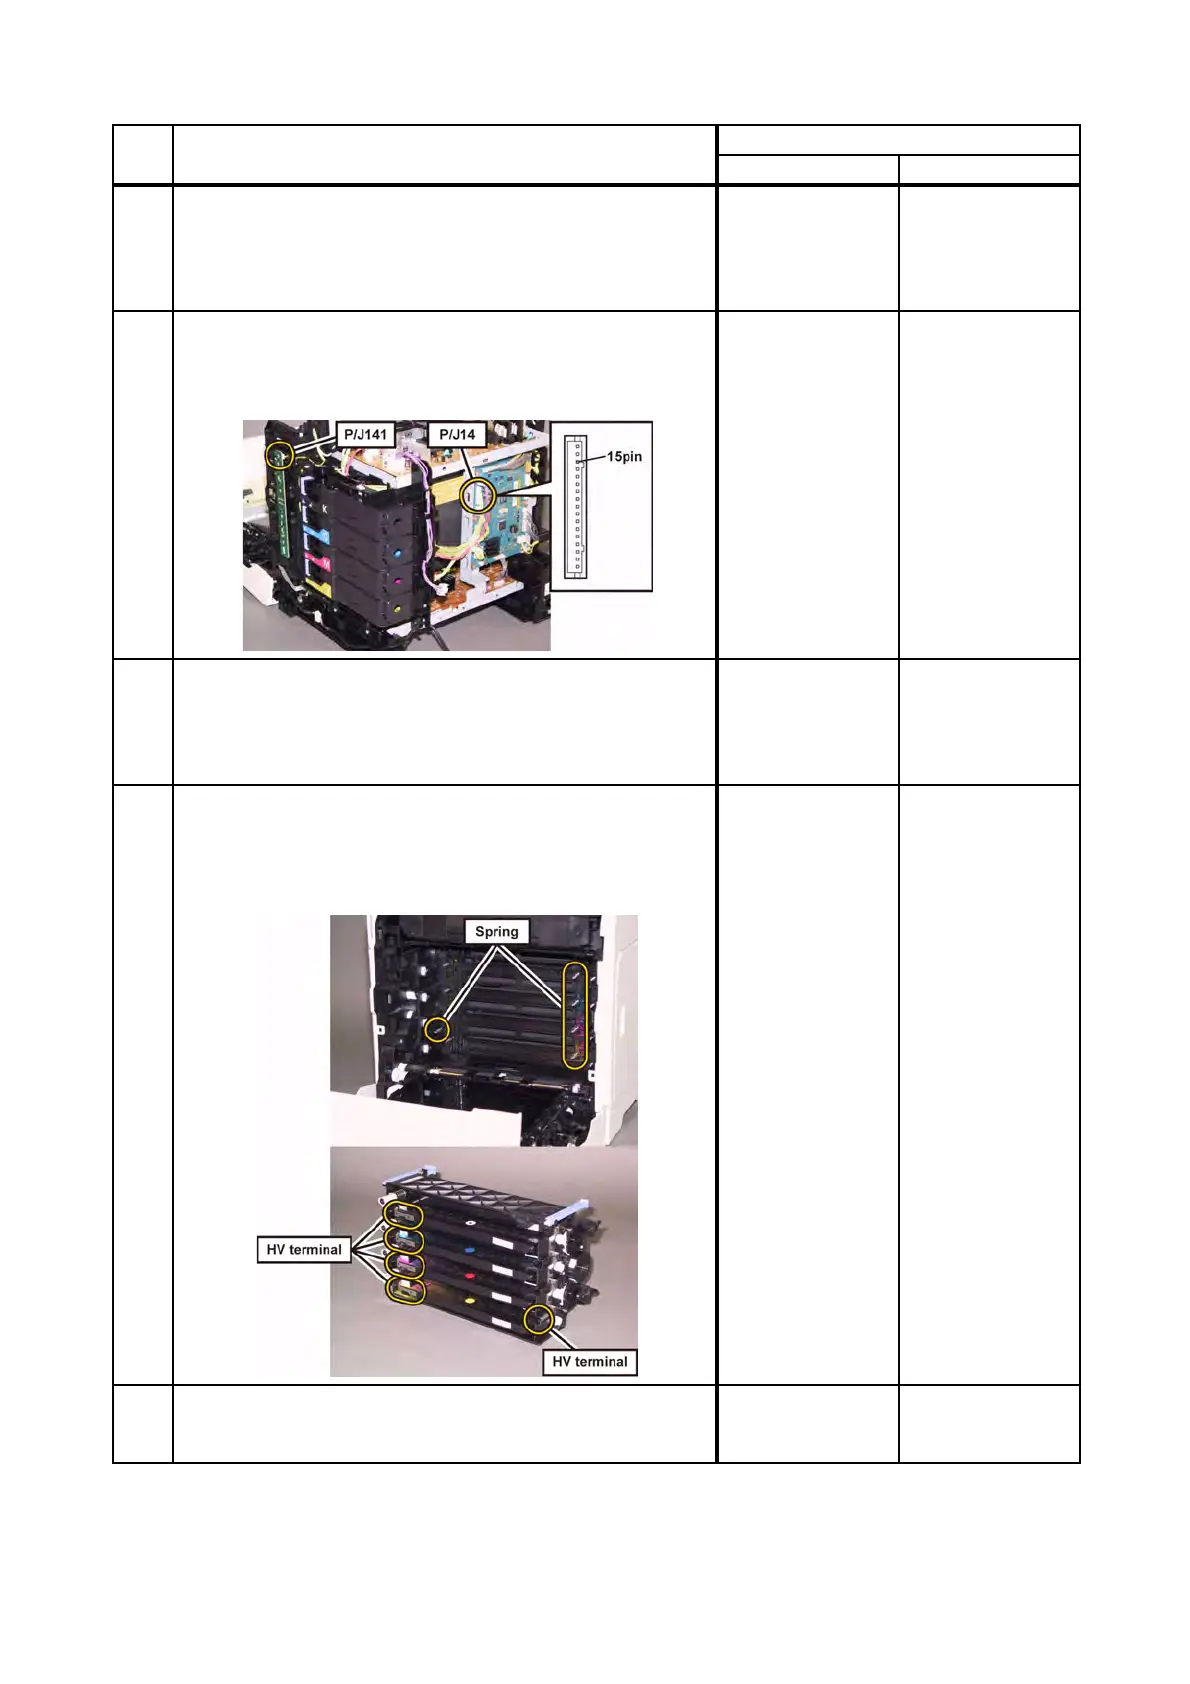
8
Checking the connectors for connection.
Check the connections between the PWBA MCU and LED
ASSY ERASE.
Are P/J141 and P/J14 connected correctly?
Go to step 9.
Reconnect the
connector(s) P/
J141 and/or P/J14
surely, then go to
step 9.
9
Checking the HARN ASSY LVPS for continuity.
Disconnect J14 from the PWBA MCU.
Disconnect J141 from the LED ASSY ERASE.
Is each cable of J14 <=> J141 continuous?
Replace the LED
ASSY ERASE
(Refer to
REP4.4.),then go
to step 10.
Replace the
HARNESS ASSY
LVPS MAIN MG
AIO.
10
Checking the PHD ASSY for connection Remove the PHD
ASSY.
Are five HV terminals on the PHD ASSY, and five springs on
the frame (PL4.1.10 and PL4.1.15 to 18) dirty and/or
deformed?
Clean and/or
replace the PHD
ASSY or
SPRING(s).
Go to step 11.
11
Checking after resetting the PHD ASSY.
Reseat the PHD ASSY.
Is the image printed correctly?
End of work. Go to step 12.
Step Check
Remedy
Yes No
 Loading...


