4 - 233
Chapter 4 Disassembly / Assembly and Adjustments
[Replacement]
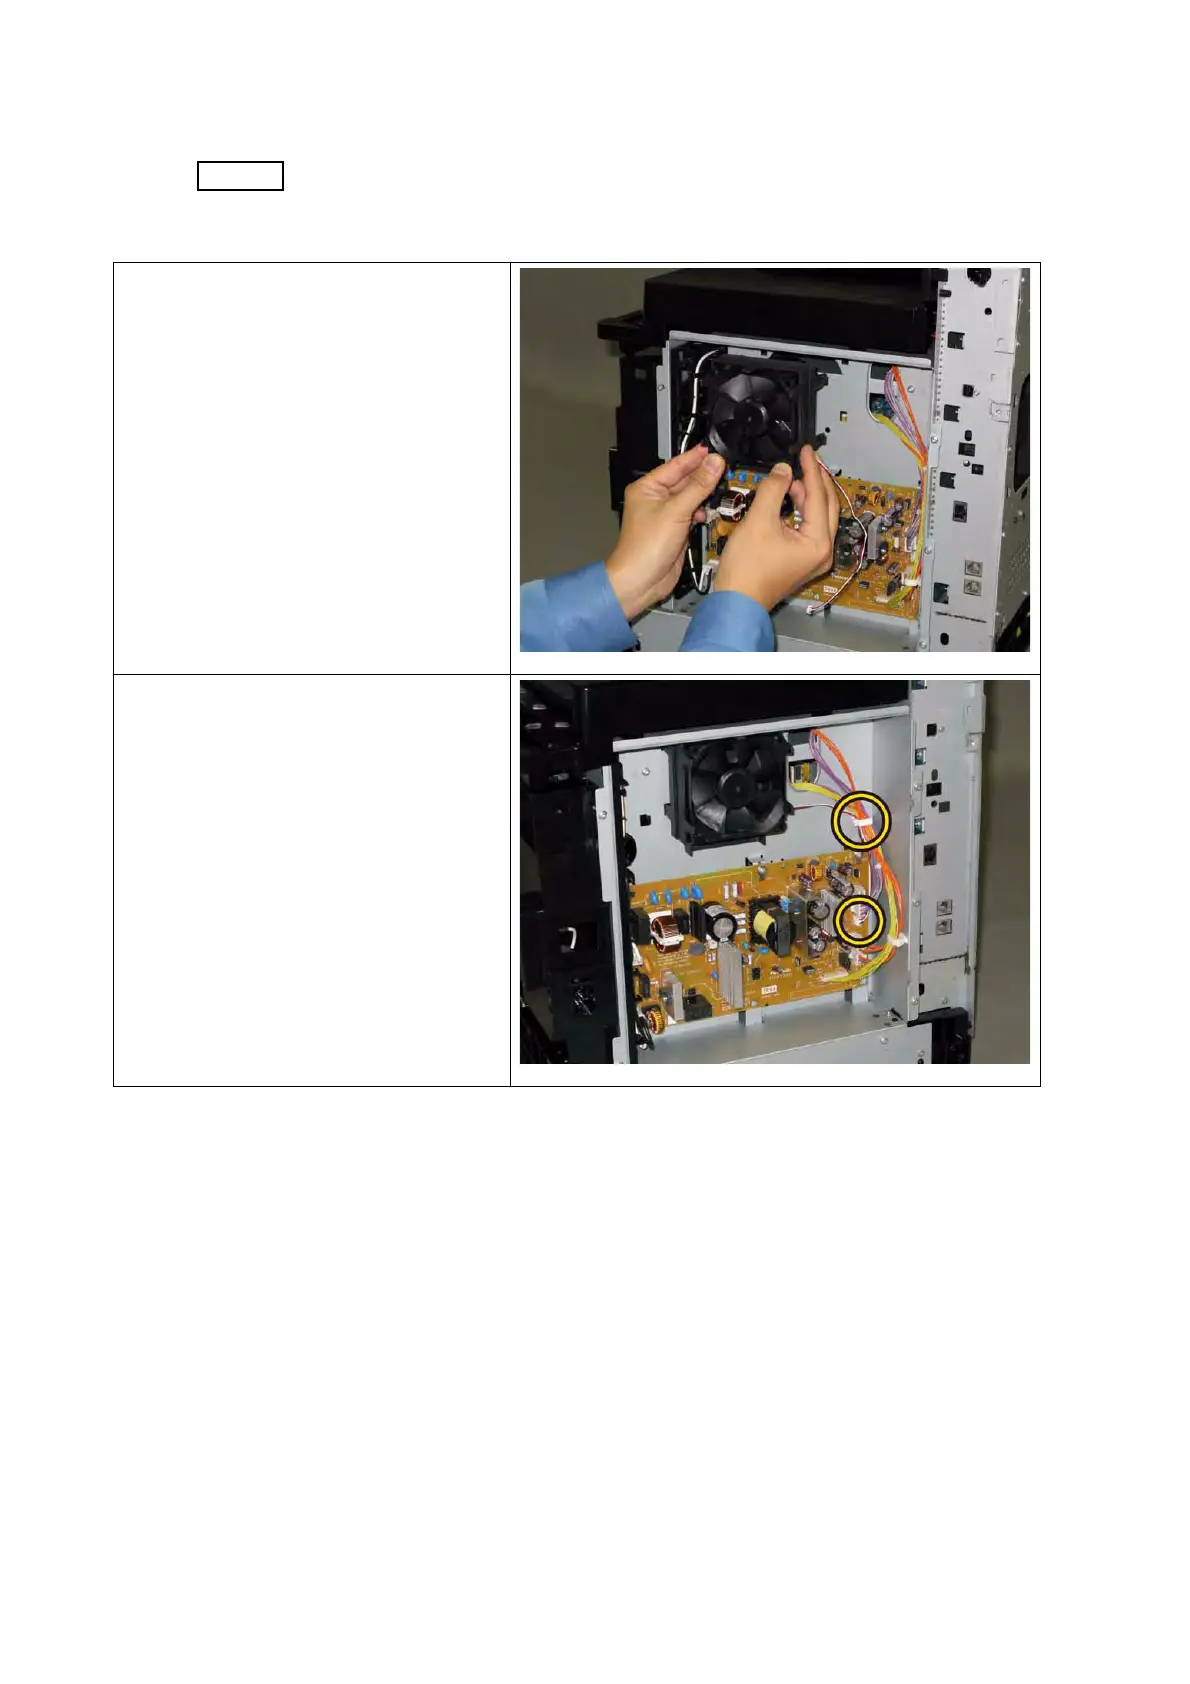
When carrying out the work described next procedure, take care to check the
orientation of the FAN. (Attach the FAN so that its labeled surface faces front.)
1) Secure the DUCT FAN ASSY AIO to
the printer with the four hooks.
2) Engage the connector (P/J503) of the
DUCT FAN ASSY AIO to the PWBA
LVPS, secure the harness using the
clamp.
 Loading...


