8-18
Configuring Demand Routing for Primary ISDN Modules
Using Demand Routing for ISDN Connections
To configure demand routing for a primary ISDN module, you must complete
the following steps:
1. Create an extended access control list (ACL) to define the traffic that will
trigger the dial-up connection.
2. Configure a demand interface.
3. Configure the BRI interface.
4. Configure an ISDN group.
5. Create a static route to the far-end network.
Define the Traffic That Triggers the Connection
When configuring demand routing, you must define the interesting traffic—
the traffic that triggers, or activates, the WAN connection. For example, if
you are configuring demand routing for an ISDN connection between the
main office and a branch office, the interesting traffic would be the packets
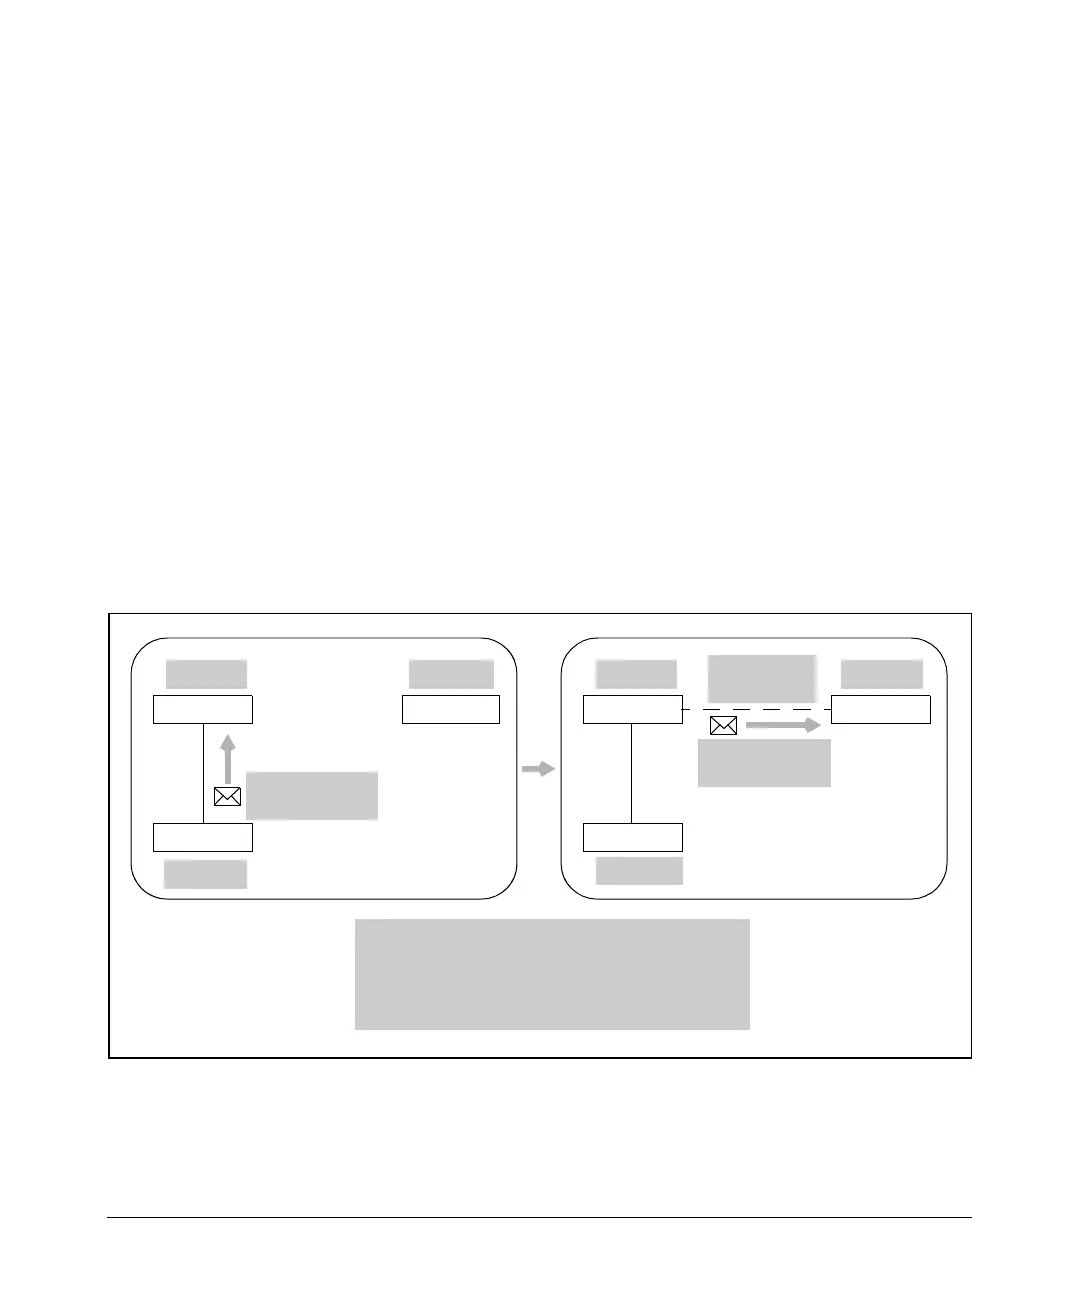
destined for the branch office. (See Figure 8-6.)
Figure 8-6. Connection Triggered When Interesting Traffic Is Received on a
Router Interface
To: 10.4.4.23
From: 10.2.2.5
Main Router
Office Router
Switch
10.1.1.0 10.4.4.0
10.2.2.0
Main Router Office Router
Switch
To: 10.4.4.23
From: 10.2.2.5
Connection
triggered
10.1.1.0 10.4.4.0
ACL configured on Main Router:
ip access-list extended OfficeConnection
permit ip 10.1.1.0 0.0.0.255 10.4.4.0 0.0.0.255
permit ip 10.2.2.0 0.0.0.255 10.4.4.0 0.0.0.255
10.2.2.0
 Loading...