Creating User Programmable DME Patterns 199
•
In the <Transition Mode> group of the Key Frame
>DME User PGM menu, select [Frame I/O].
Notes on picture-in-picture (two-channel mode)
Create a minimum of three keyframes.
•
Create the first keyframe for each channel as follows.
-
Channel 1: create the image full-size.
-
Channel 2: since the priority is low, it will not be
visible on the screen, so no particular restrictions
apply.
In the Global Effect >Ch1 to Ch4 >Combiner menu,
when setting the priority of channel 1 and channel 2, set
the channel 1 priority higher.
•
In the intermediate part of the transition, create the two
images so that both are visible within the screen. In the
Global Effect >Ch1 to Ch4 >Combiner menu, when
setting the priority of channel 1 and channel 2, set the
channel 2 priority higher.
It is recommended to make the priority settings at a
keyframe point at which the two images are not
overlapping.
•
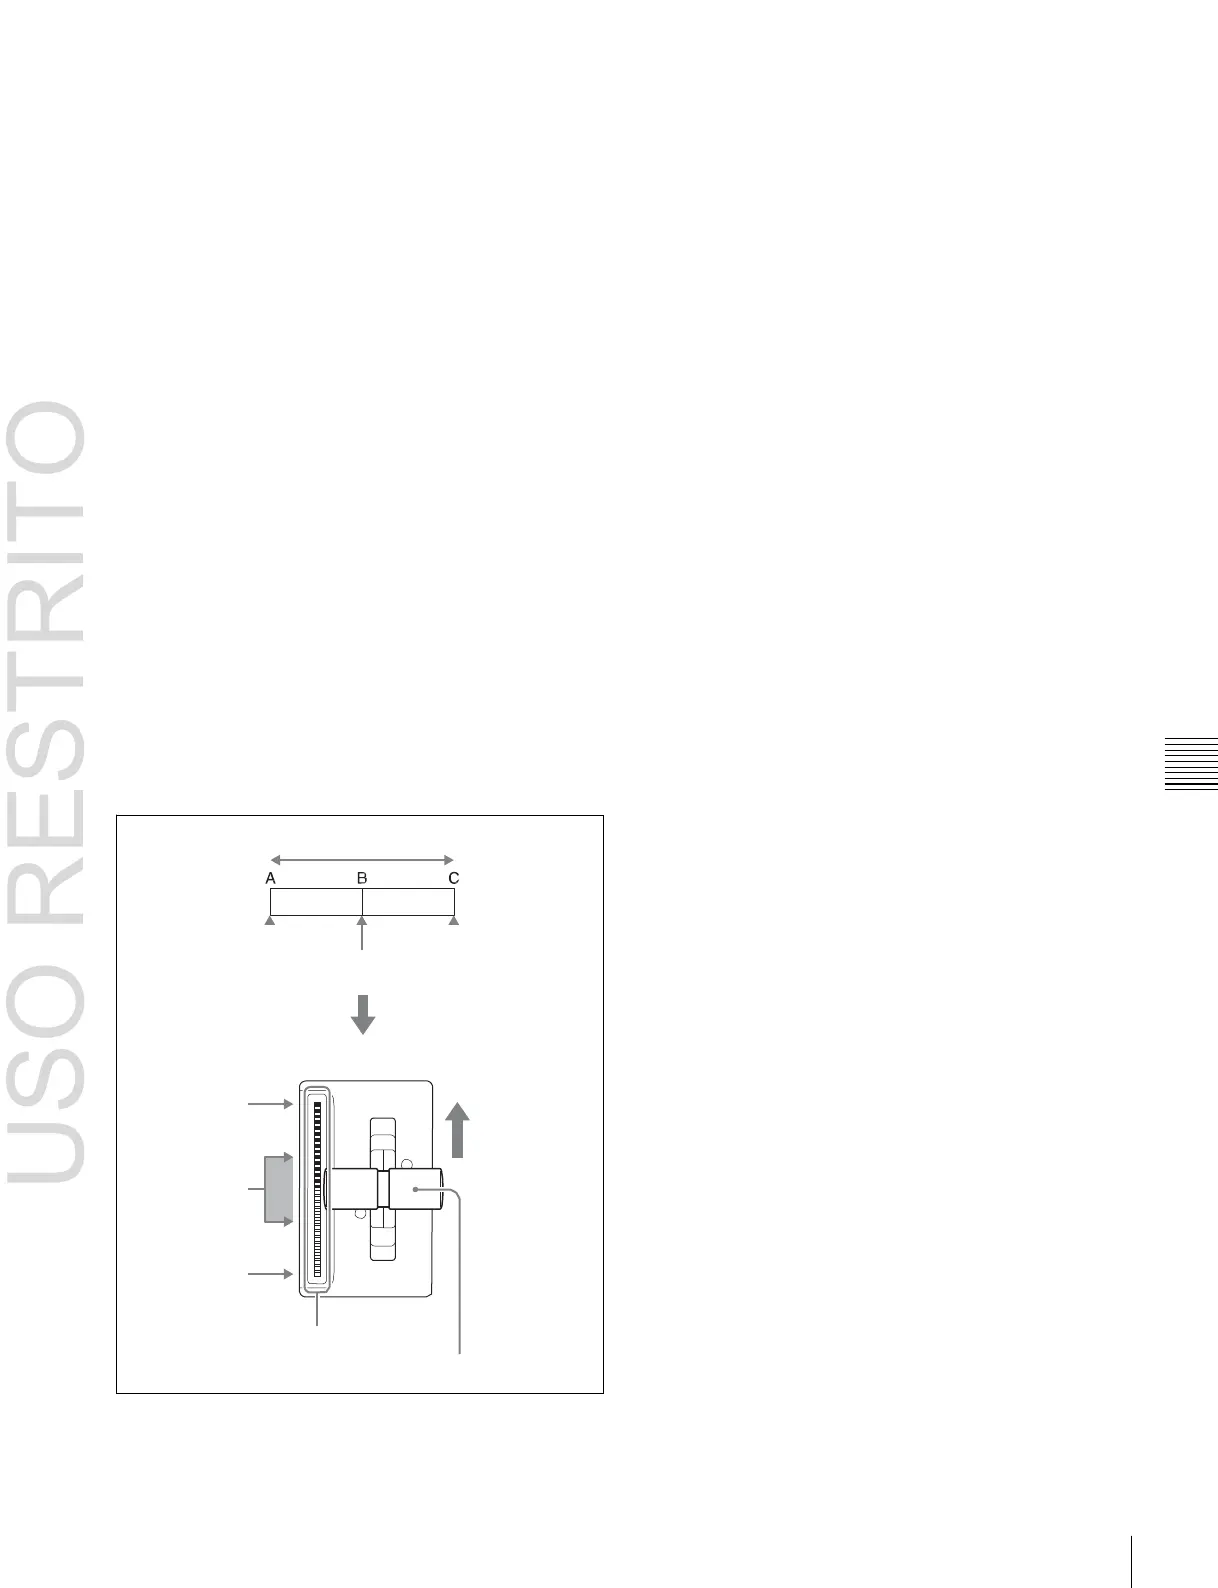
During the course of a transition, there is a “dead zone”
corresponding to the intermediate point of the whole
effect (see following figure), during which the image
does not change. Therefore, it is necessary to create the
effect so that the image in the intermediate part of the
transition is the keyframe for the mid-point of the whole
effect. The range of this “dead zone” corresponds to the
central one-third of the range of the transition indicator.
This also applies to an auto transition.
-
Channel 1: since the priority is low, it will not be
visible on the screen, so no particular restrictions
apply.
-
Channel 2: create the image full-size.
•
In the <Transition Mode> group of the Key Frame
>DME User PGM menu, select [P In P].
Keyframe effect
First keyframe Last keyframe
Mid-point of effect
Change in image through transition
Image at point C
appears
Image at point B
appears
(dead zone)
Image at point A
appears
Transition indicator
Fader lever
•
Create the last keyframe for each channel as follows.

 Loading...


