Overall Control Panel Settings (Config Menu) 575
Chapter
19
Control
Panel
Setup
(Panel)
To assign a key to the main base
To assign a key to the independent key transition control
block (simple type), use the following procedure. Here the
example shown is the case in which keys 3 and 4 (“Key3,
4”) are assigned to the second row switcher bank of the
main base.
1
In the Panel >Config menu, press [Compact Key
Module Assign].
The Compact Key Module Assign menu appears.
The left side of the status area shows data for the main
base (physical layout and switcher bank names and
key assignment).
2
Press directly on the display on the left, to select the
control block for the assignment.
Here, press on the intersection of the “2nd Row”
column and “Module” row.
3
Select the key from the table on the right.
4
Press [Set].
To return the key assignment to the default
In the Compact Key Module Assign menu, press [Default].
This returns all key assignments for the main base to their
factory default state.
To assign a key to an extension
Press [Extension Port], to display the Extension Port
menu, then continue as for the main base.
To return the extension assignments to their original
values, press [Default].
Assigning Functions to Key Control
Block Buttons
Select one of the four key control blocks installed in the
main base and extension, then assign functions to the 30
buttons.
1
In the Panel >Config menu, press [Link/Program
Button].
The Link/Program Button menu appears.
2
Press [Key Control Module].
The Key Control Module menu appears.
3
Press one of [1st], [2nd], [3rd], and [4th], to select the
key control block.
4
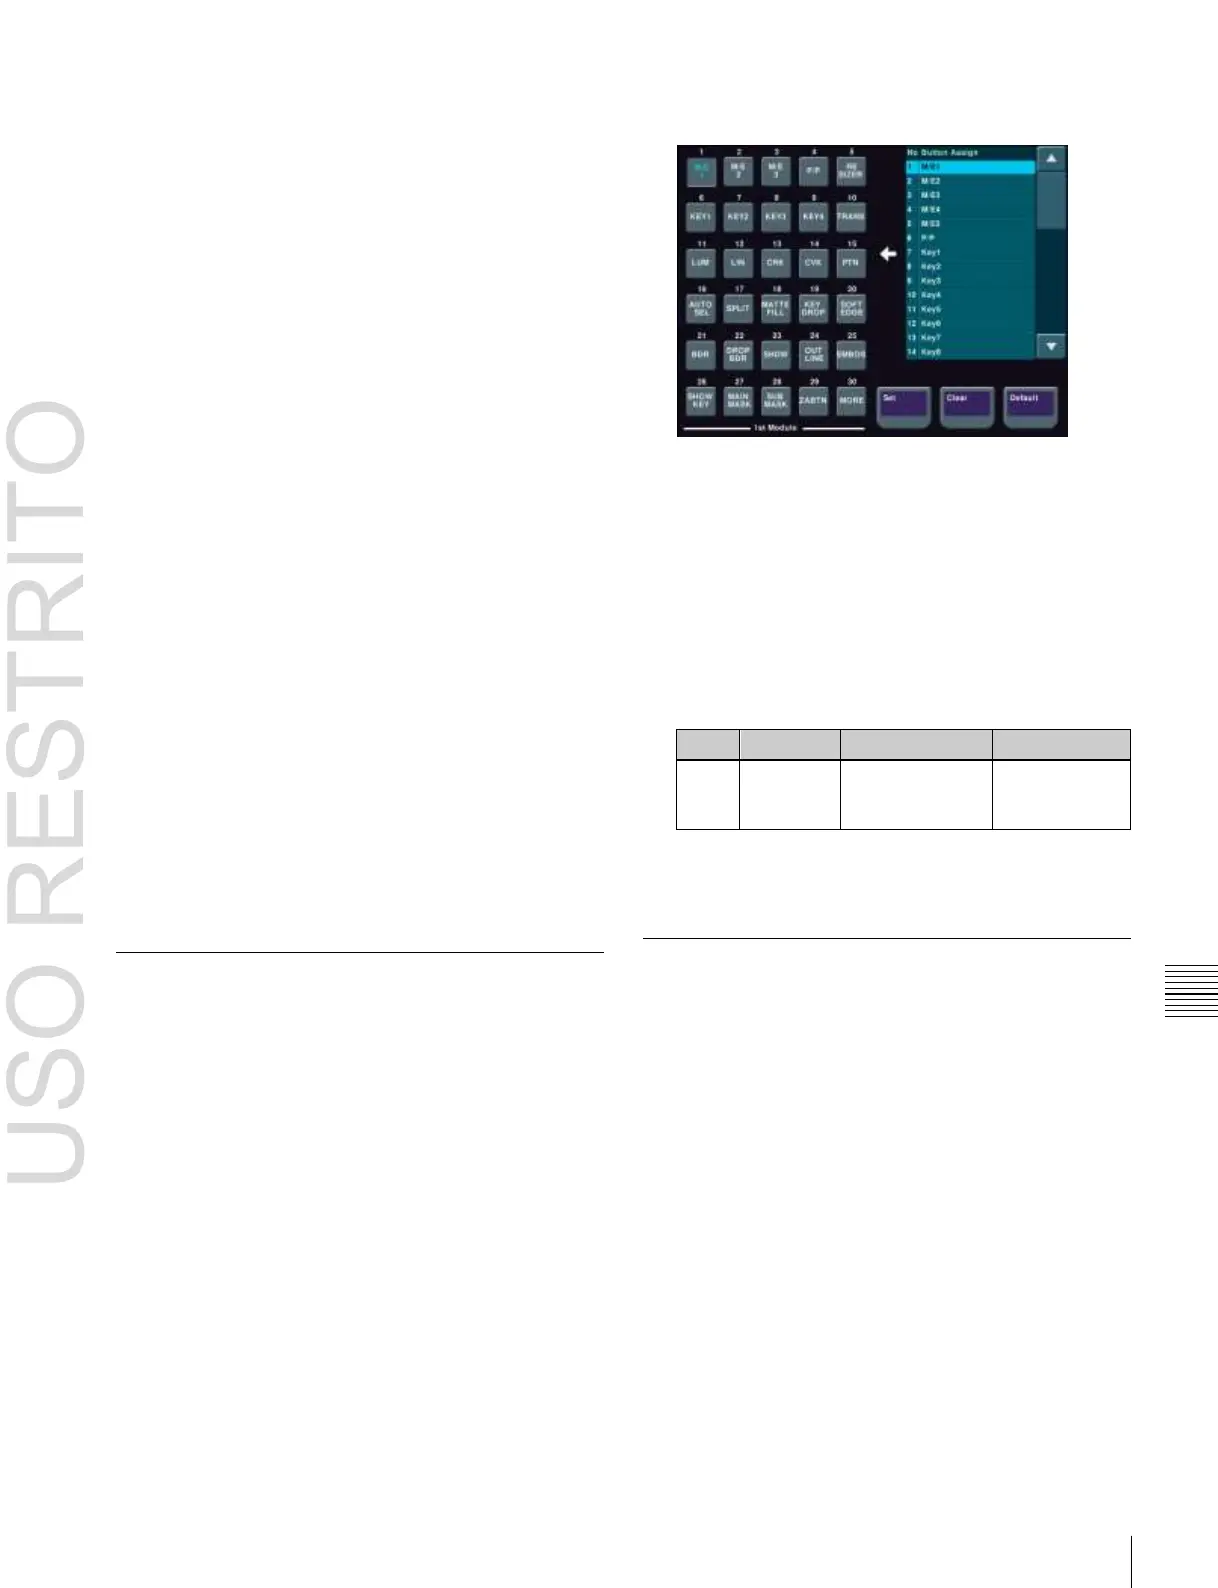
Press [Button Assign].
The assignment status of the control block you
selected in step 3 above appears.
5
Press the button to which you want to assign a
function, displaying it in reverse video.
6
Using any of the following methods, select the
function you want to assign from the Button Assign
list.
•
Press directly on the list.
•
Press the arrow keys to scroll the reverse video
cursor.
•
Turn the knob.
Select function to
be assigned to
button
7
When you have completed the required assignments,
press [Set].
Assigning Preview Output to
Preview Selection Buttons
It is possible to assign any preview output to a preview
selection button.
This applies to the preview selection buttons in the fade-to-
black control block and the downstream key/fade-to-black
control block.
1
In the Panel >Config menu, press [Link/Program
Button].
The Link/Program Button menu appears.
2
Press [Fade To Black Module].
The Fade To Black Module menu appears.
On the left of the status area, preview selection buttons
(1 to 11) appear. On the right side a list of signals to be
assigned appears.

 Loading...


