Names and Functions of Parts of the Control Panel 57
Chapter
2
Menus
and
Control
Panel
3
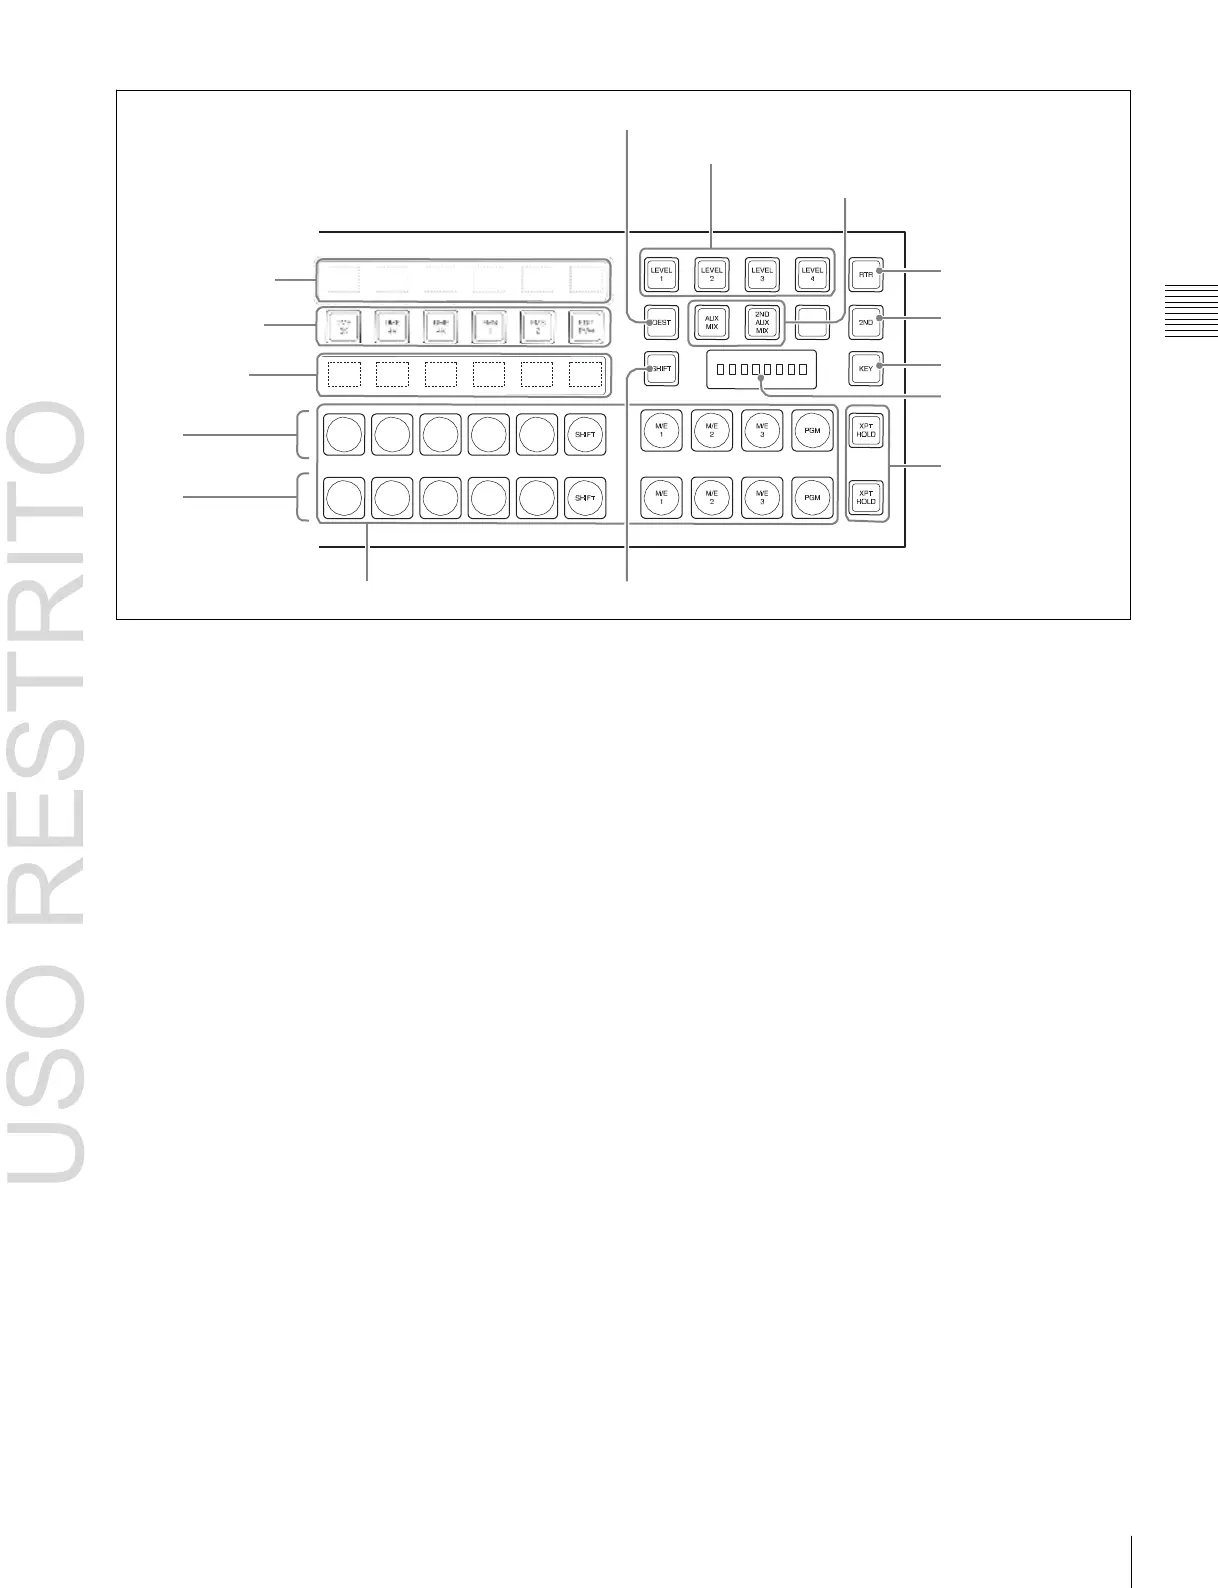
DEST button
m
Level selection buttons
k
AUX mix buttons
2
Selected source
name displays
1
AUX delegation
buttons
9
Source name
displays
l
RTR button
8
2ND button
7
KEY button
4
Selected bus display
1st
2nd
6
XPT HOLD buttons
5
Cross-point buttons
0
SHIFT button
a
AUX delegation buttons
Press one of these buttons, turning it on, to select the bus
to which to assign the cross-point buttons in the auxiliary
bus control block.
For buses that can be selected, see “Bus Selection” (page
89).
b
Selected source name displays
These show the name of the currently selected signal
(source) on the bus corresponding to the delegation button.
c
DEST (destination) button
Press this button, turning it on, to display the names of
buses allocated to the delegation buttons in the selection
source name displays.
In the case of a module without selected source name
displays, this button is invalid.
d
Selected bus display
This shows the name of the bus selected by the auxiliary
bus delegation buttons.
e
Cross-point buttons
The cross-points in the auxiliary bus control block are
arranged in two rows: an upper row (1st row) and a lower
row (2nd row), and are allocated to the buses selected with
the AUX delegation buttons. The 1st row contains the
cross-point buttons for unshifted buses, and the 2nd row
contains the cross-point buttons for shifted buses.
When the DME 1 V/K to DME 8 V/K buses are selected
with the AUX delegation buttons, the 1st row cross-point
buttons are for the currently showing side of DME, and the
2nd row are for the reverse side.
By holding down the [2ND] button and making an AUX
delegation selection, you can allocate the 2nd row to a
different bus from the 1st row.
In this case, if the 32nd button is set to be a [SHIFT] button
(in a 32-button system), you can select the shifted cross-
point buttons in the 1st and 2nd rows.
f
XPT HOLD (cross-point hold) buttons
Press one of these buttons, turning it on, to enable cross-
point hold.
g
KEY button
While this button is held down, you can use the cross-point
row of buttons to select key signals.
h
2ND button
After selecting a bus with an AUX delegation button, hold
down this button, and select another AUX delegation, thus
allocating a different bus in the 2nd row from the 1st row.
i
Source name displays
These show the names of the source signals which can be
selected by the cross-point buttons. While the [SHIFT]
button is enabled, the shifted signal name is displayed. If a
different bus is allocated to the 2nd row, while the [2ND]
button is held down, the 2nd row signal name is displayed.
While the [KEY] button is held down, the source name of
the key signal assigned to the cross-point buttons appears.
j
SHIFT button
While this button is enabled, the shifted signal names
appear in the source name display. Pressing this buttons
toggles the source name display between the shifted signal
names and unshifted signal names.

 Loading...


