Configuring SNMP & RMON Configuration Example
Configuration Guide
735
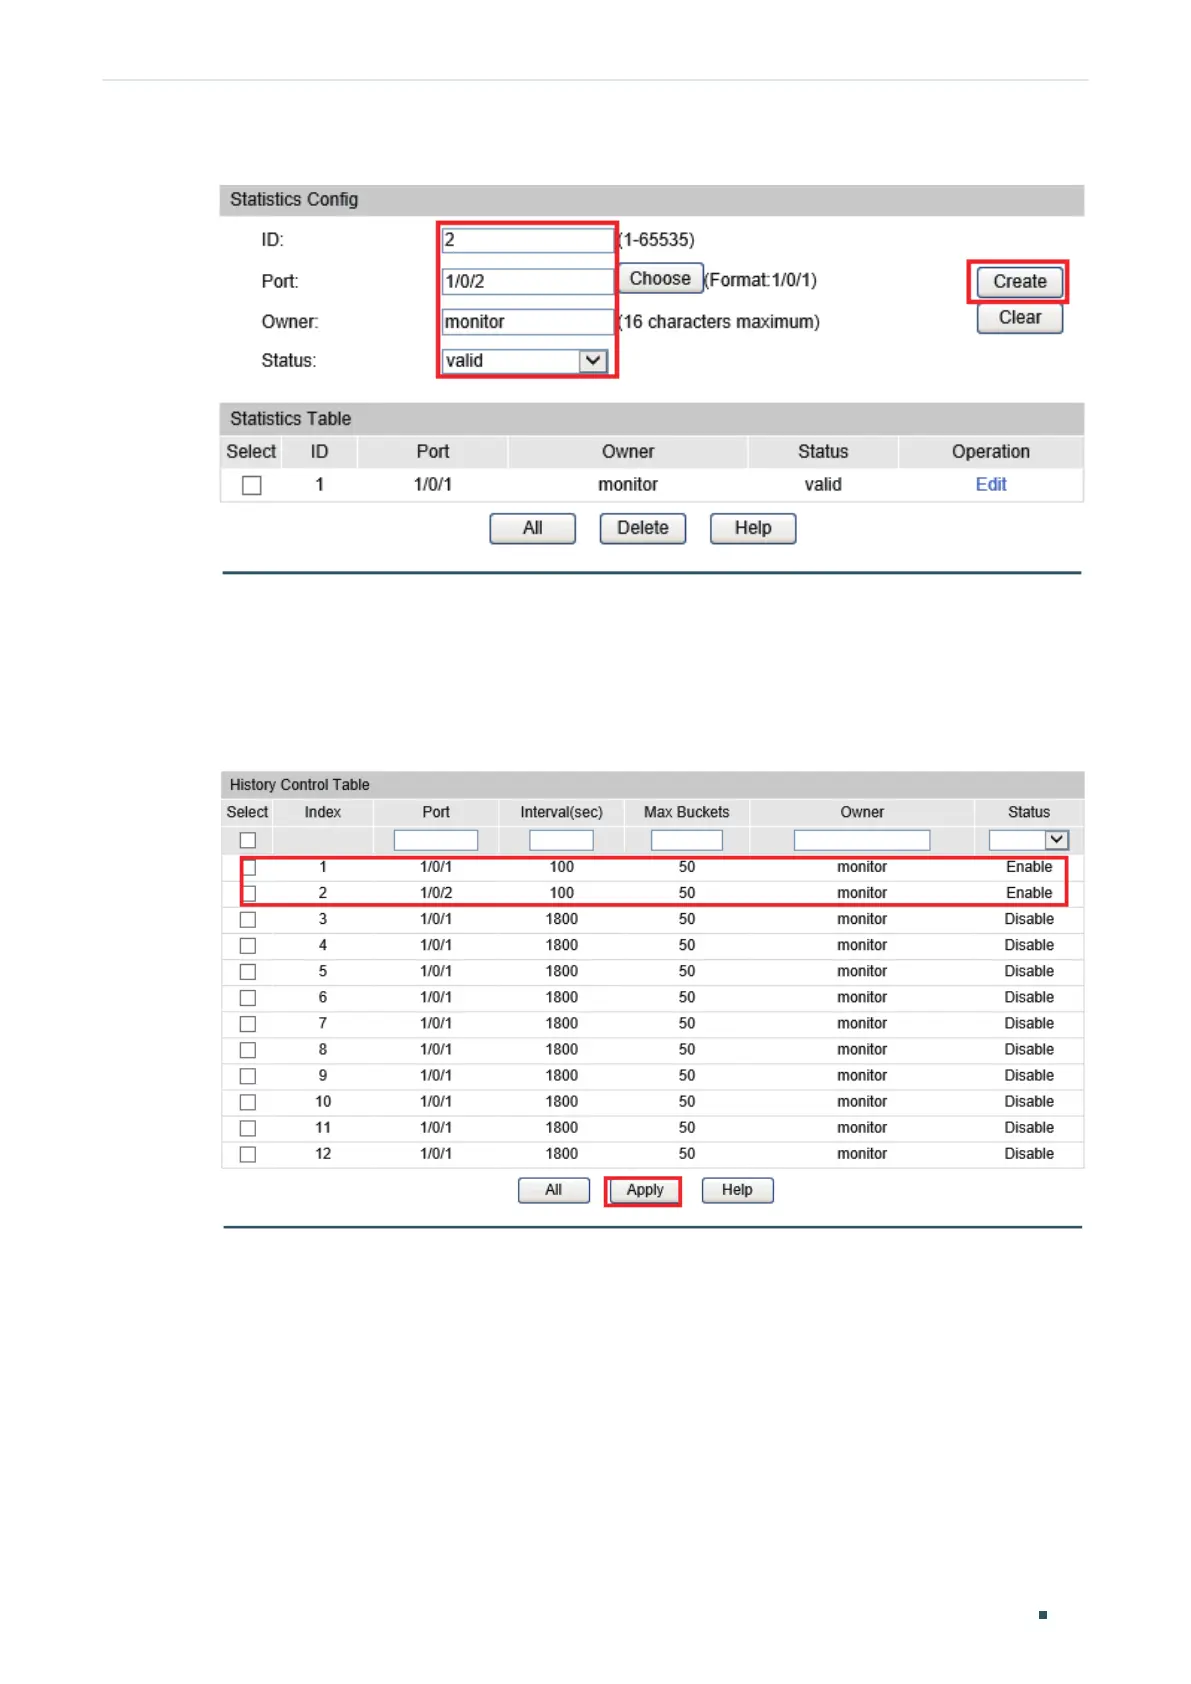
Figure 6-8 Configuring Entry 2
2) Choose the menu SNMP > RMON > History to load the following page. Configure
entries 1 and 2. Bind entries 1 and 2 to ports 1/0/1 and 1/0/2 respectively, and set the
Interval as 100 seconds, Max Buckets as 50, the owner of the entries as monitor, and
the status as Enable.
Figure 6-9 History Configuration
3) Choose the menu SNMP > RMON > Event to load the following page. Configure entries
1 and 2. For entry 1, set the SNMP user name as admin, type as Notify, description as
“rising notify”, owner as monitor, and status as enable. For entry 2, set the SNMP user
name as admin, type as Log, description as “falling log”, owner as monitor, and status as
enable.