3 - 12
Chapter 3 Image Quality Troubleshooting
13
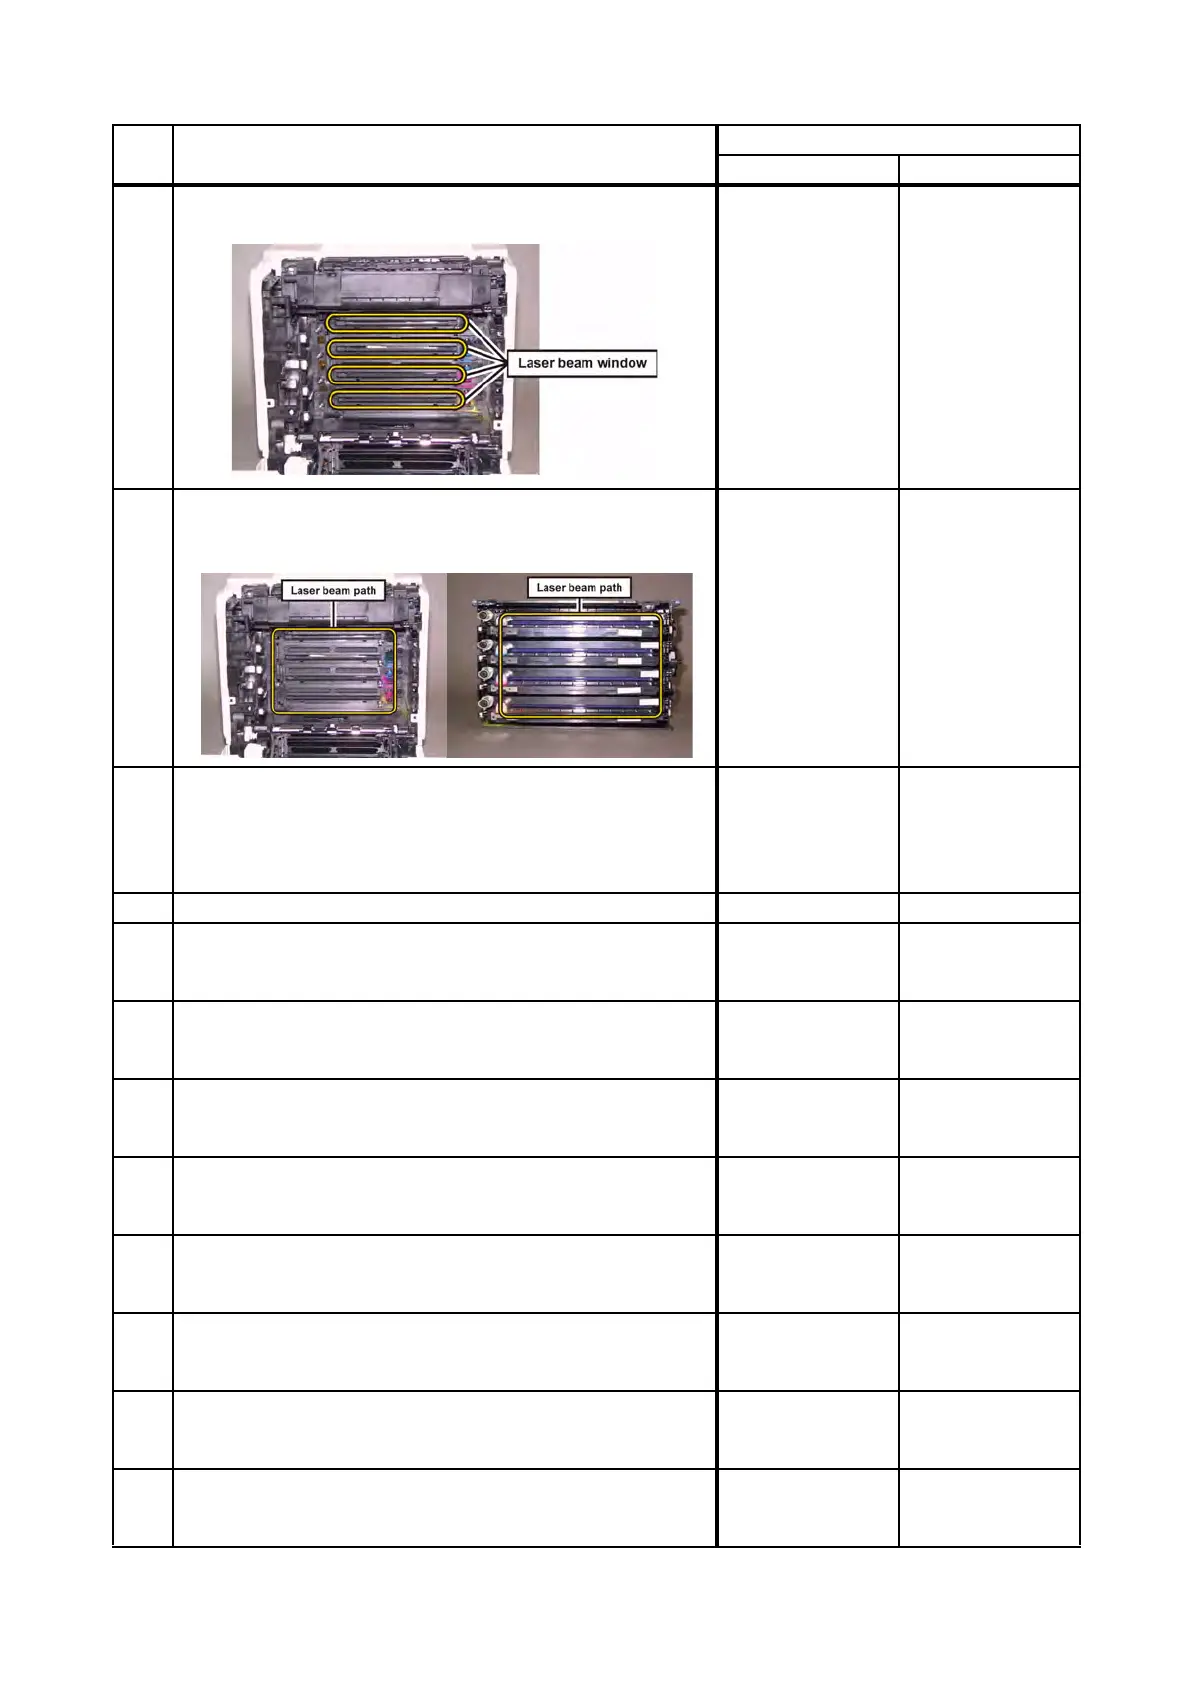
Checking the laser beam windows of the ROS ASSY.
Are the laser beam windows on the ROS ASSY clean?
Go to step 14.
Clean the
window(s) with
soft cloth or cotton
swab gently.
14
Checking the laser beam path.
Are there any foreign substances between the ROS ASSY
and PHD ASSY?
Remove the
foreign
substances.
Go to step 15.
15
Does the Toner Dispenser Motor function normally?
Checked by [Digital Output] - [Yellow Toner Motor,Magenta
Toner Motor,Cyan Toner Motor,Black Toner Motor] in [IOT
Diag] of diagnosis.
Go to step 17.
Replace the
DISPENSER
ASSY. (Refer to
REP5.1.), then go
to step 16.
16 Is the image printed correctly? End of work. Go to step 17.
17
Checking after resetting the PWBA MCU.
Reseat the PWBA MCU.
Is the image printed correctly?
End of work. Go to step 18.
18
Checking after resetting the PWBA ESS AIO.
Reseat the PWBA ESS AIO.
Is the image printed correctly?
End of work. Go to step 19.
19
Checking after resetting the TRANSFER ASSY.
Reseat the TRANSFER ASSY.
Is the image printed correctly?
End of work. Go to step 20.
20
Checking after replacing the TRANSFER ASSY.
Replace the KIT TRANSFER ASSY. (Refer to REP6.3.)
Is the image printed correctly?
End of work. Go to step 21.
21
Checking after replacing the PHD ASSY.
Replace the PHD ASSY. (Refer to REP4.6.)
Is the image printed correctly?
End of work. Go to step 22.
22
Checking after resetting the PWBA HVPS.
Reseat the PWBA HVPS.
Is the image printed correctly?
End of work. Go to step 23.
23
Checking after replacing the DISPENSER ASSY.
Replace the DISPENSER ASSY. (Refer to REP5.1.)
Is the image printed correctly?
End of work. Go to step 24.
24
Checking after replacing the KIT ROS.
Replace the KIT ROS. (Refer to REP4.1.)
Is the image printed correctly?
End of work.
Replace the
PWBA HVPS.
(Refer to REP4.5.)
Step Check
Remedy
Yes No

 Loading...


