4 - 72
Chapter 4 Disassembly / Assembly and Adjustments
When carrying out the work described next procedure, leave the relay connector
on the printer harness side.
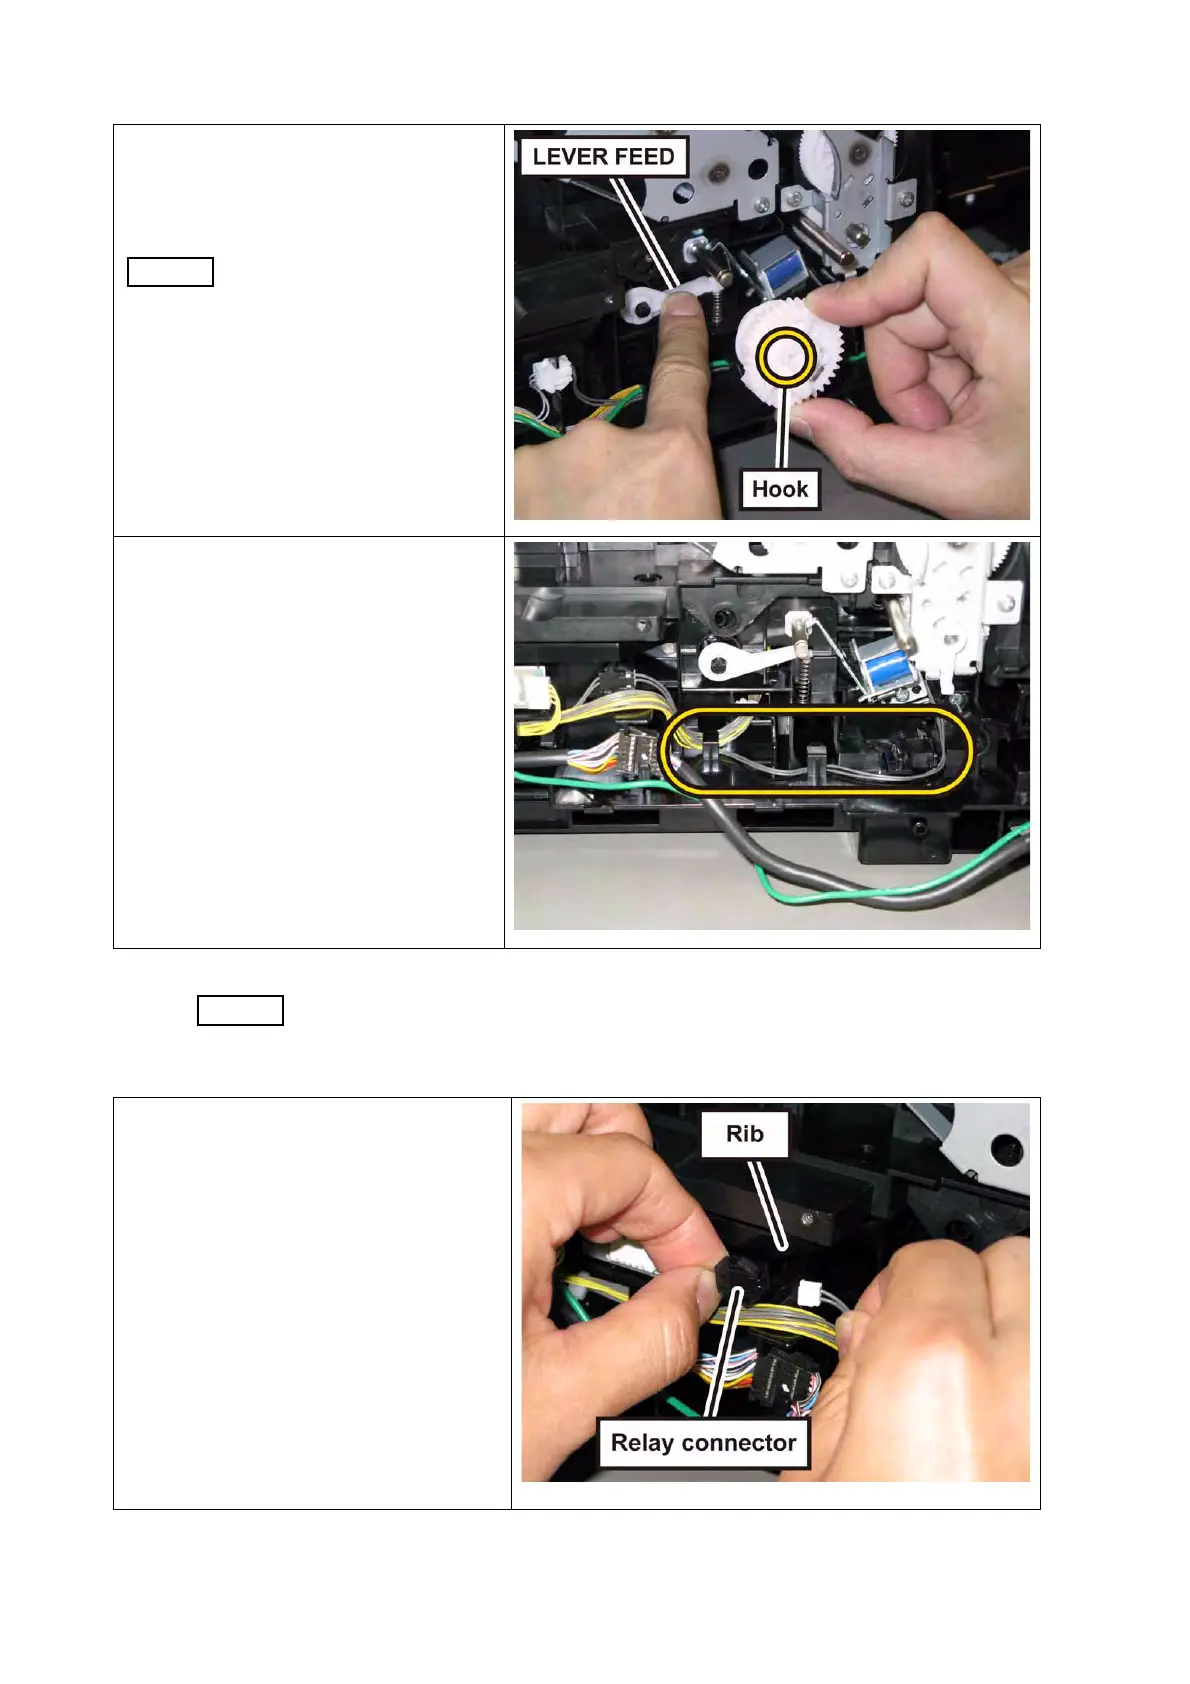
14) Release the hook of the GEAR
ASSY FEED (PL3.1.19), remove the
GEAR ASSY FEED from the
SHAFT ASSY FEED (PL3.2.2).
When carrying out the work
this procedure, pushing
down the LEVER FEED
(PL3.1.13).
15) Release the harness of the SOLE-
NOID FEED MSI (PL3.1.11) from
the hooks of the printer.
16) Release the relay connector from the
rib of the printer, disengage the con-
necter (P/J231) of the SOLENOID
FEED MSI.
 Loading...


