4 - 75
Chapter 4 Disassembly / Assembly and Adjustments
When carrying out the work described next procedure, it is easier to put the D-
cut surface of the SHAFT ASSY FEED on the front.
6) Close the COVER ASSY FRONT.
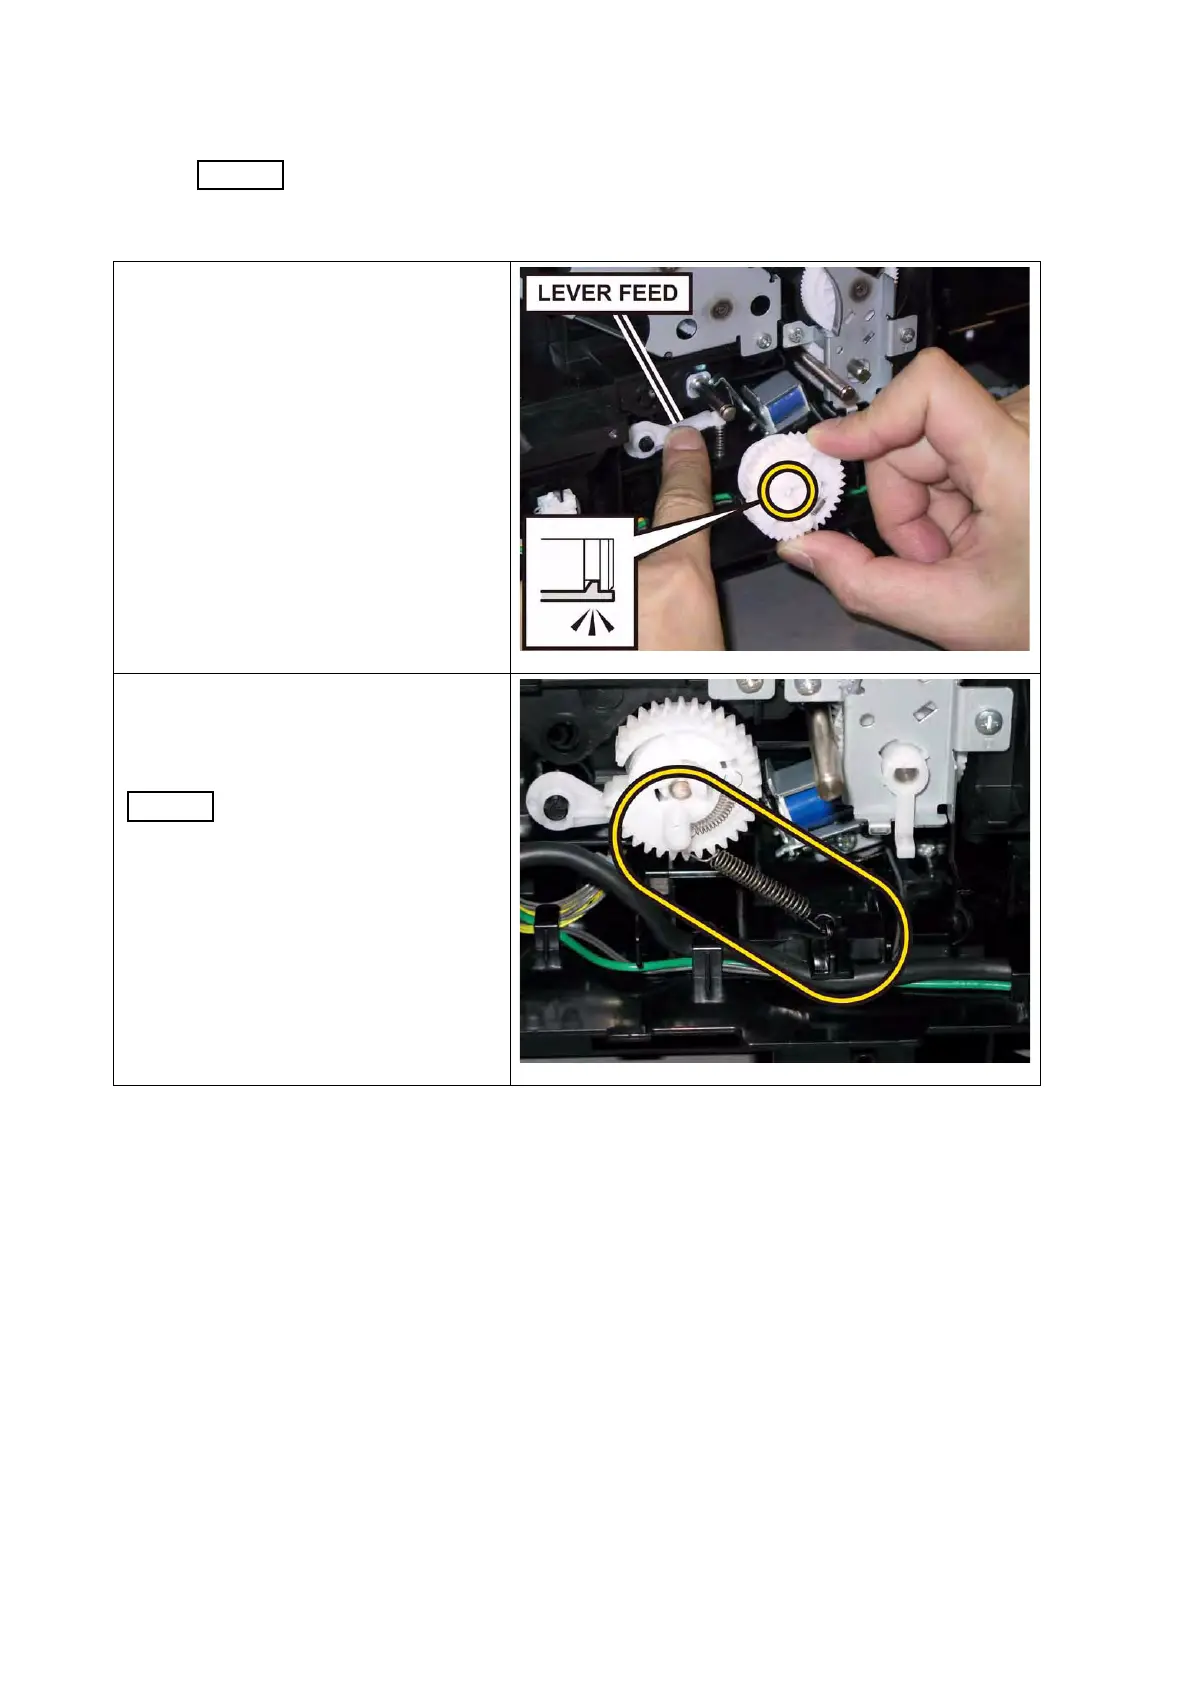
4) Attach the GEAR ASSY FEED to
the SHAFT ASSY FEED by pushing
down the LEVER FEED, mate the
hook of the GEAR ASSY FEED with
the groove of the SHAFT ASSY
FEED.
5) Hang the SPRING FEED OUT to
the GEAR ASSY FEED and the
printer.
Ensure that the SPRING
FEED OUT is oriented to
the direction shown in the
right.
 Loading...


