4 - 197
Chapter 4 Disassembly / Assembly and Adjustments
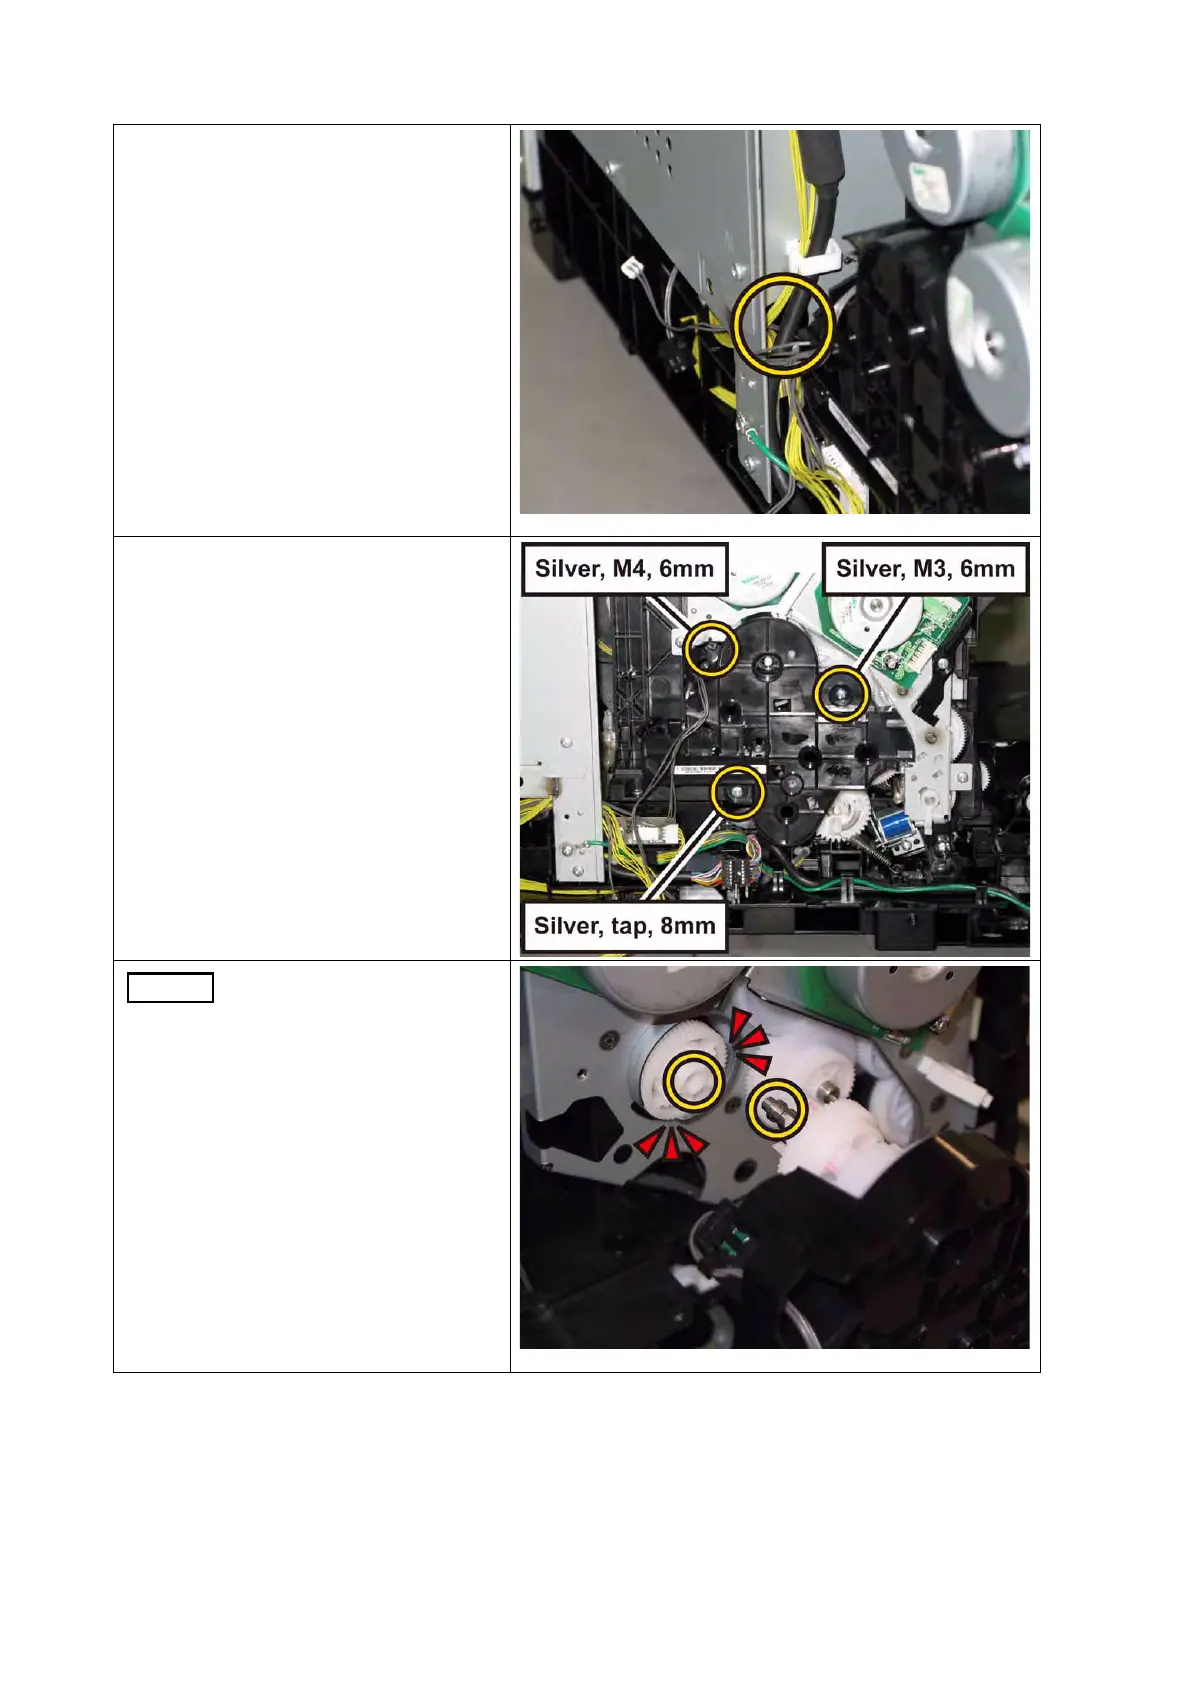
9) Pull out the harness of the DRIVE
ASSY PH from the hole of the
printer.
10) Remove the one screw (silver, M4,
6mm), the one screw (silver, M3,
6mm) and the one screw (silver, tap,
8mm) that fix the DRIVE ASSY PH
to the printer.
When carrying out the work
described next procedure,
take care not to drop the
coupling gear to inside.
 Loading...


