Rigging grommet mounting
3-13
Rigging grommet mounting
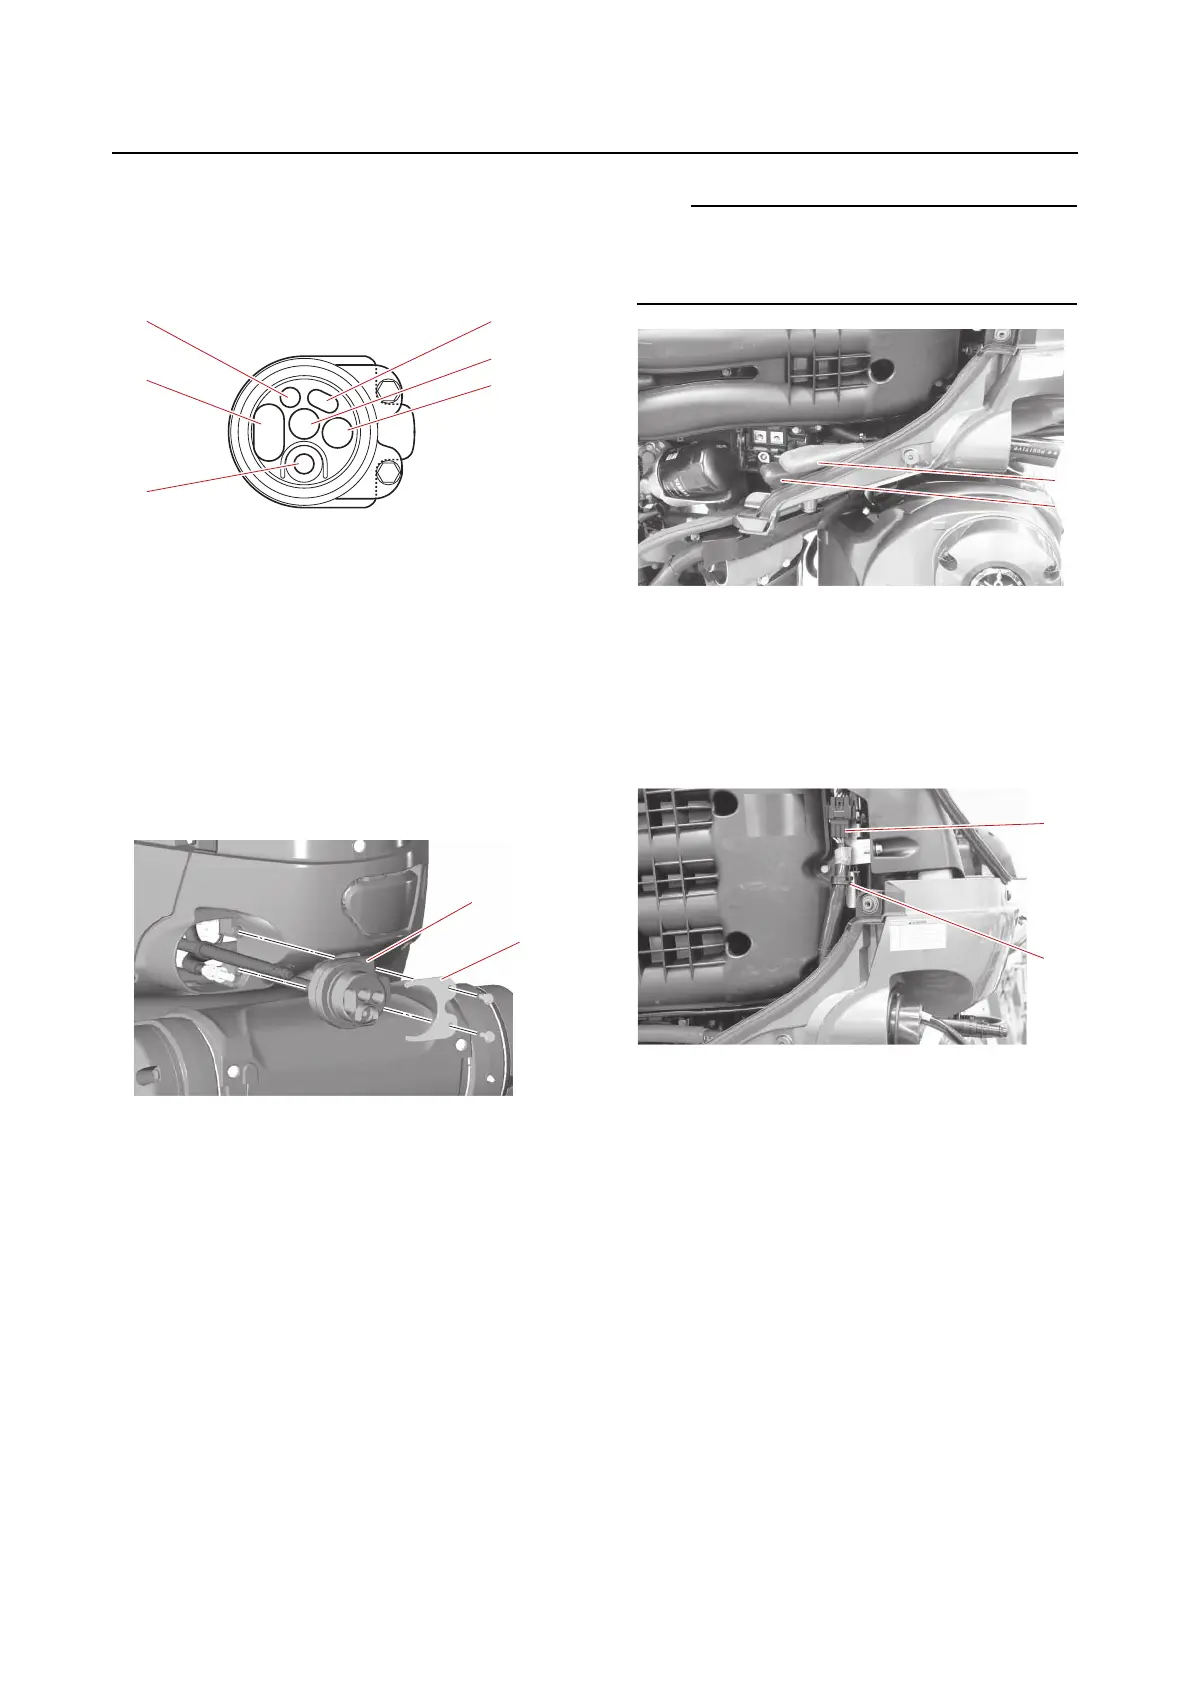
Rigging grommet description
Pass all the control components through the
proper holes in the rigging grommet.
1. Remove the grommet holder “1” and rig-
ging grommet “2”.
Installing the battery cable
1. Remove:
• Bottom cowling cover
See “Bottom cowling cover and apron
cover” (9-1).
• Bottom cowling (STBD)
See “Bottom cowling (PORT and STBD)”
(9-3).
2. Install
• Battery cable
a. Insert the battery cables into the bot-
tom cowling so that the positive battery
cable “1” is routed above the negative
battery cable “2”.
Make sure that the hole in the end of the neg-
ative battery cable terminal fits over the pro-
jection.
Installing the main wire harness
1. Install:
• Main wire harness
a. Connect the main wire harness coupler
“a”, and then fasten it using the holder
“1”.
Installing the rigging grommet
1. Install:
• Rigging grommet
a. Route each harness through the proper
hole in the rigging grommet. See “Rig-
ging grommet description” (3-13).
b. Align the tape “a” on the battery cable
“1” and mark “b” on the flushing hose
“2” with the outer end of the rigging
grommet.
c. Align the tape “c” on the SCU commu-
nication lead with the outer end of the
rigging grommet. (For multiple engine
applications)
1. Main wire harness
2. SCU communication lead (for multiple
engine applications)
3. Flushing hose
4. Fuel hose
5. Battery cable
6. Isolator lead (optional)