Camshaft
7-53
Installing the camshaft, VCT
assembly, and driven sprocket
If the valve clearances are adjusted or any
parts related to valve movement are replaced
after installing the timing belt, check the valve
clearances. See “Checking the valve clear-
ance” (7-1).
When the timing belt is not installed, do not
turn the crankshaft or camshaft. Other-
wise, the pistons and valves could collide
with each other and be damaged.
1. Install:
• Wire harness guide bracket
2. Check:
• Crankshaft position
Check that the “ ” mark “a” on the crank-
shaft is aligned with the “” mark “b” on the
cylinder block.
3. Install:
• Valve lifters
Install the valve lifters in their original positions.
4. Assemble:
• VCT assemblies
• VCT bolts (temporarily)
• Camshafts (IN)
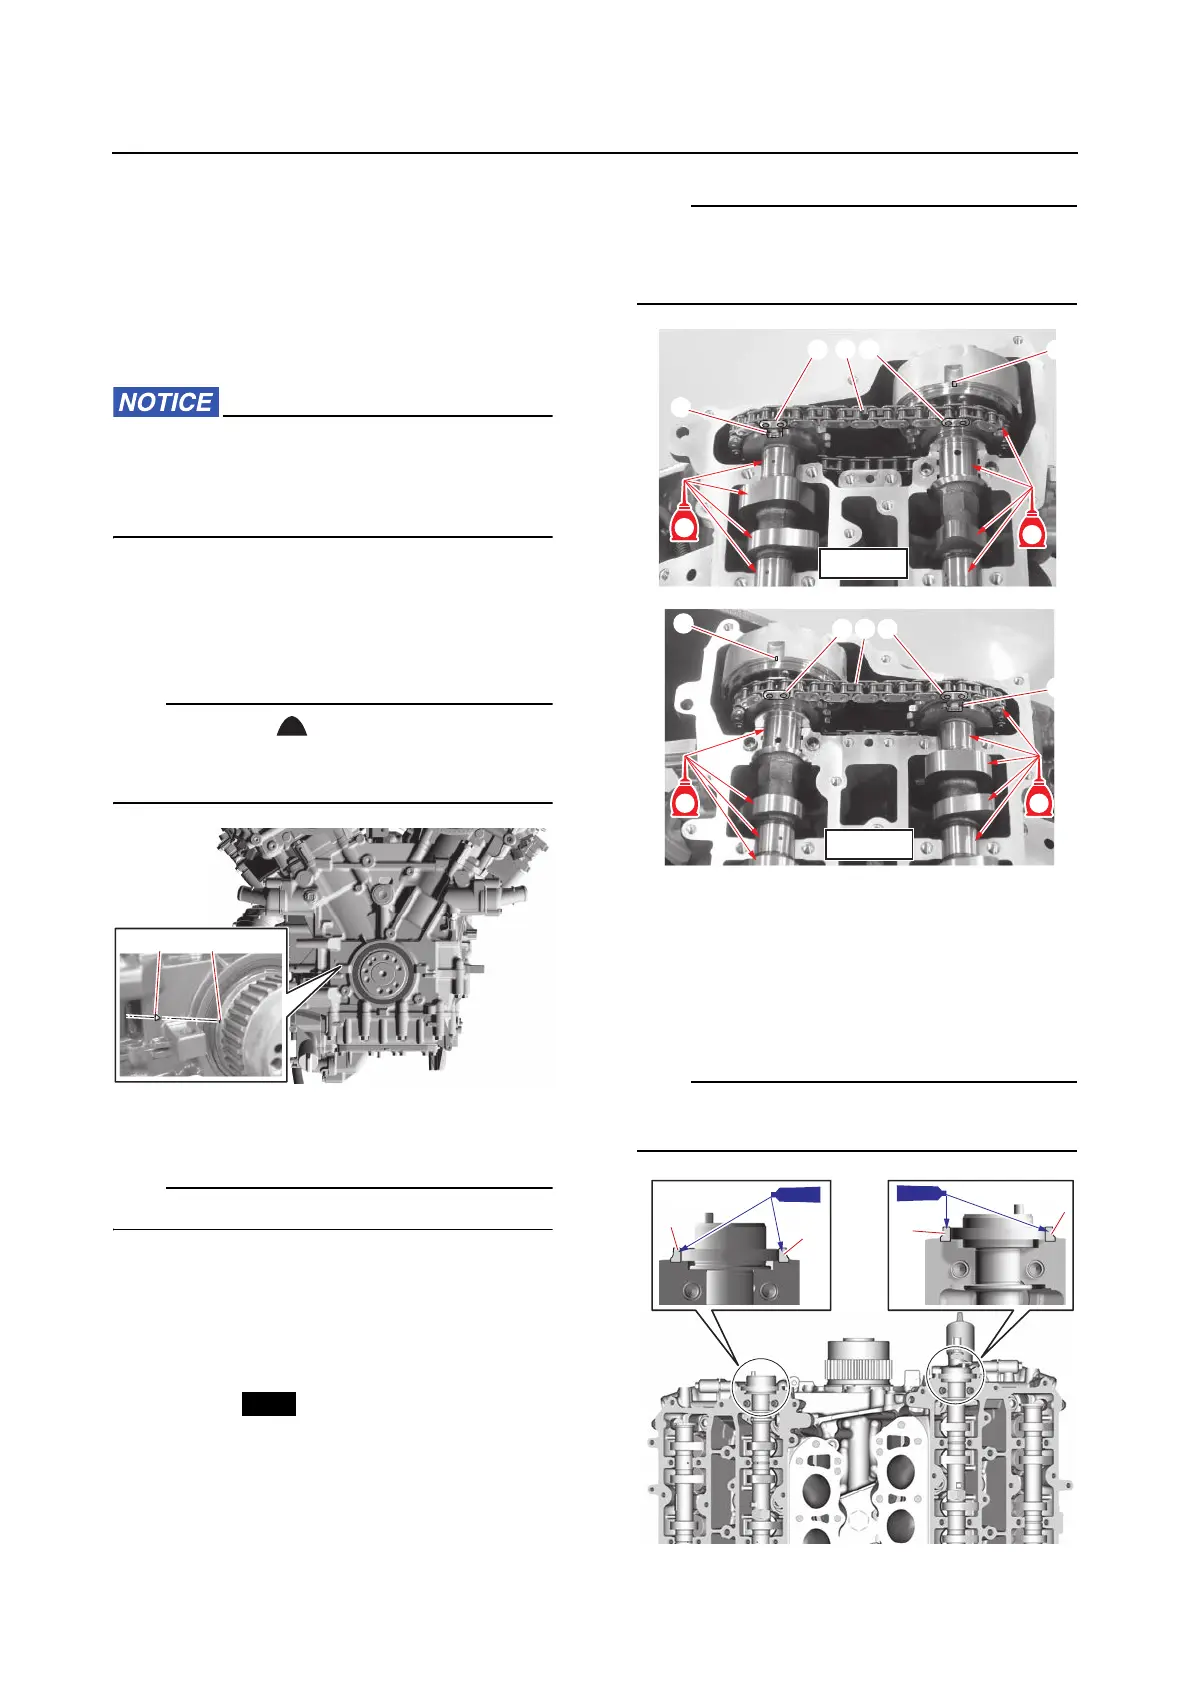
5. Install:
•Oil seals
• Camshafts (IN) (along with cam chain)
• Camshafts (EX)
Align the mark “a” on the VCT assembly and
the big slot “b” on the camshaft (EX) with the
gold-colored plates “c” on the cam chain “1”.
6. Install:
• Camshaft caps
• Camshaft cap bolts
a. Apply a thin, even coat of sealant to the
mating surfaces “a” of the camshaft
caps and cylinder heads.
Do not block the oil passages or oil holes with
the sealant.