Vapor separator and high-pressure fuel pump
6-10
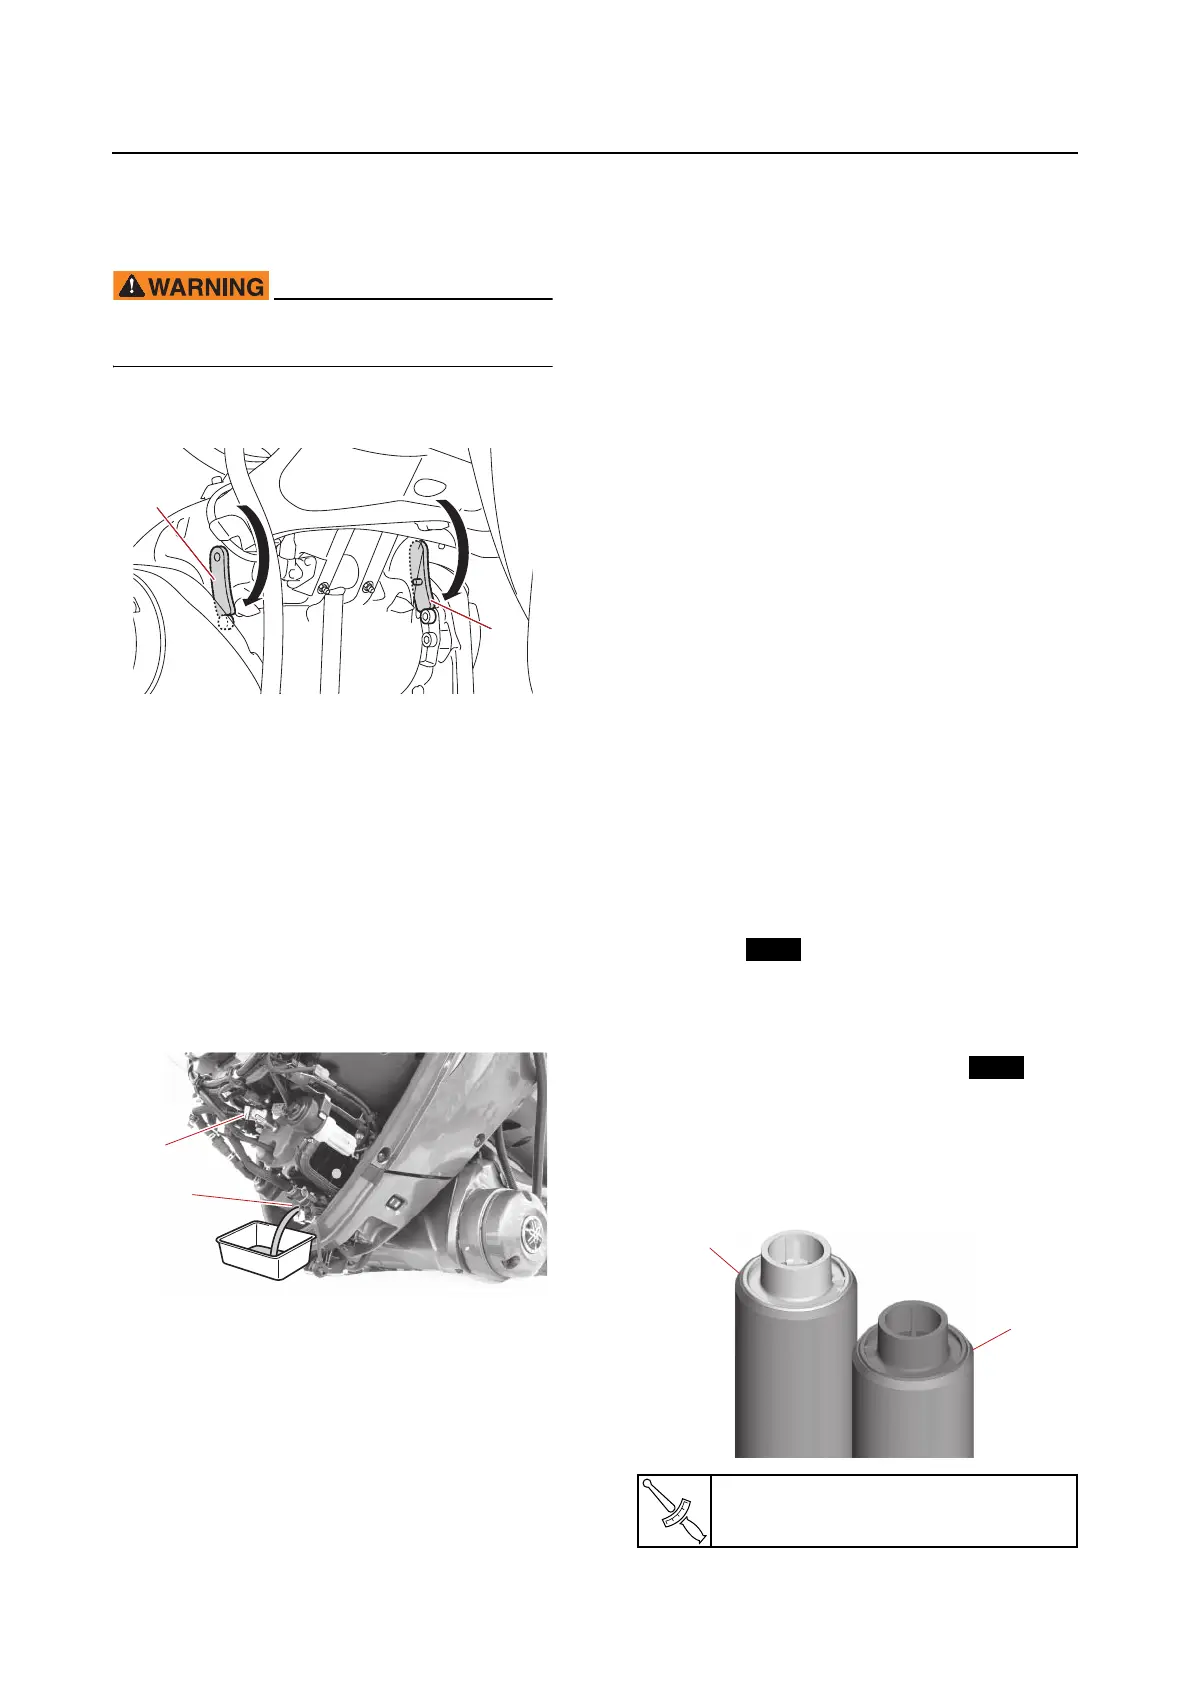
Draining the fuel
Cover the fuel components using a rag to pre-
vent fuel from spilling out.
Never get under the outboard motor while
it is tilted.
1. Fully tilt the outboard motor up, and then
support it using the tilt support lever “1”.
2. Disconnect:
• Quick connector “1”
See “Disconnecting the quick connector”
(6-1).
3. Remove:
•Band
• Drain hose
(from the holder on the vapor separator
cover)
4. Set the drain hose “2” into a drain pan.
5. Remove the plug in the drain hose, and
then drain the fuel into the drain pan.
6. Install:
•Plug
• Drain hose
(onto the holder on the vapor separator
cover)
•Band
7. Connect:
• Quick connector
Removing the vapor separator
Cover the fuel components using a rag to pre-
vent fuel from spilling out.
1. Reduce:
•Fuel pressure
See “Reducing the fuel pressure” (6-1).
Checking the high-pressure fuel
pump
1. Check:
• Electrical performance of the high-pres-
sure fuel pump
See “Checking the low-pressure fuel
pump and high-pressure fuel pump”
(5-29).
Assembling the vapor separator
1. Install:
• Pump bracket
•Damper
• High-pressure fuel pump cover (to the sub
pump)
• High-pressure fuel pump (main) “1”
(gray inlet)
• High-pressure fuel pump (sub) “2”
(white inlet)
•Pipe
•O-ring
• Fuel cooler pipe
• High-pressure fuel pump bracket
• Rubber damper
• Vapor separator cover gasket
• Vapor separator cover
• Vapor separator drain hose
• Quick connector
•Plug
Vapor separator cover screw
2.0 N·m (0.20 kgf·m, 1.5 lb·ft)