7-8
Exhaust joint (outside)
Removing the exhaust joint assembly
When not disassemble the exhaust joint as-
sembly, use suitable bolts “1” to secure the
exhaust joints “2”, “3”, and “4” so that they do
not become misaligned, and then remove the
exhaust joint assembly.
1. Remove:
• Bottom cowling cover
See “Bottom cowling cover and apron
cover” (9-1).
• Bottom cowling
See “Removing the bottom cowling” (9-5).
• Fuel rail cover
See “Fuel hose assembly” (6-12).
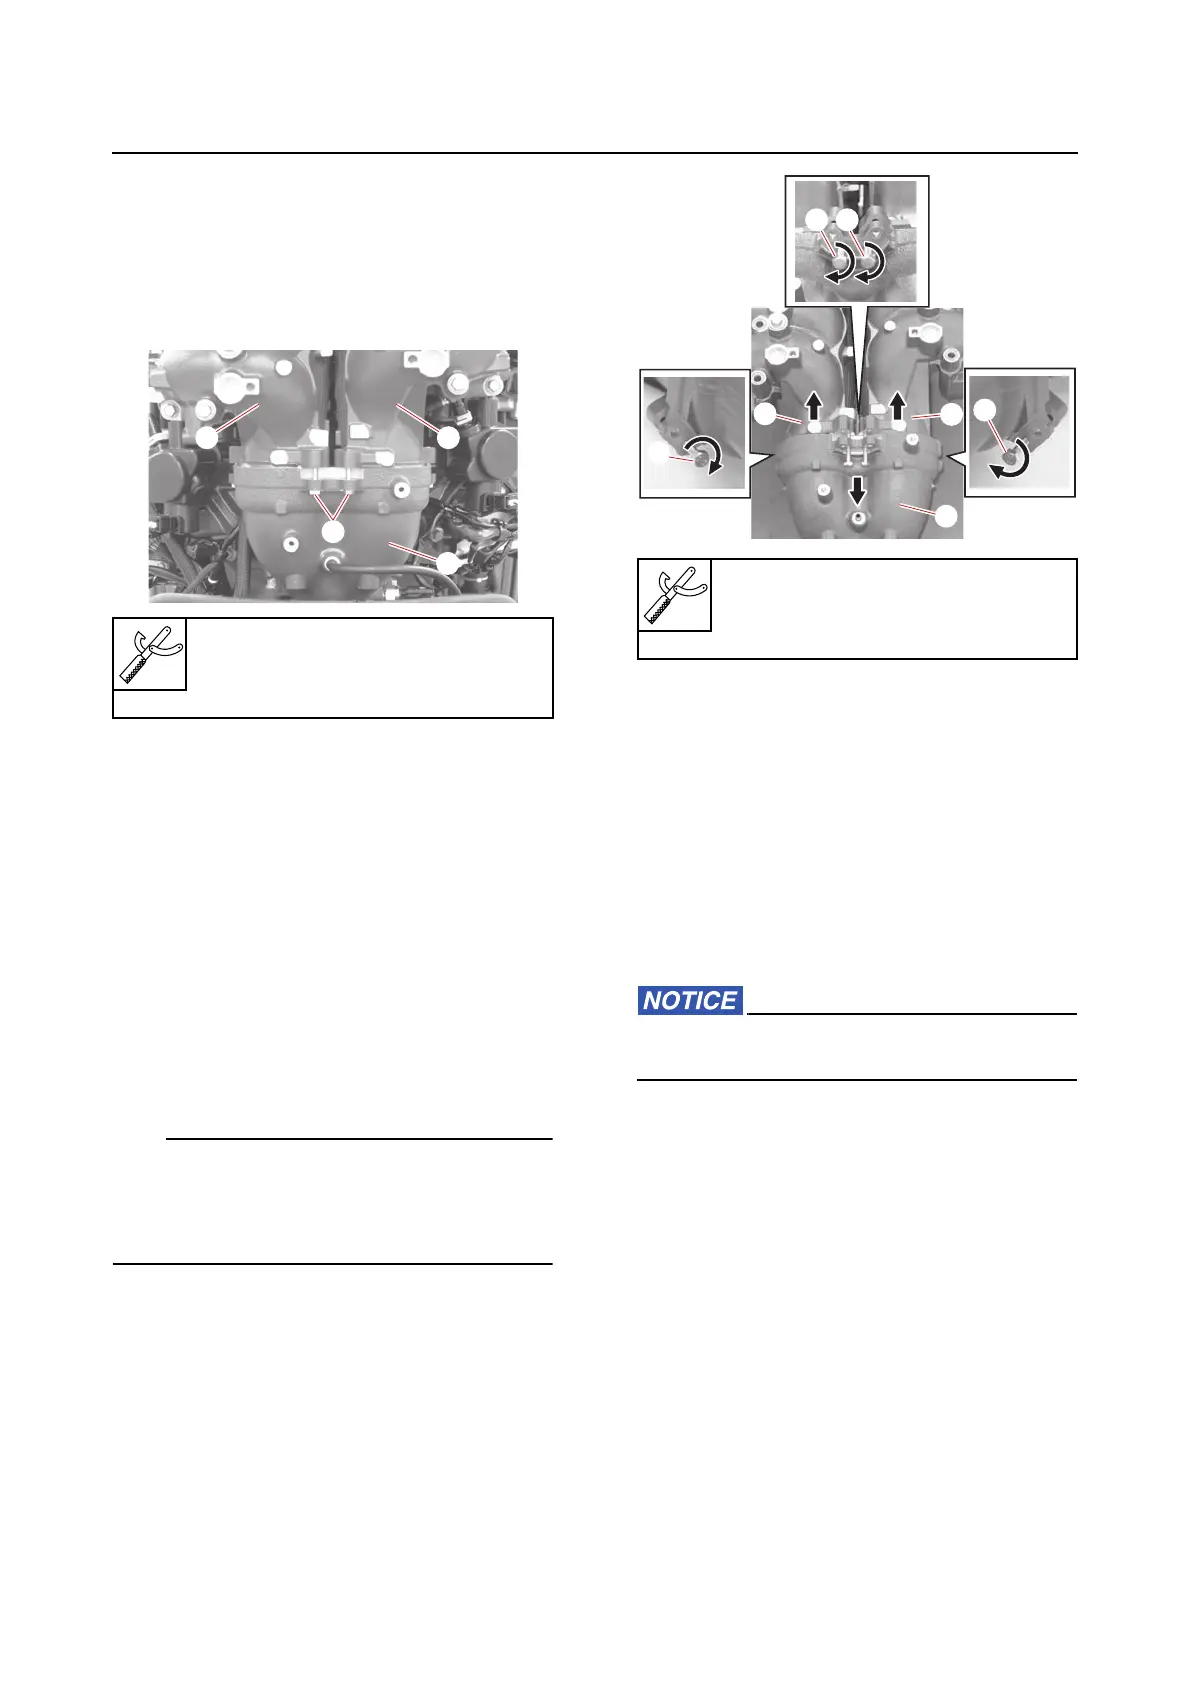
Disassembling the exhaust joint
assembly
1. Disassemble:
• Exhaust joint assembly
Use suitable bolts “1” to separate the exhaust
joint (PORT) “2”, exhaust joint (STBD) “3”, and
exhaust joint (lower) “4”. Screw in the bolts “1”
evenly.
Checking the exhaust joint
1. Check:
• Exhaust joint
Corroded/cracked → Replace.
Checking the exhaust joint anode
1. Check:
•Anode
Eroded (1/2 or more worn out) → Replace.
Adhered grease, oil, or scales → Clean.
Do not apply grease, oil, or paint to the an-
odes.
Checking the water pressure sensor
1. Check:
•Exterior
Cracked → Replace.
• Electrical performance
See “Checking the water pressure sen-
sor” (5-26).
Installing the exhaust joint assembly
If the exhaust joint assembly is not disassem-
bled, skip step 1. After tighten the exhaust
joint assembly bolts temporarily, remove the
bolts “1” that was used to secure the exhaust
joints “2”, “3”, and “4”.
Bolt “1”
(commercially available)
M6 × 40 mm (1.57 in)
Bolt “1”
(commercially available)
M6 × 40 mm (1.57 in)