Bottom cowling (front) and flushing hose
9-17
Assembling the bottom cowling
(front)
1. Install:
•Grommets
•Clamp plate
2. Assemble:
•Washer “1”
• Lever shaft “2”
• Cowling lock lever “3”
•Pin “4”
• Retaining clip “5”
Install the pin “4” in the direction shown.
3. Install:
• Bushings
• Wave washer
•Washer
• Cowling lock lever assembly
• Clamp lever
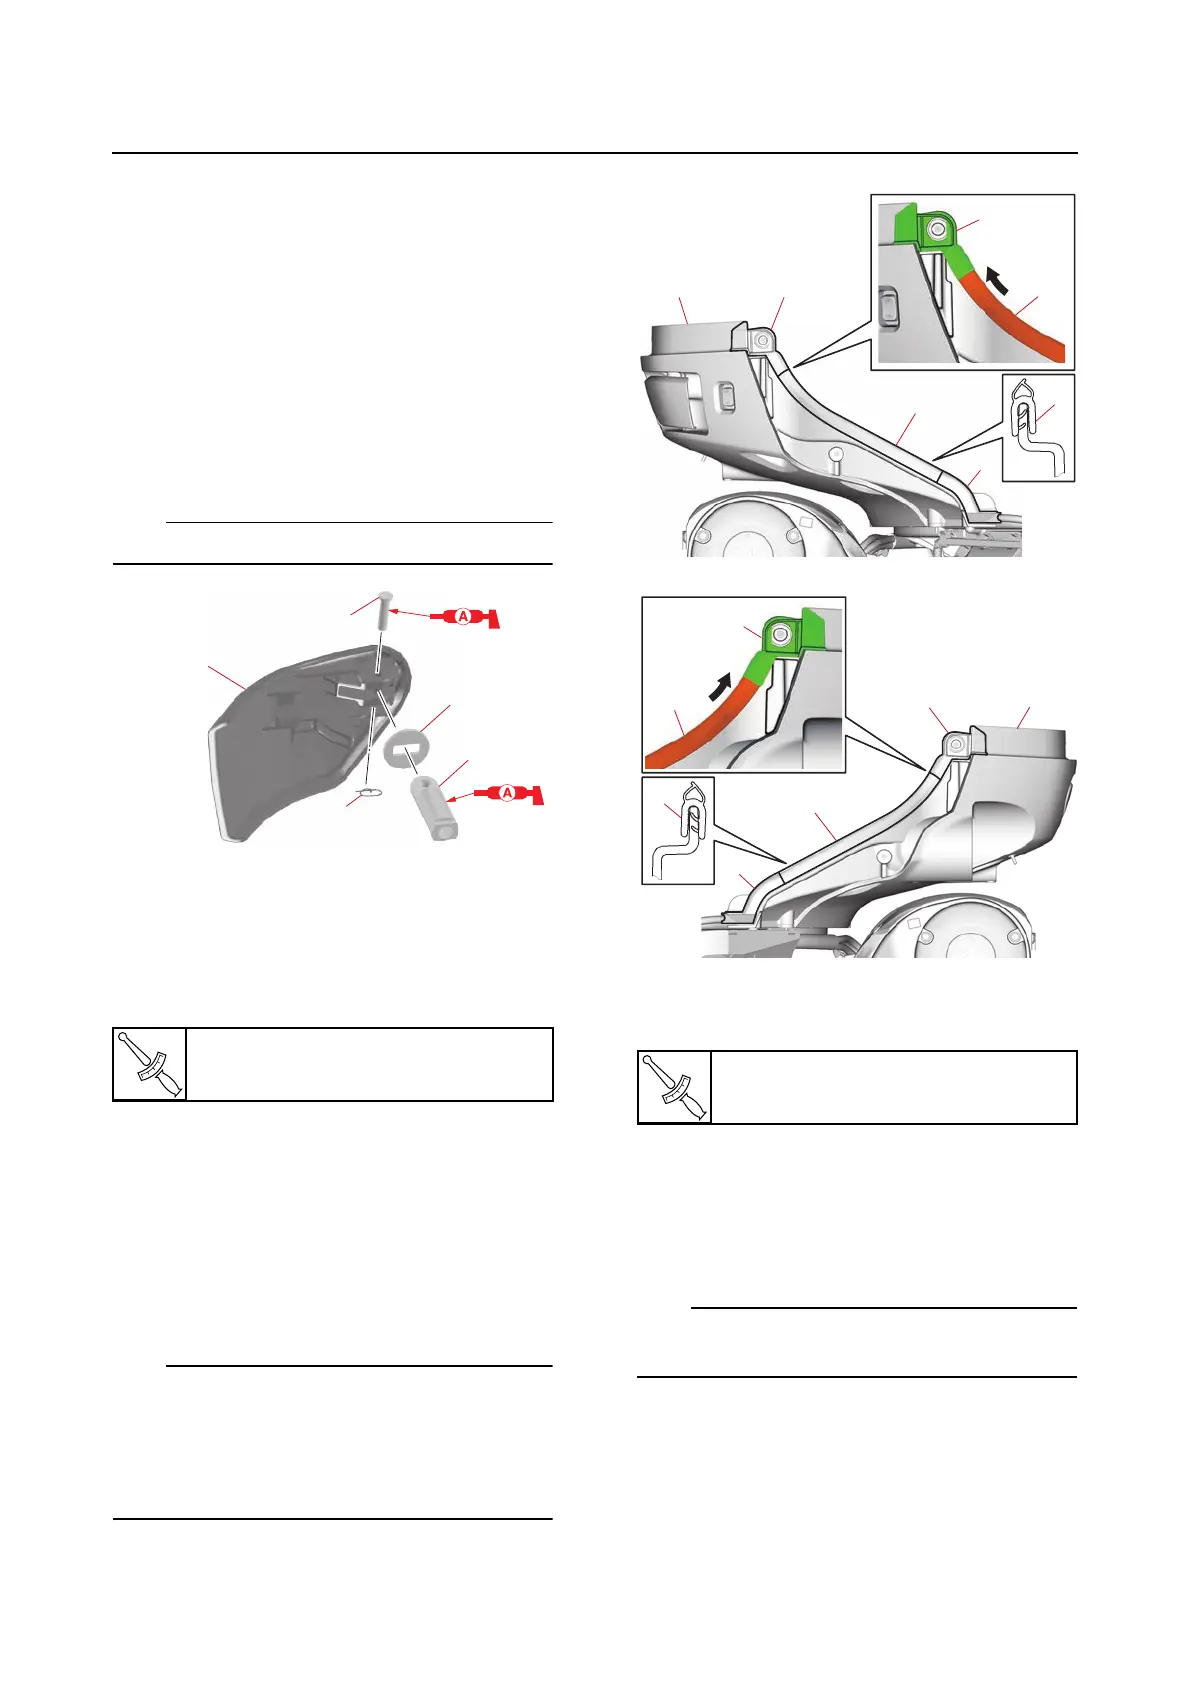
Installing the bottom cowling (front)
1. Install:
• Rubber seal (onto the exhaust guide)
• Grommet “1”, “2”
• Rubber seal (PORT) “3”, “4”
• Rubber seal (STBD) “5”, “6”
• Bottom cowling (front) “7”
• Attach the grommets “1” and “2” to the bot-
tom cowling (front) “7”.
• Install the rubber seals “3” and “5” so that
they are pushed against the grommets “1”
and “2”.
A
B
Installing the flushing hose and PTT
switch
1. Install:
•PTT switch
Install the PTT switch so that the side with the
“UP” mark is facing up.
2. Install:
•Grommet
•Holder
•Joint
•Gasket
•Flushing plug
Clamp lever bolt
19 N·m (1.9 kgf·m, 14 lb·ft)
A. PORT
B. STBD
Bottom cowling (front) bolt
19 N·m (1.9 kgf·m, 14 lb·ft)