PTT cylinder
9-65
2. Drain:
•Fluid
Checking the tilt cylinder and trim
cylinder
1. Check:
• PTT body
• Tilt cylinder
Corroded/cracked → Replace.
2. Check:
• Inner surface of the PTT body
• Inner surface of the tilt cylinder
Scratched → Replace.
3. Check:
• Outer surfaces of the tilt piston
• Outer surfaces of the trim piston
• Outer surfaces of the free piston
Scratched → Replace.
4. Check:
•Backup rings
Damaged/worn → Replace.
5. Check:
• Trim rams
•Tilt ram
Rust → Clean using 400–600-grit sandpa-
per.
Bent/corroded → Replace.
6. Check:
•Pipe
Corroded/cracked → Replace.
Checking the absorber valve
1. Check:
• Tilt piston absorber valves
Dirt/residue → Clean.
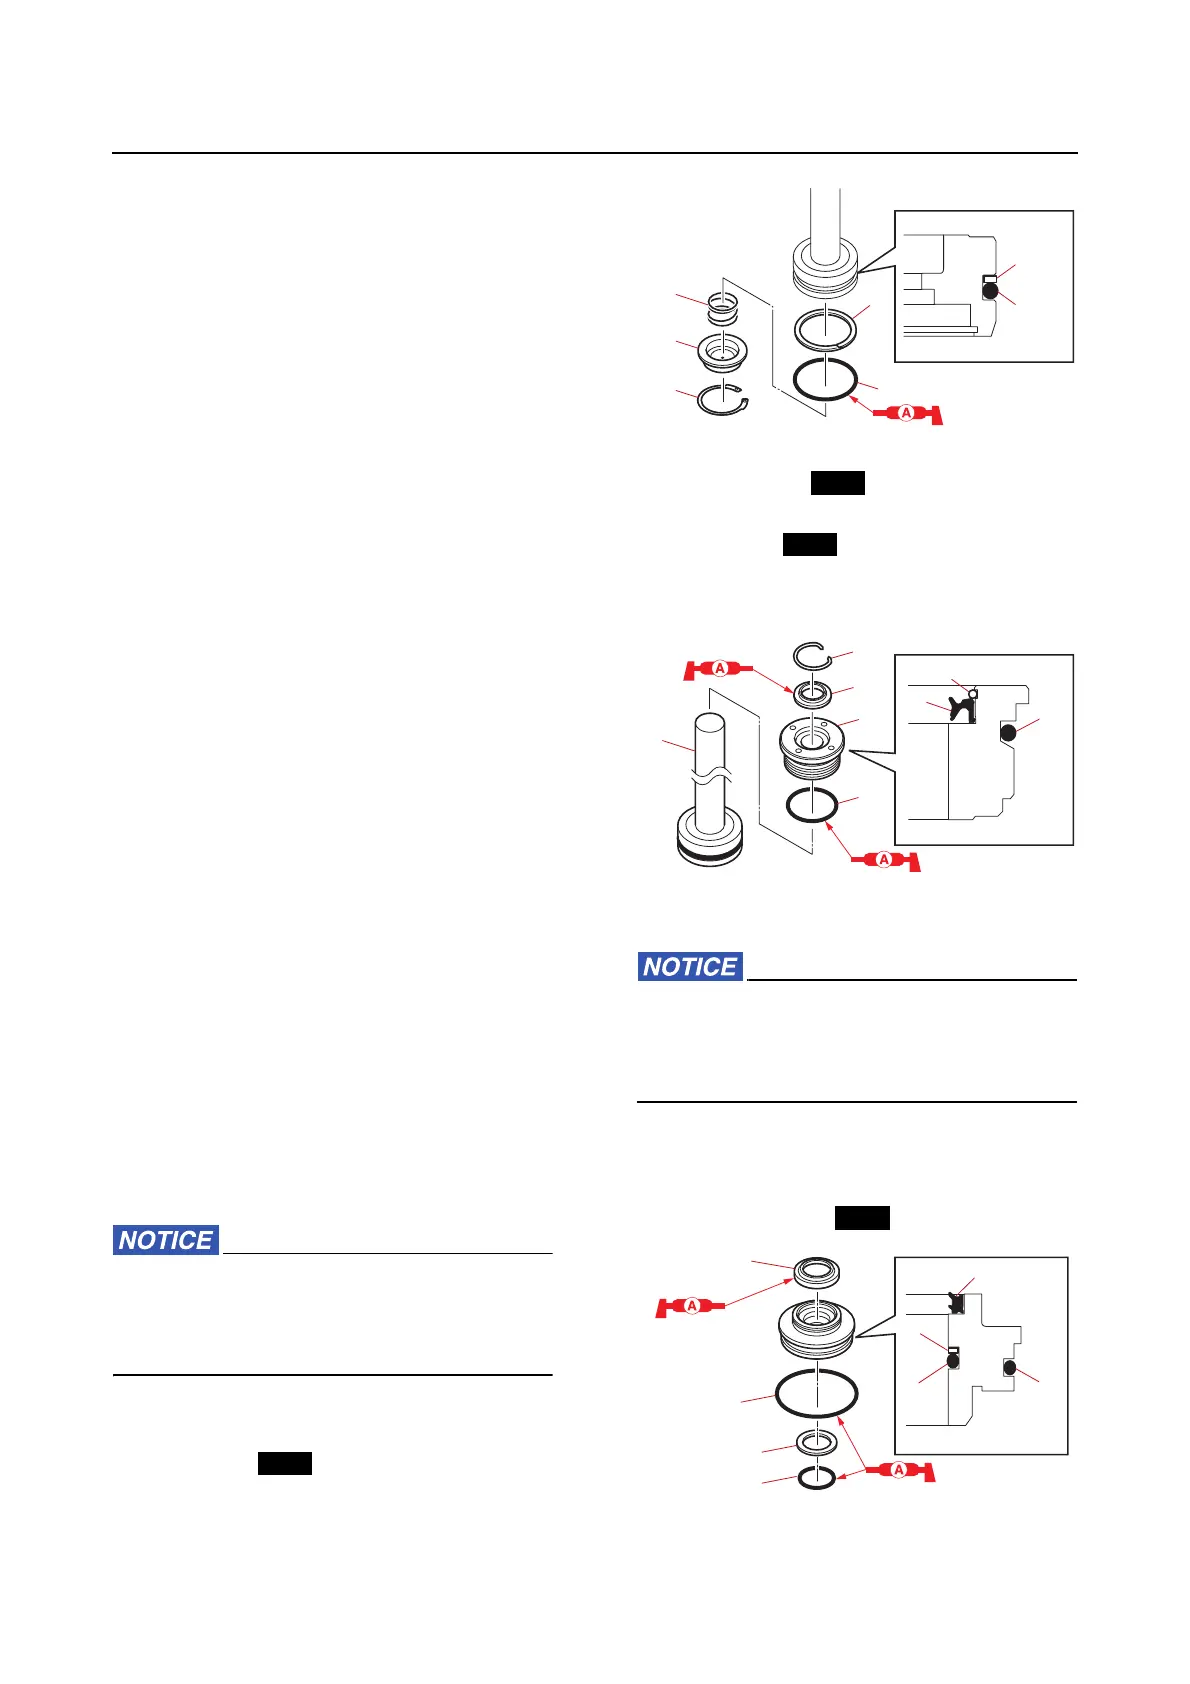
Assembling the trim ram
When assembling the PTT unit, do not use
a rag. Otherwise, dust and particles could
get on the PTT unit components, causing
poor performance.
1. Install:
• Backup ring “1”
• O-ring “2”
• Spring “3”
• Adapter “a”
•Circlip “4”
2. Install:
• Dust seal “1”
• Circlip “2”
• O-ring “3”
• Trim cylinder end screw “4”
(onto the trim ram “5”)
Assembling the tilt ram
When assembling the PTT unit, do not use
a rag. Otherwise, dust and particles could
get on the PTT unit components, causing
poor performance.
1. Install:
•Dust seal “1”
•Backup ring “2”
• O-rings “3”, “4”
2. Install:
•Tilt ram “a”









 To Next Page