Bottom cowling (PORT and STBD)
9-5
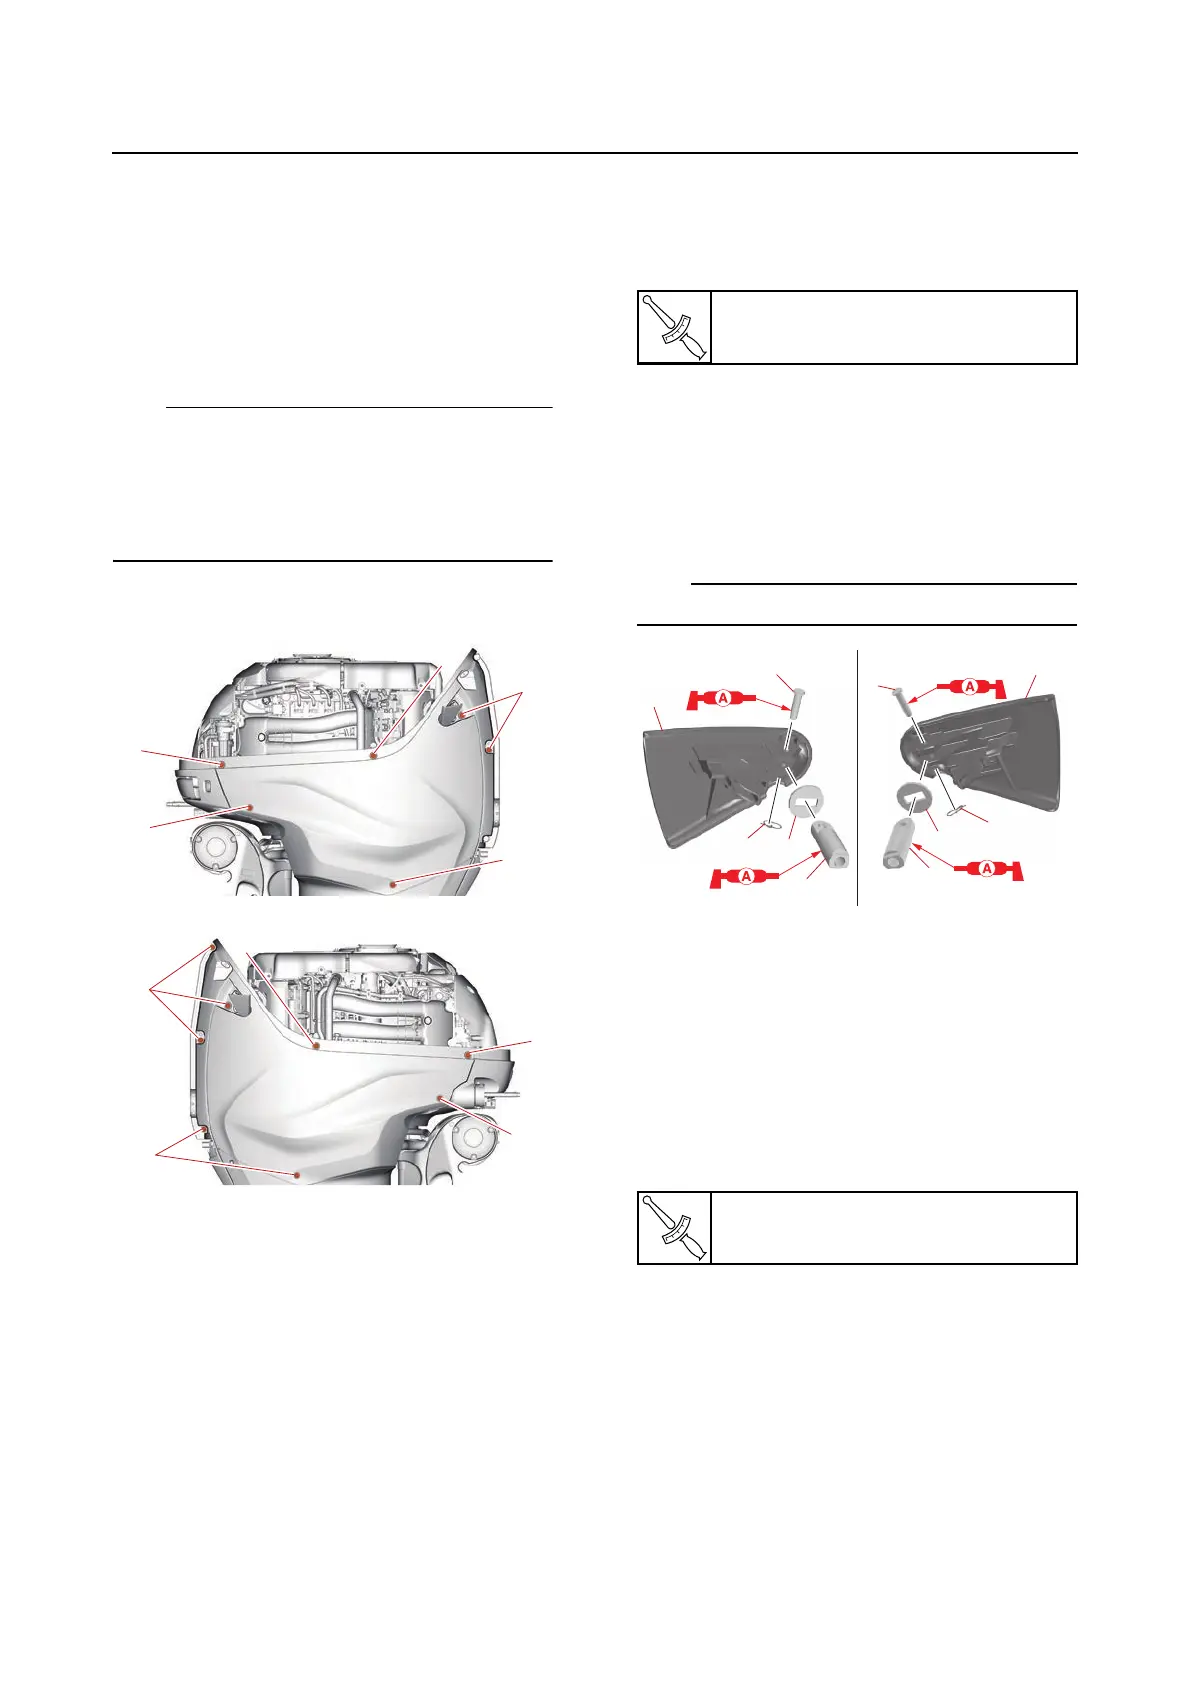
Removing the bottom cowling
1. Remove:
•Bolts (M6 × 14 mm)
• Bottom cowlings
a. Remove the bolts (M6 × 14 mm) “1”,
and then loosen the bolts (M6 × 25 mm)
“2”.
Although the bolts (M6 × 25 mm) “2” will re-
main in the bottom cowlings when the bolts
are loosened, make sure that the bolts (M6 ×
14 mm) “1” do not fall from the bottom cowl-
ings because those bolts are removed.
b. Remove the bottom cowlings.
A
B
2. Remove:
•Plate
•Rubber seal
• Bottom cowlings
• Dipstick guide
See “Intake manifold” (6-24).
• Cowling brackets
Assembling the bottom cowling
1. Install:
•Dampers
•Clamp plates
2. Assemble:
•Washers “1”
• Lever shafts “2”
• Cowling lock levers “3”
•Pins “4”
• Retaining clips “5”
Install the pins “4” in the direction shown.
3. Install:
• Bushings
• Wave washers
•Washers
• Cowling lock lever assemblies
• Clamp levers
• Bottom cowling cover brackets
4. Install:
• Grommets “1”, “2”
• Collars “3”
•Bolts (M6 × 25 mm) “4” (to the collars “3”)
A. PORT
B. STBD
Damper screw
3.0 N·m (0.30 kgf·m, 2.2 lb·ft)
A. PORT
B. STBD
Clamp lever bolt
19 N·m (1.9 kgf·m, 14 lb·ft)