8-15
Water pump and shift rod
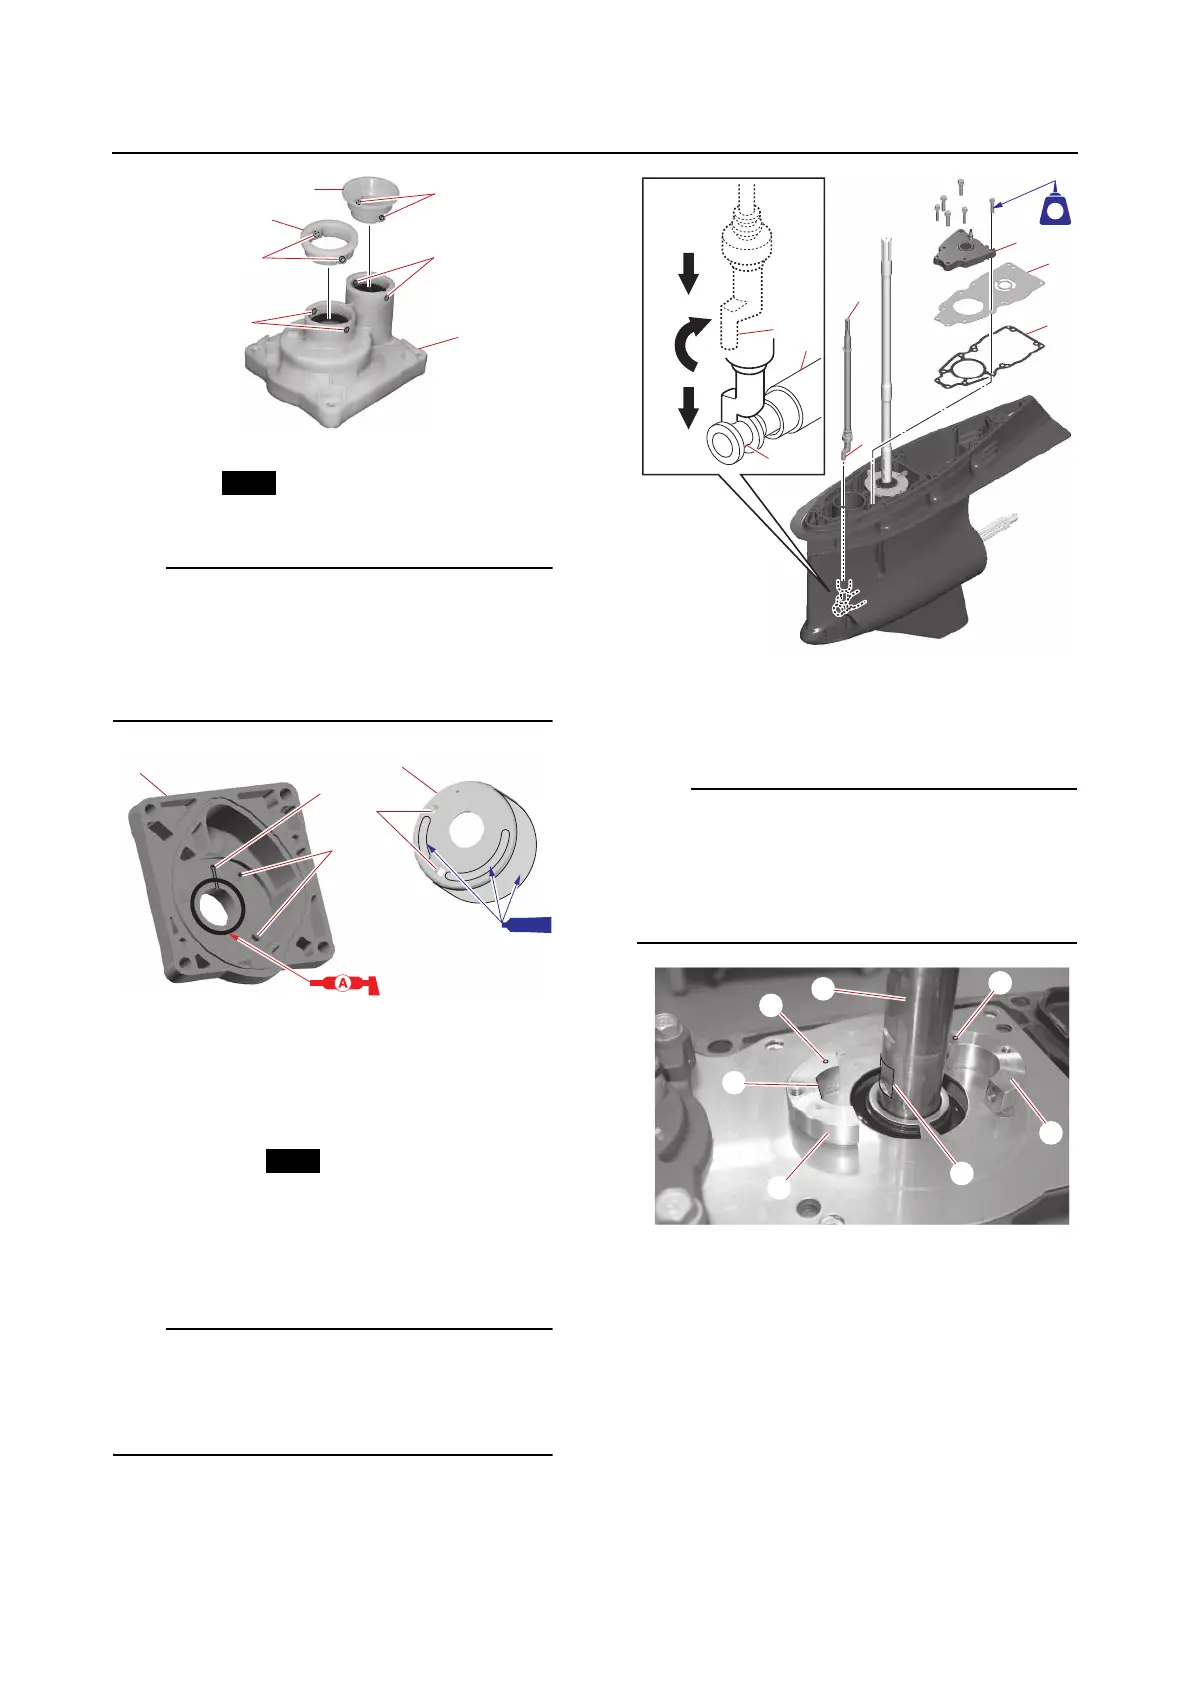
3. Install:
•O-ring
• Insert cartridge “1”
• Fit the protrusions “a” on the insert cartridge
“1” into the slots “b” in the upper water
pump housing “2”.
• Do not apply sealant to the slot “c” in the up-
per water pump housing “2”.
Installing the water pump and shift
rod (regular rotation model)
1. Install:
•Dowels
•Gasket “1”
•Plate “2”
• E-clip
• Shift rod “3”
• Shift rod guide plate “4”
Turn the shift rod “3” clockwise 90°, and then
push it down so that the tip “a” of the shift rod
“3” fits into the groove “b” in the shift slider
“5”.
2. Install:
• Spacers
a. Install the spacers “1” and “2”.
• Install the spacers “1” and “2” so that the
punch marks “a” on the spacers are facing
up.
• Align the flat portion “b” of the spacer “1”
with the cutout “c” in the drive shaft “3”.
b. Install the spacer bolts “1” and “2”.
c. Tighten the spacer bolt “1” temporarily
until the mating surfaces (the ends with
the punch marks “a”) of the spacers
“3” and “4” are contacting, and then
tighten the spacer bolt “2” temporarily.
d. Tighten the spacer bolt “1”, then the
spacer bolt “2”.