7-12
Exhaust joint (inside)
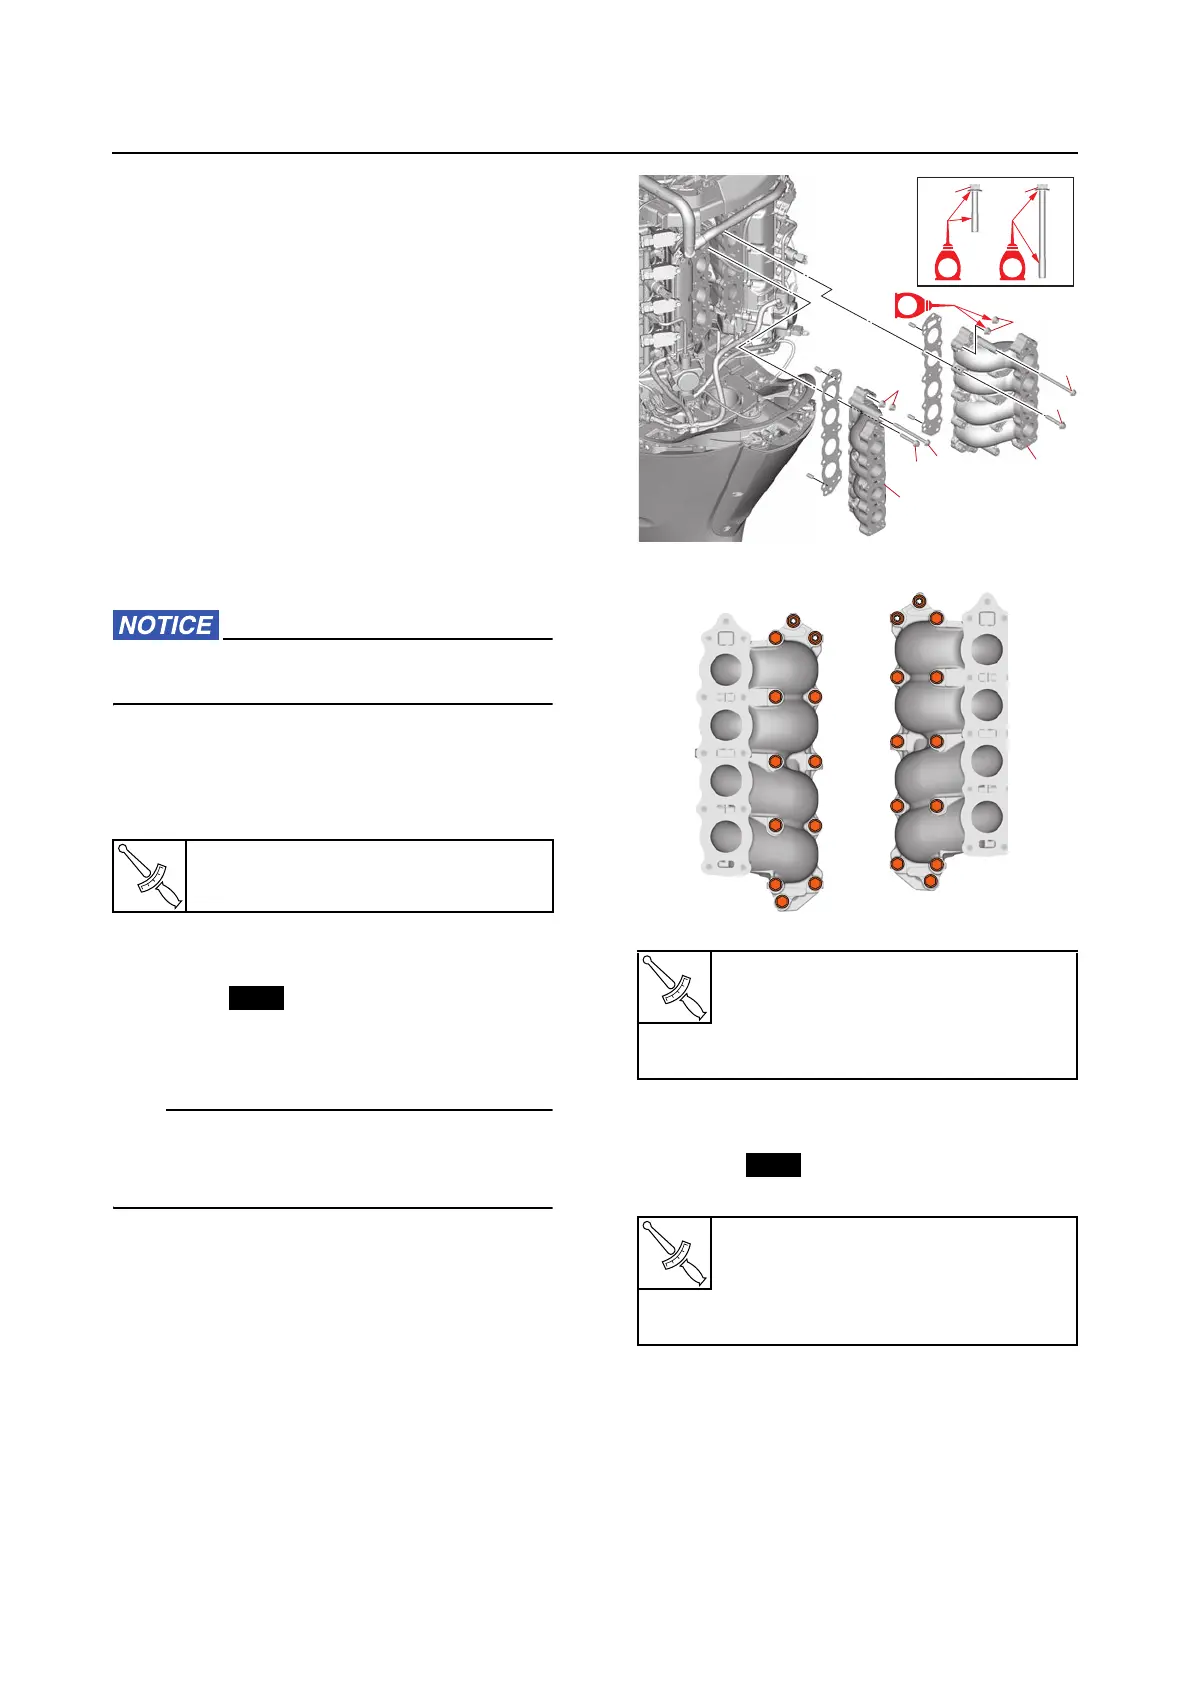
Removing the exhaust joint
1. Remove:
• Exhaust joint assembly
See “Exhaust joint (outside)” (7-7).
Checking the exhaust joint
1. Check:
• Exhaust joint
Corroded/cracked → Replace.
Checking the exhaust joint anode
1. Check:
•Anode
Eroded (1/2 or more worn out) → Replace.
Adhered grease, oil, or scales → Clean.
Do not apply grease, oil, or paint to the an-
odes.
Installing the exhaust joint
1. Install:
• Stud bolt
2. Install:
•Dowel
•Gasket
• Exhaust joint (PORT) “1”
• Exhaust joint (STBD) “2”
Tighten the exhaust joint bolts “3” and “4” and
exhaust joint nuts “5” in the order [1], [2], and
so on.
3. Install:
• Exhaust joint anode
•O-ring
• Exhaust joint anode plug
4. Install:
• Exhaust joint assembly
See “Installing the exhaust joint assem-
bly” (7-8).
Stud bolt
14 N·m (1.4 kgf·m, 10 lb·ft)
Exhaust joint bolt “3”, “4”
21 N·m (2.1 kgf·m, 15 lb·ft)
Exhaust joint nut “5”
14 N·m (1.4 kgf·m, 10 lb·ft)
Exhaust joint anode screw
2.0 N·m (0.20 kgf·m, 1.5 lb·ft)
Exhaust joint anode plug
18 N·m (1.8 kgf·m, 13 lb·ft)
[11][11]
[12][12][12][12]
[6][6]
[2][2]
[3][3]
[7][7]
[6][6]
[2][2]
[3][3]
[7][7]
[8][8]
[9][9]
[5][5]
[1][1]
[4][4]
[8][8]
[11][11]
[6][6]
[2][2]
[3][3]
[7][7]
[10][10]
[5][5]
[1][1]
[4][4]
[9][9]
[11][11]
[12][12]
[6][6]
[2][2]
[3][3]
[7][7]
[7][7]
[8][8]
[10][10]
[5][5]
[1][1]
[4][4]
[8][8][9][9]
[10][10]
[5][5]
[1][1]
[4][4]
[8][8][9][9]