Upper case assembly and mount
9-21
Removing the upper case assembly
1. Drain:
•Engine oil
See step 5 in “Changing the engine oil by
removing the drain bolt” (10-11).
2. Suspend:
• Upper case assembly
3. Remove:
•Caps
• Upper mount bolts
•Washers
4. Loosen:
• Lower mount bracket bolts
5. Remove:
• Lower mount nuts “1”
•Washers “2”
• Upper case assembly “a”
•Damper “3”
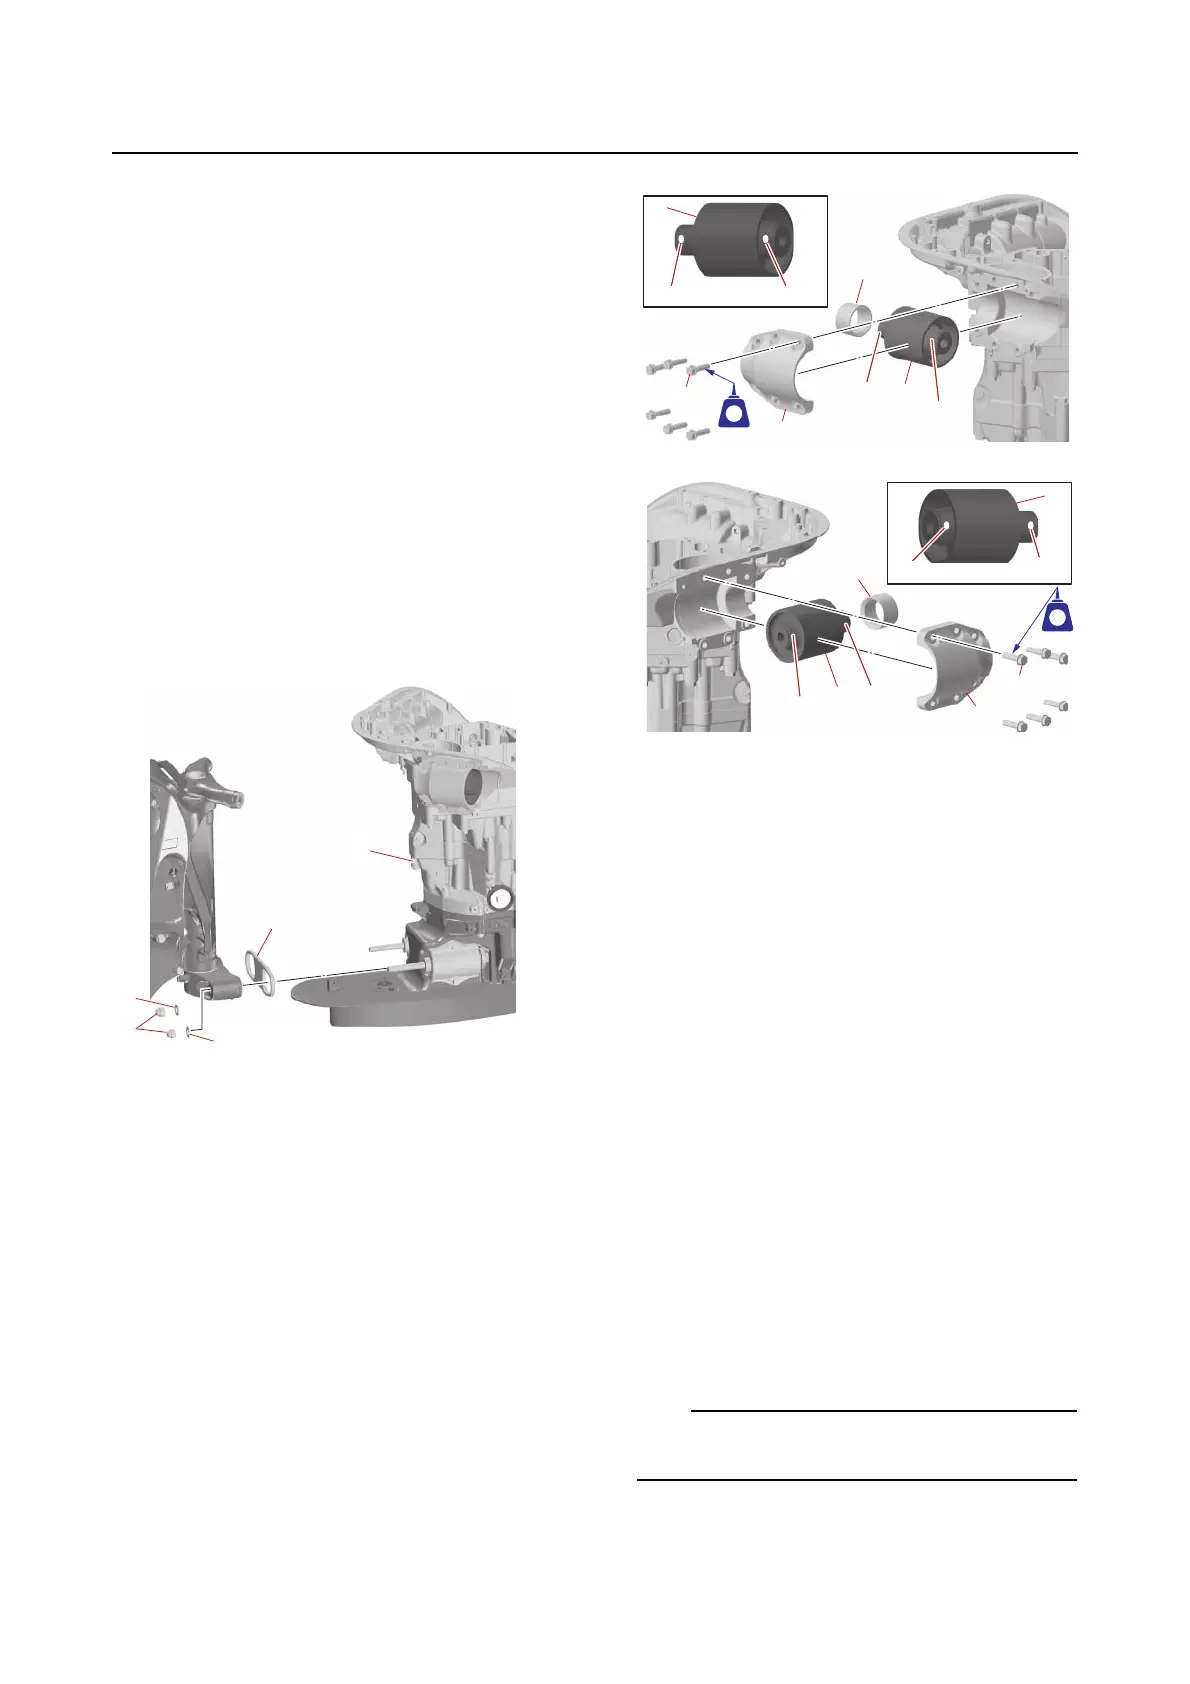
Installing the upper case assembly
1. Install:
•Grommets
• Dampers “1”
(into the upper mount bracket)
• Upper mount (PORT) “2”
• Upper mount (STBD) “3”
• Upper mount brackets “4”
• Upper mount bracket bolts “5” (temporar-
ily tighten)
A
B
2. Install:
• Ground lead (PORT only)
•Washers
• Lower mount bolts
• Lower mounts
• Lower mount brackets
• Lower mount bracket bolts (temporarily
tighten)
a. Install the ground lead “1” and washers
“2” and “3” onto the lower mount bolt
“4”.
b. Install the lower mount bolt “4” into the
lower mount “5”.
c. Install the lower mount “5” and lower
mount bracket “6”, and then tighten
the lower mount bracket bolt “7” tem-
porarily.
The ground lead “1” should be installed on the
same side as originally installed.
A. PORT
B. STBD
a. Red paint marks
b. Green paint marks