9-10
Cooling water hose and gear oil changing hose
Removing the cooling water hose (oil
pan side)
1. Remove:
• Cooling water hose (engine side)
See “Intake manifold” (6-24).
2. Remove:
•Plastic ties
• Cooling water hoses (oil pan side)
• Joints (exhaust guide side)
• Joints (oil pan side)
•Rubber seals
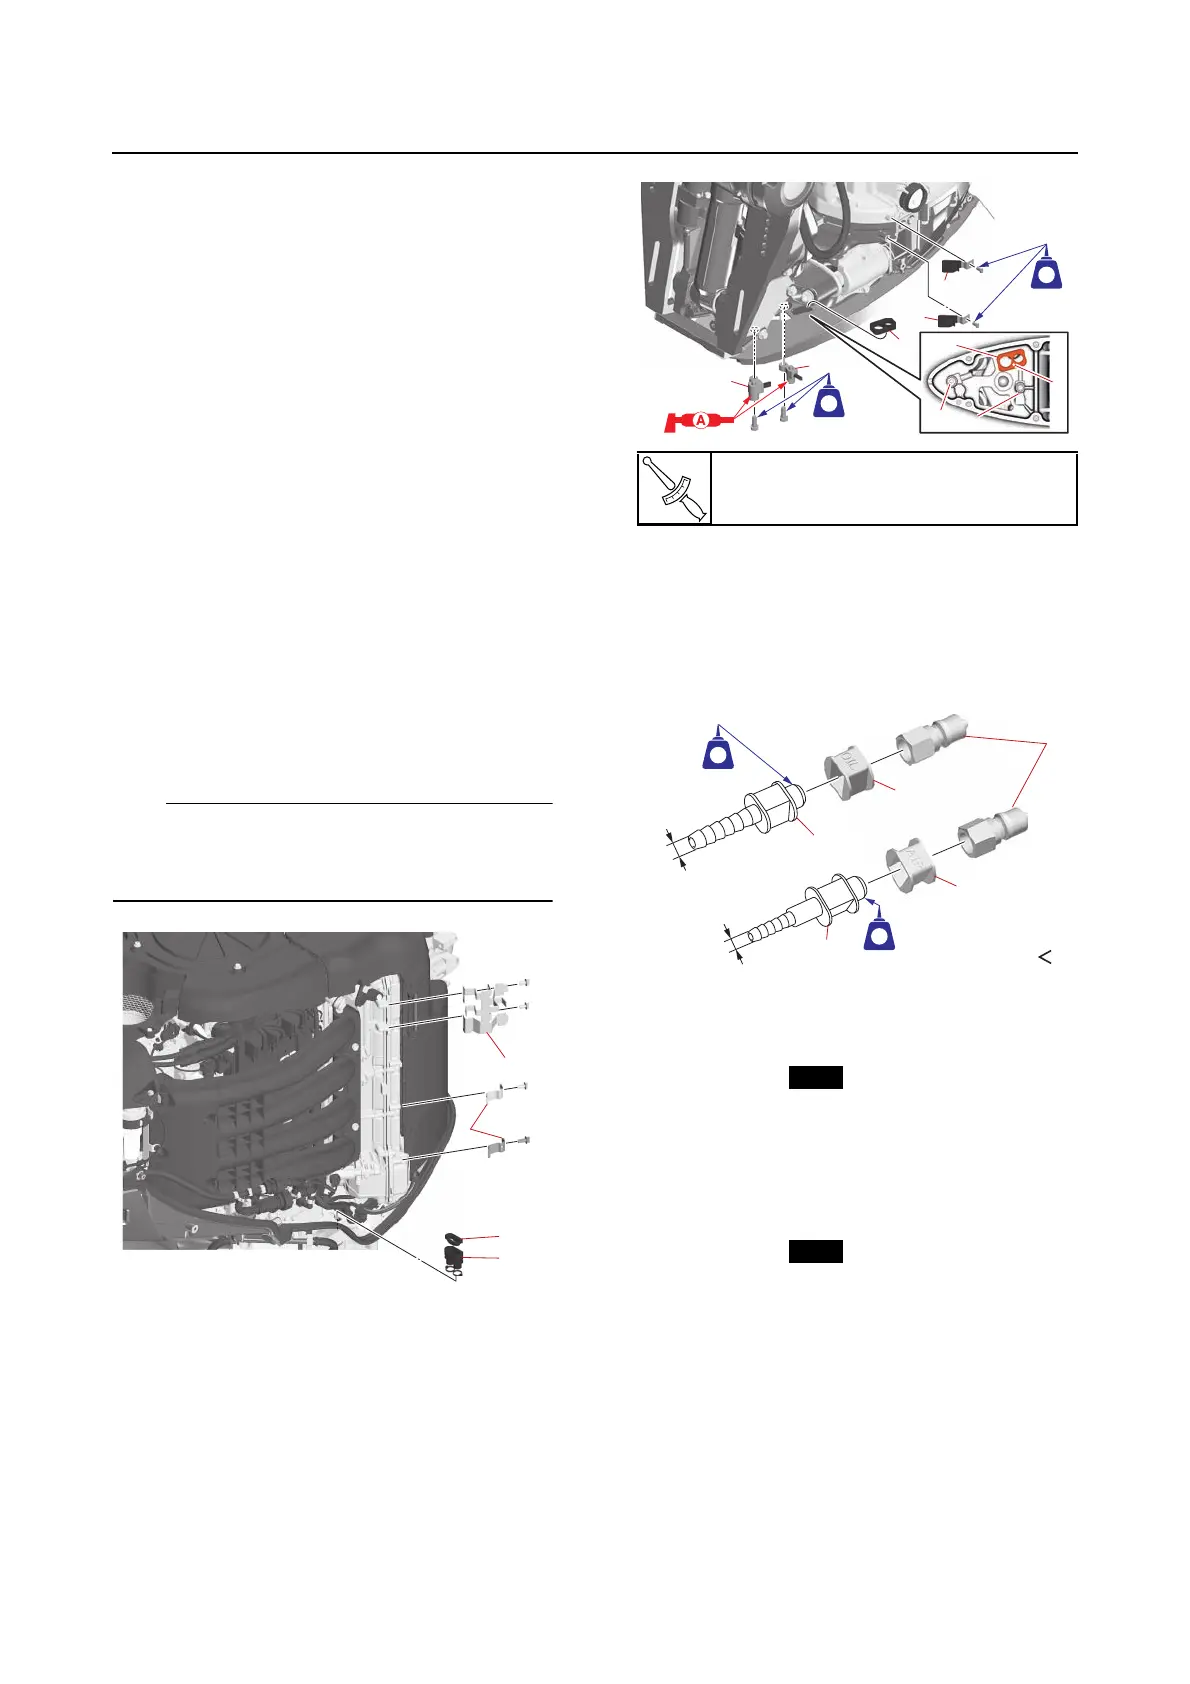
Installing the gear oil changing hose
1. Install:
• Holders “1”, “2”
• Hose holder “3”
• Grommet “4”
•Cap “5”
•Rubber seal “6”
• Joint (air) “7”
•Joint (gear oil) “8”
Make sure to face the paint mark “a” on the
rubber seal “6” in the direction shown in the il-
lustration.
2. Assemble:
• Quick connectors “1”
• Hose fitting (air) “2”
• Hose fitting (gear oil) “3”
• Cover (air) “4”
• Cover (gear oil) “5”
3. Install:
•Hoses (air)
• Hoses (gear oil)
•Plastic ties
•Joint (air)
•Joint (gear oil)
• Hose fitting assembly (air)
• Hose fitting assembly (gear oil)
•Bands
•Plastic ties
•Plastic ties
•Cover
a. Install the hose (gear oil) “1” and hose
(air) “2” onto the hose fitting on the
joint. Face the paint mark “a” on the
hoses downward.
b. Fasten the hose (gear oil) “1” and hose
(air) “2” using new plastic ties “3”.
Joint bolt
20 N·m (2.0 kgf·m, 15 lb·ft)
572572
LTLT
572572
LTLT
8
7
2
2
6
6
7
8
6
a
7
8
1
572572
LTLT
572572
LTLT
5
3
b
a
ab
4
2
OIL
AIR